I will presenting at Kscope25 this year. Usually I present on an established technology or feature, such as how to use the Essbase REST API, advanced drill-through techniques, or containerizing Essbase with Docker. But this year I really wanted to look forward, not back, and what better way than to talk about the intersection of Essbase with AI? The full title of my presentation is From Cubes to Cognition: The Fusion of Essbase and AI.
My goal for this presentation is to dive meaningfully into the intersection of Essbase – an established enterprise technology that usually lives in a fairly conservative (technology-wise) department such as finance – and AI, which is much newer, but also revolutionizing how business gets done. Hope to see you there!
This post will be something of a followup to my Kscope22 presentation on creating an Essbase 21 Docker image. Back in June during the presentation, I mentioned that while the images I had created prior to the conference were working fine, when I went to rebuild them for purposes of confirming the presentation details and creating new screenshots, I was inexplicably running into issues with the Essbase server. It would seem to start up fine, but I couldn’t actually login. I now know what that issue was and in the steps that I’ll describe in this post, I’ll call out what the fix is.
Unlike my previous efforts to build an Essbase Docker image based on the EPM 11.1.2.4 product line, the Essbase 21 Docker image actually relies on Oracle’s own scripts that they provide. This post will completely walk you through everything you need to do to create your own Essbase 21 Docker image, including how to patch it to a later point release such as 21.3, how to fix the bug I was running into in June, how to run it, load some sample data, share it with others, and different URLs for using the REST API, XMLA, and more.
Requirements
In order to build an Essbase 21 Docker image, you’ll need to have a few things:
Git
Docker
Installation media for Oracle Java, Fusion Middleware, and Essbase 21 (I’ll explain how to get these)
Linux server
Overview
In order to successfully build the Essbase 21 Docker image, we need to build an Oracle Fusion Middleware (FMW) Docker image, and in order to build the Fusion Middleware image, we need to build the Oracle Docker image. This is because the Oracle Essbase essentially sits on top of the FMW image. The following is a general overview of the process you’ll be following:
Use Git to clone the Oracle Docker GitHub repository
Download the various installation media that you need (Java, FMW, Essbase, and any patches you might need or want)
Stage the installation media in with your cloned files from Oracle’s GitHub repository
Build the Java image
Build the FMW image
Build the Essbase image
Optional: push the Essbase image to a container registry
Clone Oracle Docker Images Repository
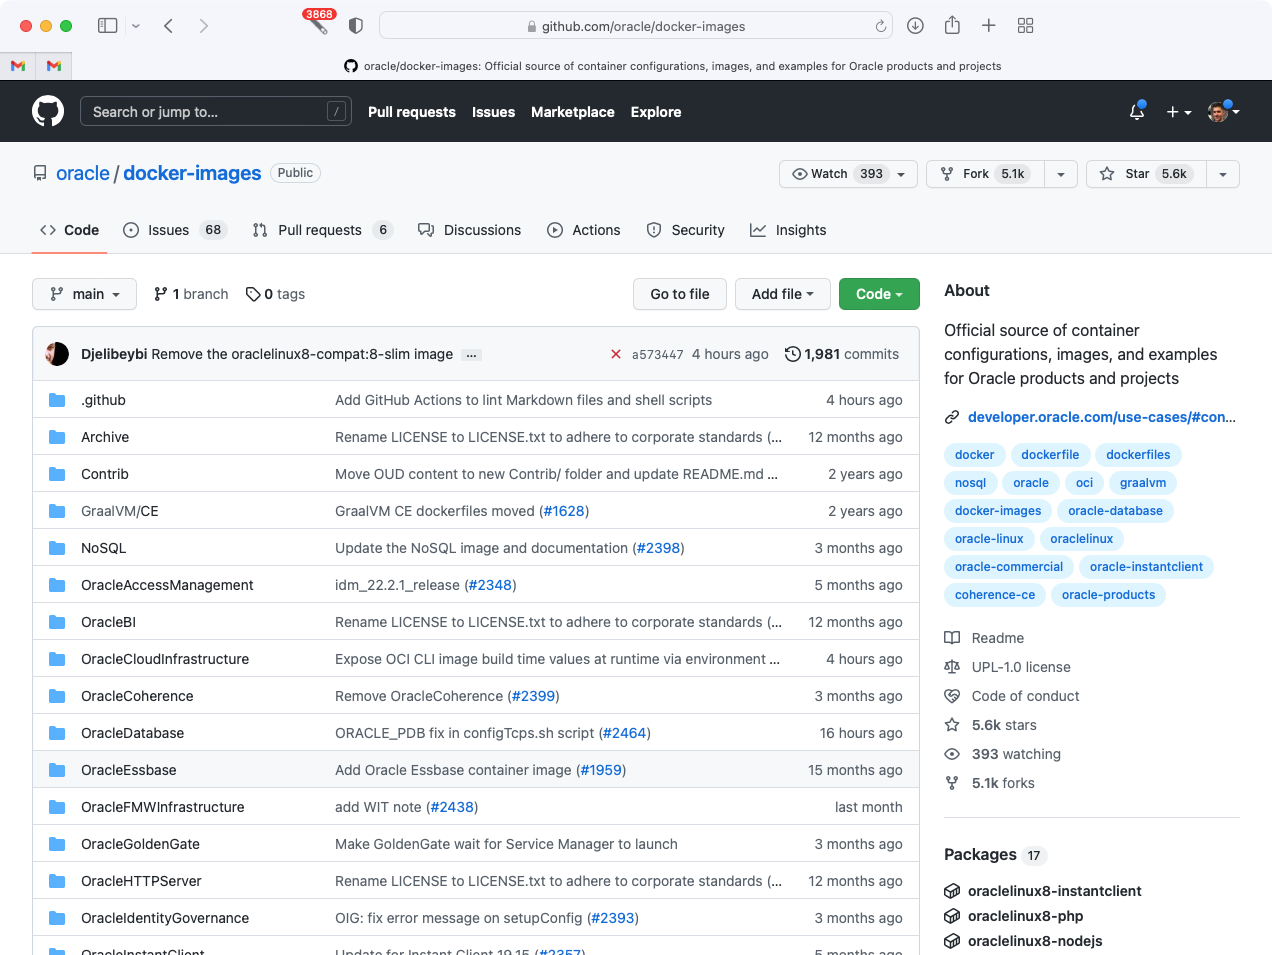
You’ll need to clone (download) the files from Oracle’s Docker images GitHub repository. You don’t strictly need Git to be installed since you could just download a ZIP of the repository, but you probably have Git installed already and if you’re really scared of the Git command-line interface, you could always download and use GitHub Desktop. If you browse to Oracle’s GitHub repository, you can see that the layout of the files looks like this:
Oracle’s docker-images GitHub repository
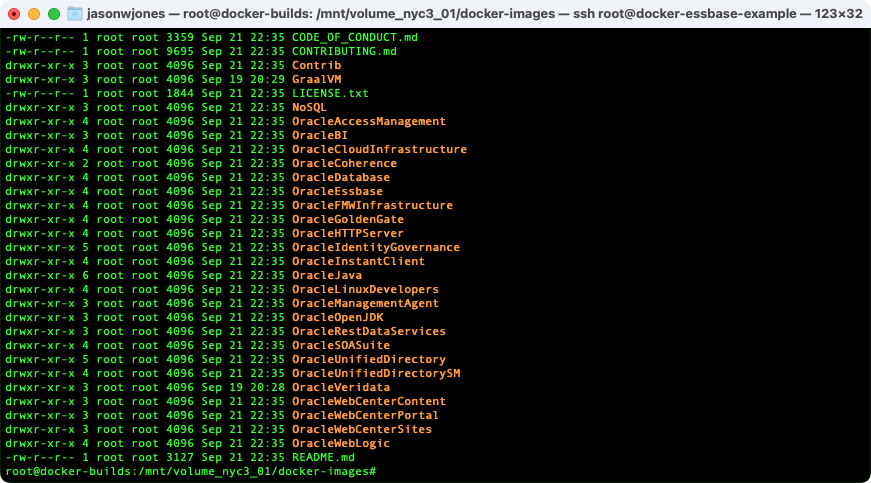
Just to be absolutely clear, this is not a Docker repository or a Docker container registry, and there are no installer/binary files in this repository. This repository basically contains scripts for building Docker images for various Oracle products. This repository is organized with a folder per project. We’ll be working in the OracleJava, OracleFMWInfrastructure, and OracleEssbase folders, as those contain the Docker files (but again, not the actual installation media, which we still need) for helping build the Docker images. After you clone or otherwise download Oracle’s files, you should have a local folder with the same files:
Listing of Oracle docker-images files that have been cloned
As I mentioned earlier in the requirements, you’ll need/want a Linux server with Docker to build the Docker images. Actually, I don’t know if that’s strictly true. You might be able to run Oracle’s build scripts (written in Bash) on a Mac, and you might be able to run them on Windows (using WSL), but I haven’t tried – even though I run on a Mac, it has an M1 CPU which makes things a little trickier. So for building these images, I am using a ‘regular’ Linux server. Generally for my Docker stuff I am either using a physical server running on my home network (a Xeon-based system running Ubuntu 18.04), but for the blog I am using a Linux system that I spun up on Digital Ocean which is running Ubuntu 20.04. You could use a Linux EC2 system on AWS too and that should work just fine. On the Digital Ocean Ubuntu server, I installed Docker via a “snap”, which mostly worked fine although because I have the Oracle files staged on a separate drive, I wound up having to run snap connect docker:removable-media in order to grant the Docker service access to the drive. If you install Docker through apt or just have your files on the normal drive, you shouldn’t have to worry about this. I purposely added the removable drive/volume to this instance because I wanted to be able to easily attach it to some other system in the future.
Download Various Installation Media
Now that we have the scripts from Oracle’s repository (the recipe, if you will), we now need to stage in the various media (the ingredients). In this analogy, actually running the build scripts is akin to baking the raw cookie dough in our oven, and the resulting Docker images are the baked cookies. To stretch the analogy a little further, running the Docker image as a container is us eating the cookies.
Java Installation Media
Getting the proper Java installation media is a little bit tricky for a couple of reasons. One, we need a very particular type of Java installer. Two, there is sometimes a mismatch between the version of Java that the Oracle Docker Java image wants and what we can easily download. And three, there is an issue with versions of Java newer than Java 1.8.0 update 331. If you remember me saying during Kscope22 that I was having issues with the Docker Essbase images I was building, in that they would seemingly build fine but then not actually work correctly, well, it turns out it is a very subtle Java issue. What is happening is that versions of Java 8 newer than and including update 331 had a very small change that impacts the Oracle FMW image, which in turn impacts the Oracle Essbase image. In order to sidestep this, we can either use a build of Java older than that, or we can apply a patch during the creation of the Oracle Essbase Docker image that patches FMW. We’ll opt for the latter approach, which is the ‘right’ thing to do.
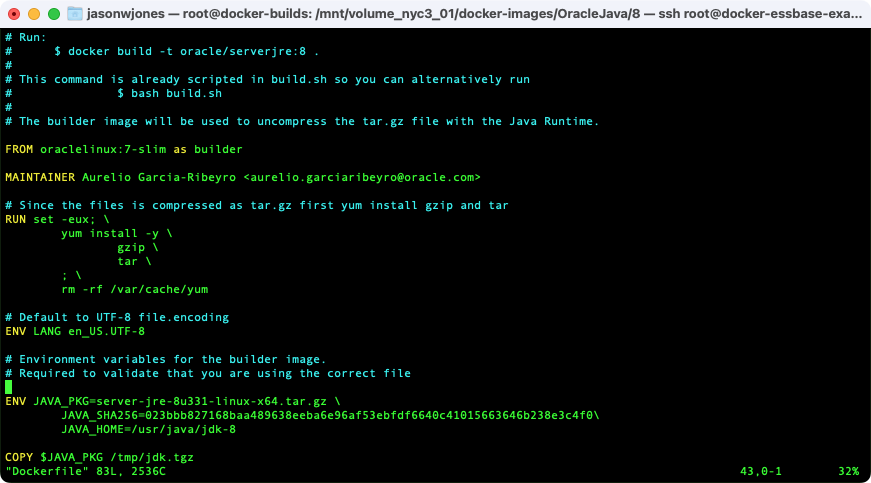
That said, we are still left with a small issue of getting the proper Java media and dealing with any version mismatches. What I mean by this is, let’s take a look at the Dockerfile for the Oracle Java 8 Docker image over in the Oracle repository. The Dockerfile is the file that the Docker engine reads in order to build the actual image. It’s basically a list of commands to run on a Linux server that creates the thing we want, usually by copying in files, running scripts, creating folders, and other things. In the case of the Oracle Java Docker image, basically what it’s doing is copying in the Java installer, installing tar and gzip (so that it can actually extract the Java files), and creating some symbolic links. At the time of this writing, the Oracle Java 8 image is built specifically with server-jre-8u341-linux-x64.tar.gz – Server JRE 8 update 341. The “problem” here is that it’s difficult to find the Java media for 341 right now. I had this problem earlier when the Java Docker files were built with Java 8 update 333 but all I could find that was easily downloadable was the 331 media. And something similar is going on right now where the official files are looking for update 341 but the public download site doesn’t have it.
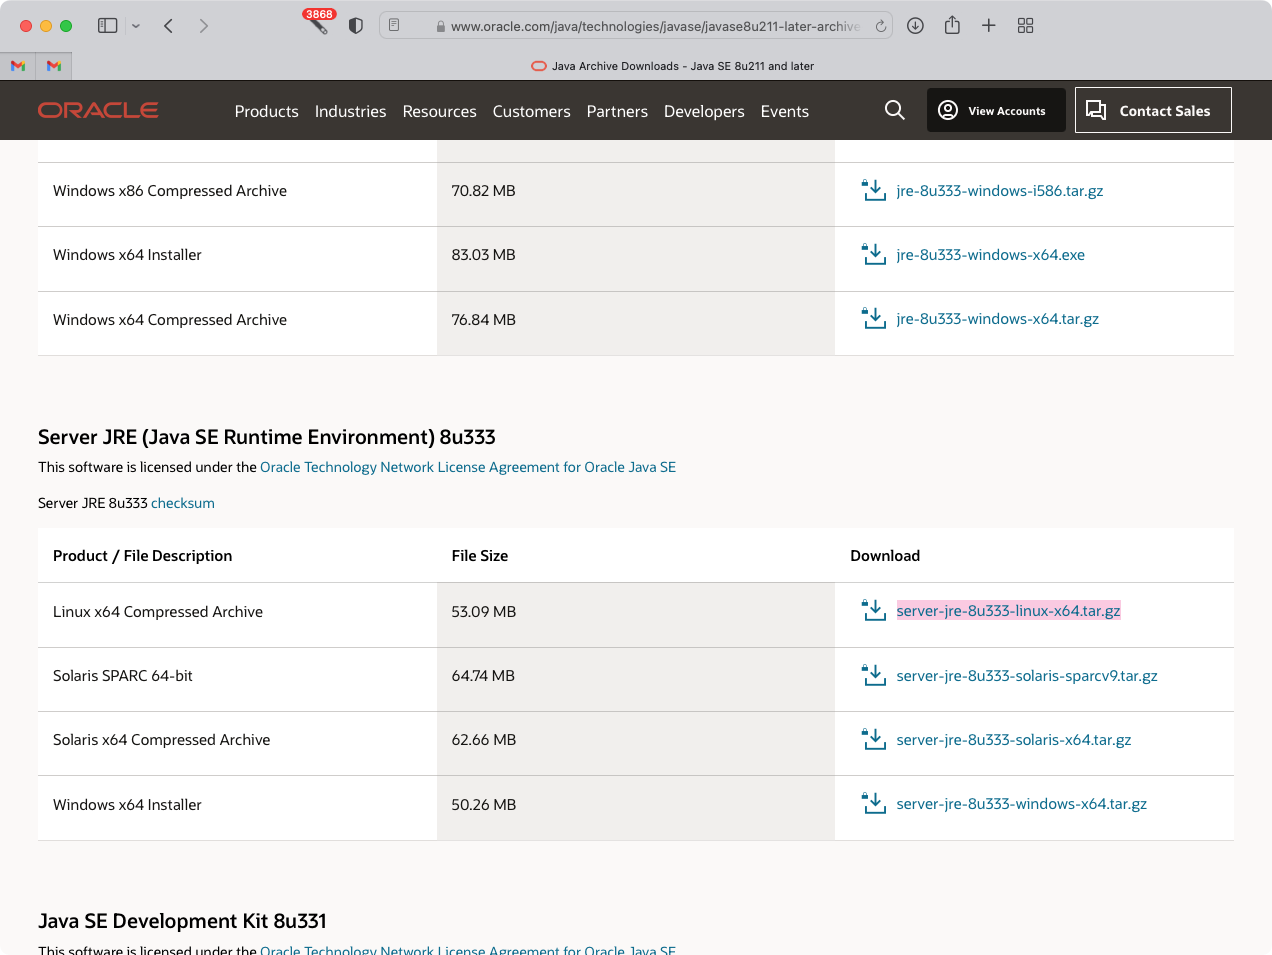
There are a few ways we can deal with this, but I think the best and simplest is this: go to the public Oracle Java download site for Java 8 update 211 and later, and then scroll down to find the absolute latest version of Java 8 in the form of the Server JRE for Linux, such as the 333 file shown here:
Oracle Java download site looking at Server JREs
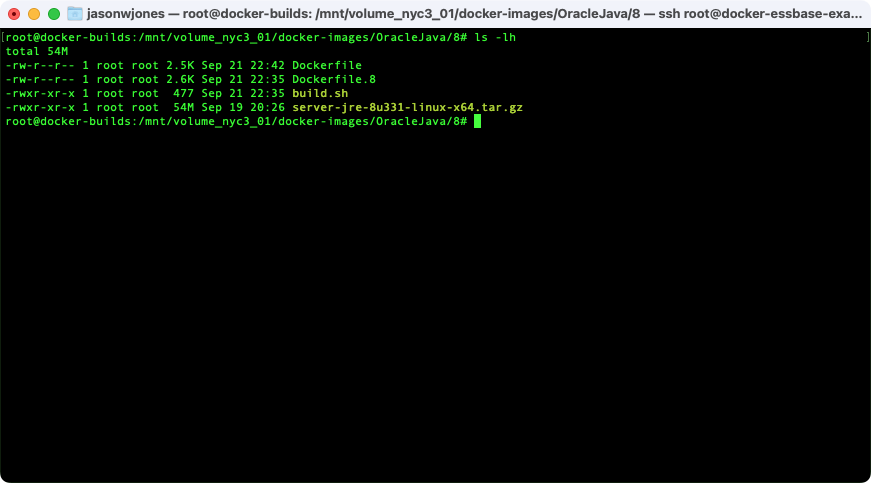
After that’s downloaded, you need to stage this file inside the docker-images/OracleJava/8 folder, so that a directory listing in that folder looks like this:
Oracle Java media staged in folder
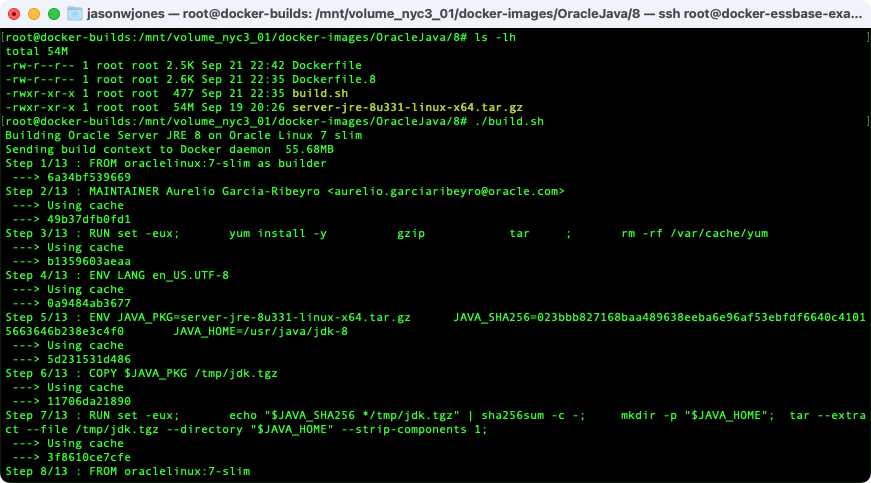
Next, if you have a mismatch between the version referenced in your Dockerfile and the version you downloaded, let’s update the Dockerfile so that it’s consistent with the version we downloaded. This means we need to edit three places in the file: two references to the filename, and one reference to the SHA256 file checksum. We can determine the SHA256 sum of the file by running the command sha256sum server-jre-8u331-linux-x64.tar.gz. After updating my file for the 331 version of Java, the top of the file now looks like this (this shows two of the updated lines, the third is lower in the file):
Updated Java Dockerfile with matching version and checksum
Again, if you have a matching Java version (e.g., you are able to download the 341 version of Java because you can find it or have an Oracle Java support contract), you don’t need to do this. Alternatively, you could checkout an older version of this repository where the Java version matches what’s available, but that approach could be problematic.
In any case, at this point you should now have everything set to be able to build the Java Docker image. You could build that now if you wanted, but in this guide we are going to stage the rest of the installation media and then do the builds.
Fusion Middleware Installation Media
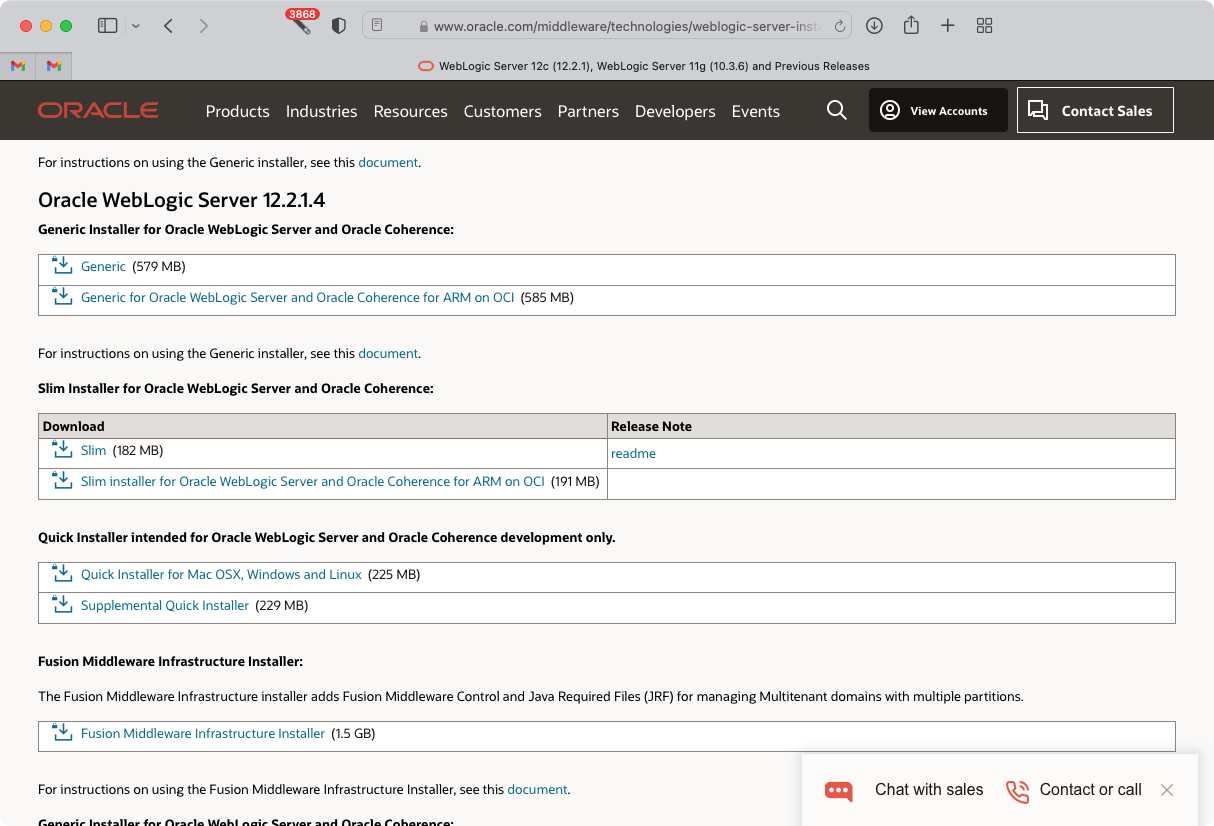
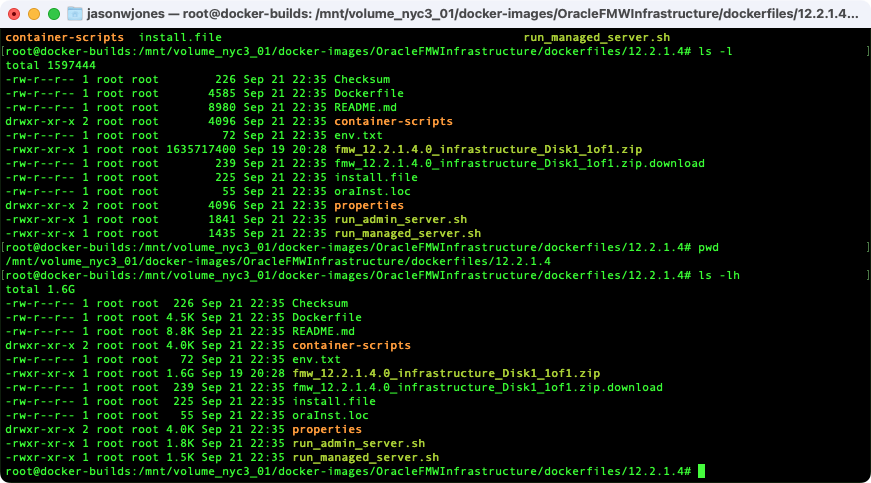
Thankfully, this part is a bit simpler than some of the shenanigans we had to go through with the Java media. We just need one file. We’ll be working in the OracleFMWInfrastructure folder this time. Specifically, we need to stage the FMW installation media in the /docker-images/OracleFMWInfrastructure/dockerfiles/12.2.1.4 folder. You need to go get a file exactly named fmw_12.2.1.4.0_infrastructure_Disk1_1of1.zip, which you can find by going to the Oracle WebLogic Server Installers page, and then scrolling down to find the Fusion Middleware Infrastructure Installer in the 12.2.1.4 section:
Oracle Fusion Middleware installer
Once downloaded, stage it in the 12.2.1.4 folder I mentioned, so that your directory listing looks like this:
FMW installation media staged in proper folder
That’s all we need to do for the FMW piece for now, until we build it. The patch that I mentioned we need for Java versions 8u331 and beyond will be applied to the Oracle Essbase image itself, not our FMW image, so we don’t need to worry about that here.
As a brief aside, note that in the README for the OracleEssbase Docker project, the original creator mentions that in lieu of creating our own FMW image (and Java image), we could potentially just download (via the docker pull command) Oracle’s FMW image from the Oracle Container Registry, tag it appropriately, and then use that instead of building our own. This sounds great, however, I tried to do just this and the Essbase image didn’t build for me. I think there may be some subtle configuration thing I haven’t quite figured out. If I can figure it out then in the future I may post an update, but for now I’m just relying on the method where we build everything ourselves.
Oracle Essbase Installation Media
Now on to staging the appropriate Essbase installation media. At an absolute minimum, you will need the Essbase 21.1 installer file. Realistically, what you’re going to want is a little more:
Essbase 21.1 installer: this file is essbase-21.1.0.0.0-171-linux64.jar and is available from Oracle (eDelivery/Oracle Software Delivery Cloud). Even if you are planning to build an Essbase 21.2/3/4 Docker image, you’ll still be using this base media, as the way you get to, say, 21.3, is that you build an 21.1 server and then patch it to the eventual version (more on this in a bit)
WebLogic patch for Java 8u333+ login bug: you’ll want the patch for WebLogic that fixes the issue I mentioned at Kscope. This is a file called p34065178_122140_Generic.zip and can be downloaded from Oracle support.
Essbase version patch(es) optional: for example, the patch file to go from 21.1 to 21.3.2 is named p33925737_213000_Linux-x86-64.zip and can be downloaded from Oracle Support (more on this in a bit too). If you are fine with just an Essbase 21.1 server, then you don’t need to worry about any patches.
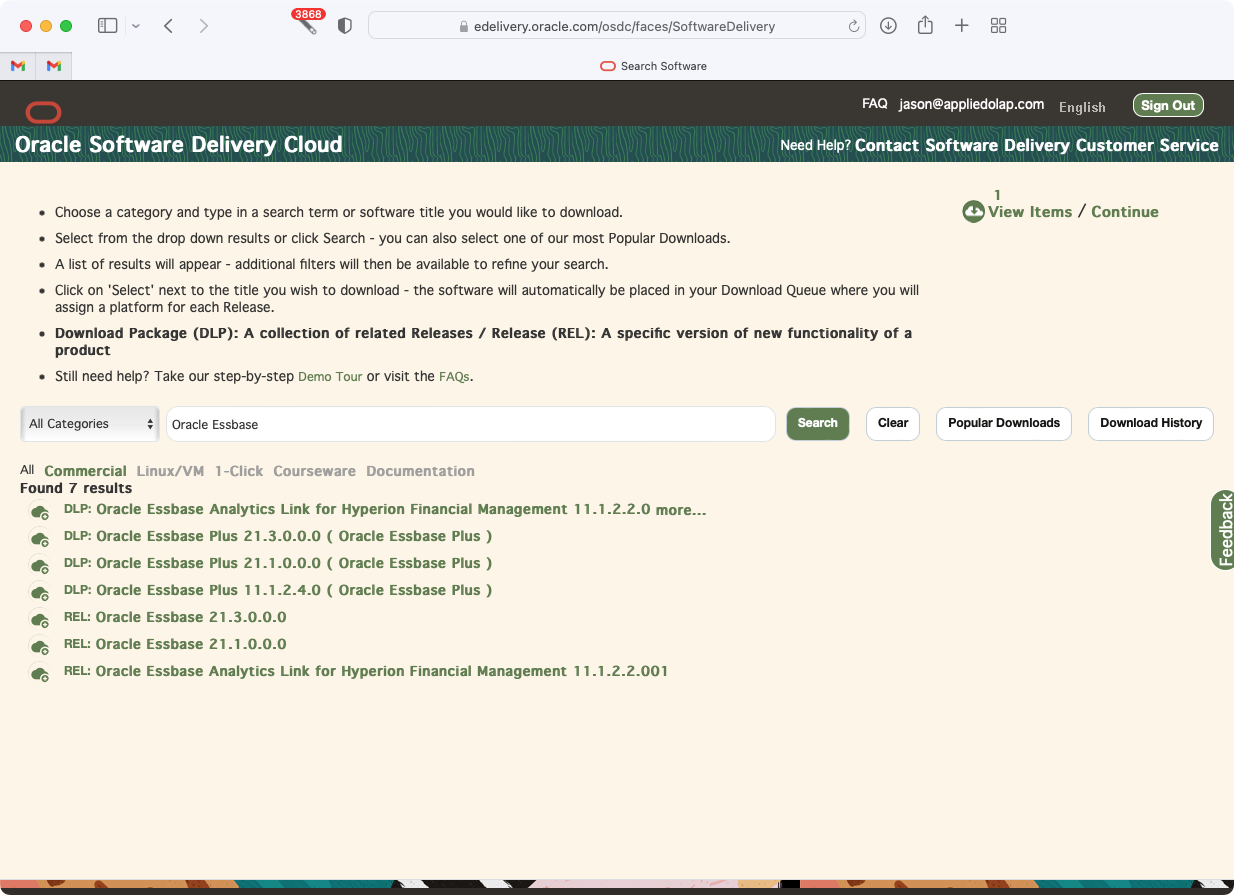
Let’s go get these files and stage them. Head over to Oracle Software Delivery Cloud and login, then search for Oracle Essbase. You should see something like the following:
Oracle Software Delivery search results for Oracle Essbase
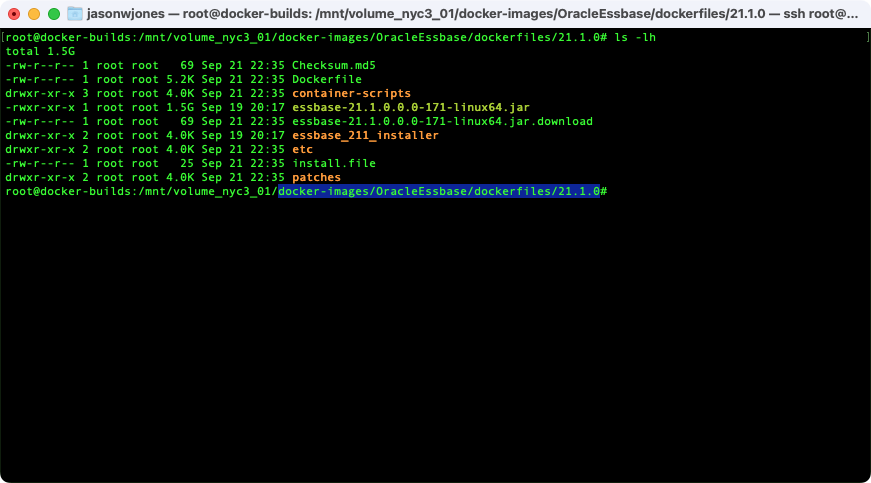
You might be tempted by the download for Essbase 21.3, but that actually only contains Windows binaries, which were first made available in version 21.3. What we need and want is the Essbase 21.1 download, which is specifically for Linux (which is what our Docker images are based on). After downloading, you may end up with a zip file. If you do, unzip it to get a JAR file and then stage that in your docker-images/OracleEssbase/dockerfiles/21.1.0 folder, so that a listing of the files looks like this:
Staged Essbase 21.1 installer
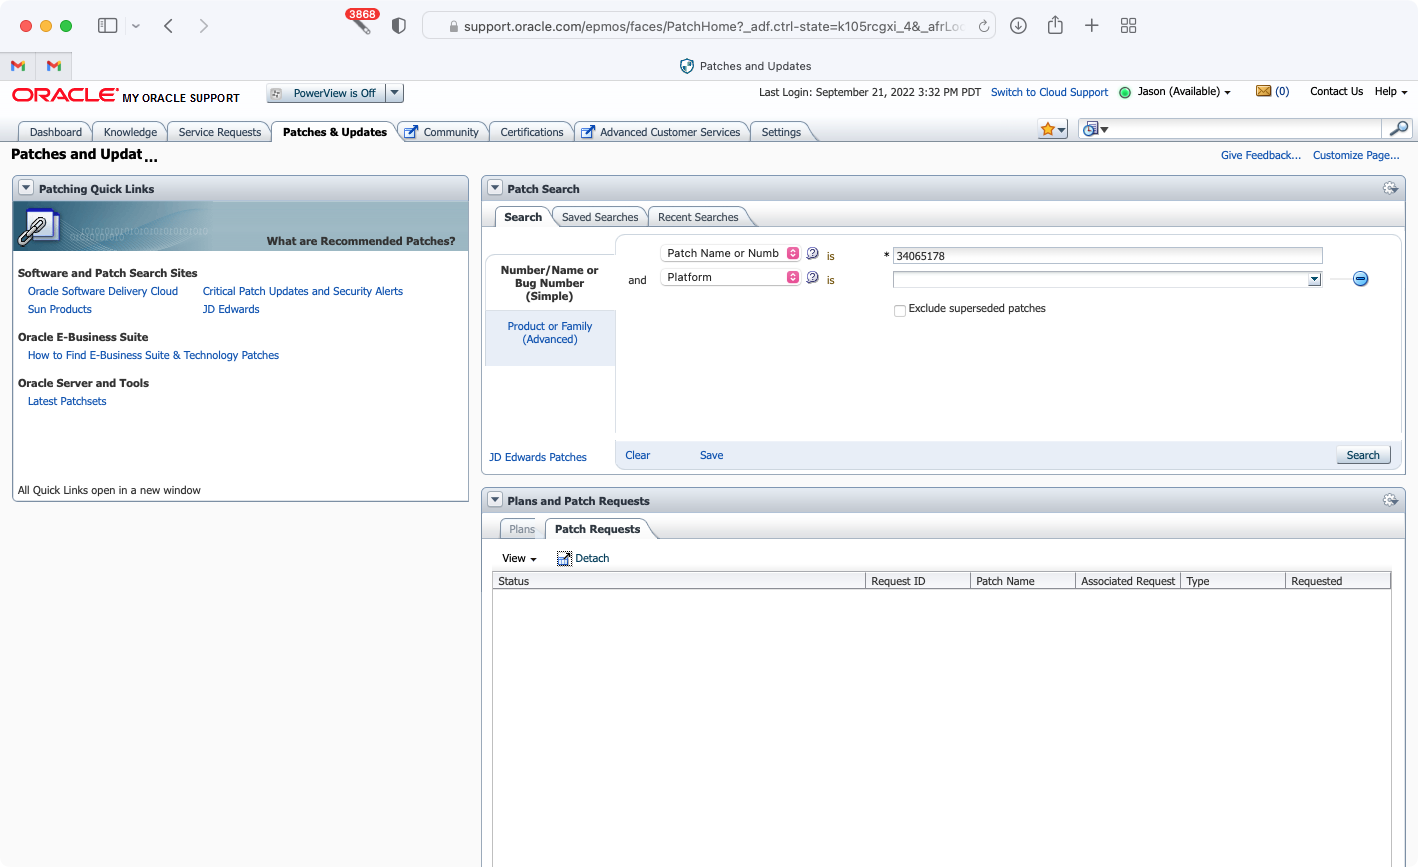
At this point, if we wanted to we could build the Java image, the FMW image, and then the Essbase image, but if we went to go start up the Essbase container, we wouldn’t be able to login due to the subtle Java issue I mentioned earlier. So let’s go get that patch from Oracle. Login to My Oracle Support, click on the Patches & Update tab, then search for patch number 34065178:
Searching for an Oracle patch
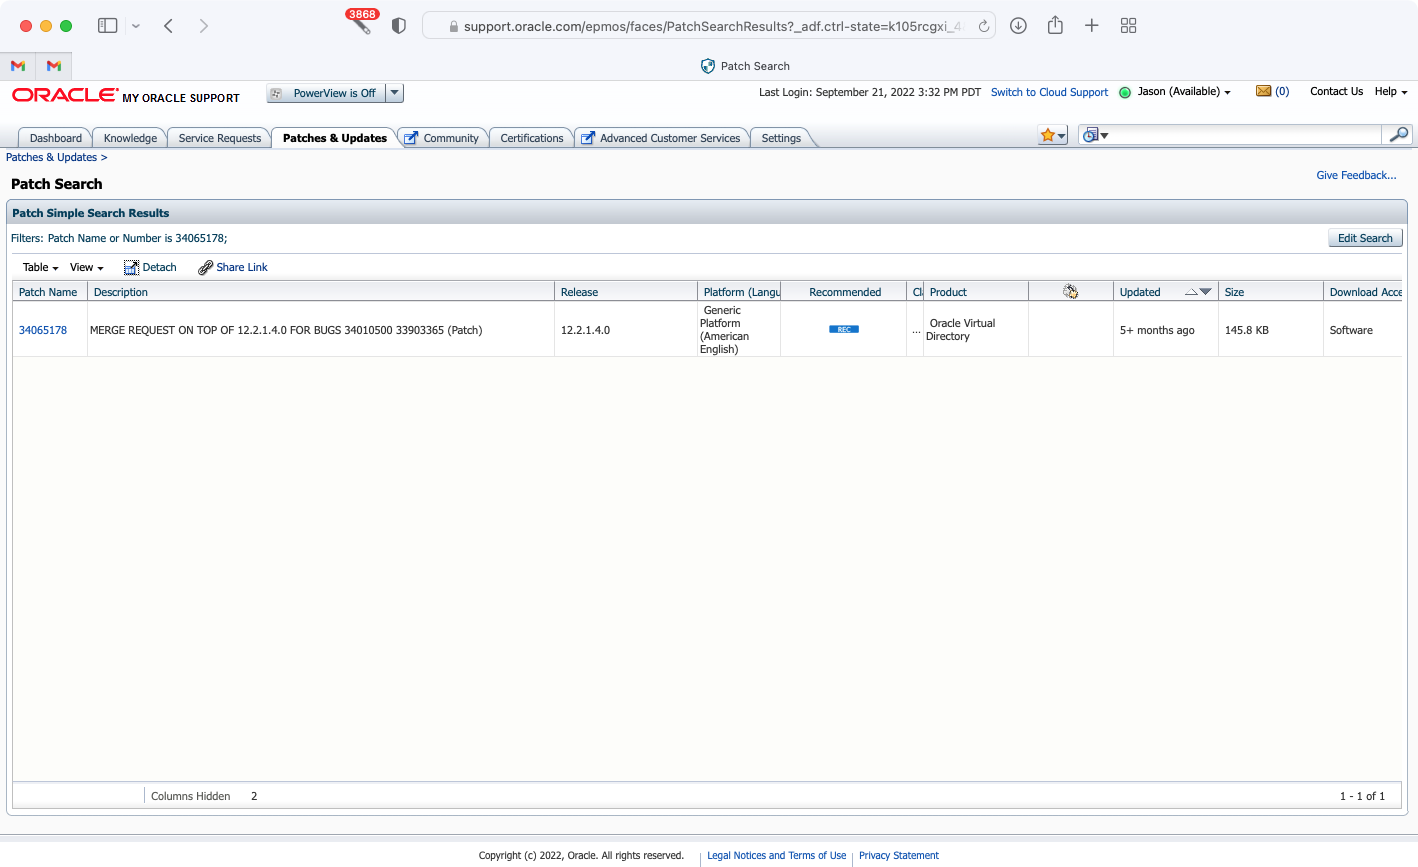
You should get the following patch in the results:
Oracle patch search results
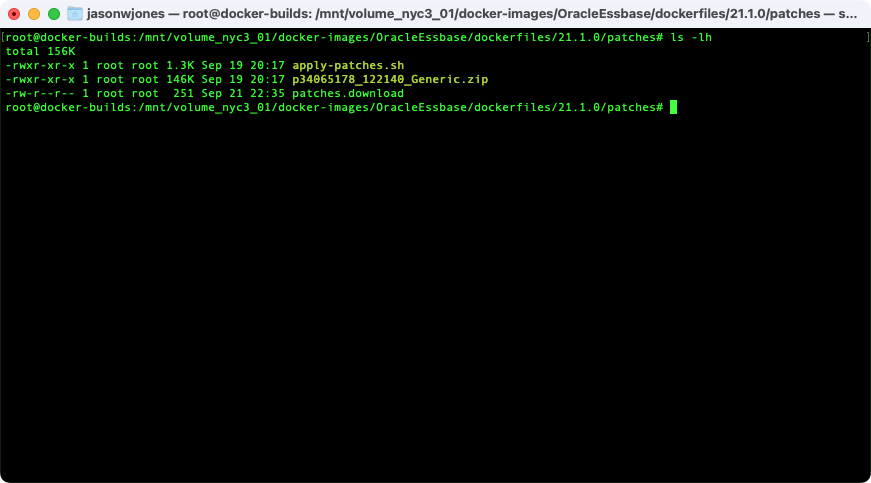
It’s a little hard to tell, but basically you can see that this is a patch for the Oracle Virtual Directory component, version 12.2.1.4.0. Download the patch and stage it in docker-images/OracleEssbase/dockerfiles/21.1.0/patches so that the contents of this folder look like this:
Staged Oracle patch for login issue
At this point, you have all of the files staged properly and assuming you have Docker installed and running, we can start to build the images.
Docker Image Build
The process here is that we’re going to build the Oracle Java image, then the FMW image (which relies on the Java image), and then the Essbase image (which relies on the FMW image).
Docker Java Image Build
Let’s go back to the docker-images/OracleJava/8 folder, which is where we will find the build.sh script we’re going to run, which will build the Oracle Java image for us. Enter ./build.sh to run the script:
Kicking off the Java image build
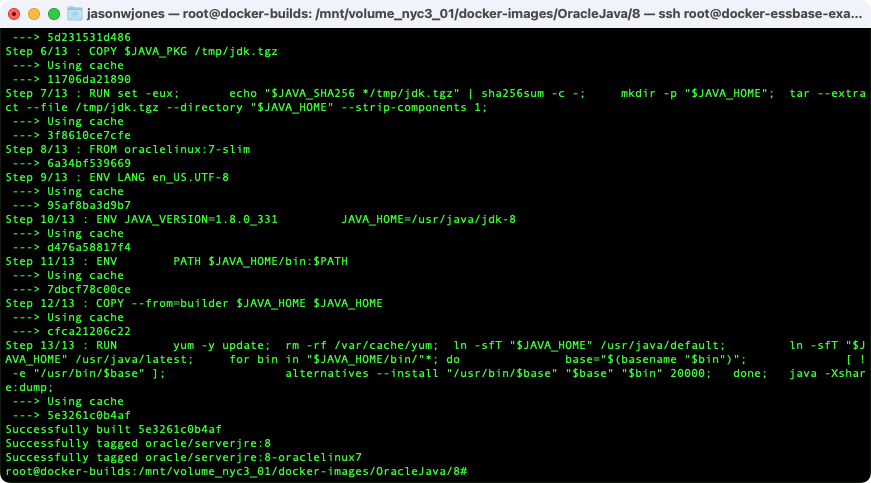
If all goes well, you should see output similar to the following (your checksums may differ if you’re using a different Java version or the scripts have been updated from when I did this):
Java build results
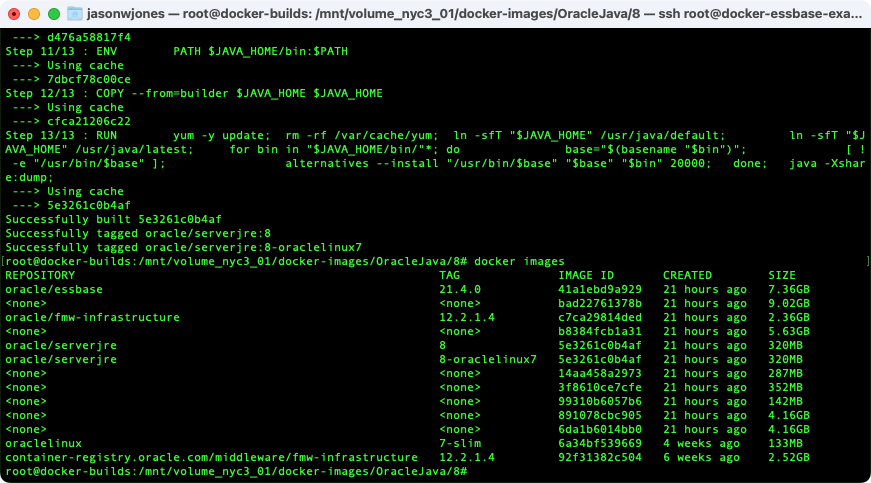
You now have an Oracle Java Docker image that is built on your local machine, and that you could run right now and do things with. You should be able to run the docker images command to get a listing of the Docker images that are available on your machine, and you should see new or existing entries for the Java images (oracle/serverjre:8 and oracle/serverjre:8-oraclelinux7):
Docker image listing showing Java images
You don’t really need to worry about these Java images directly, we just need them so that the next steps to build the FMW image will work, since they rely on the Java image.
Build the FMW Image
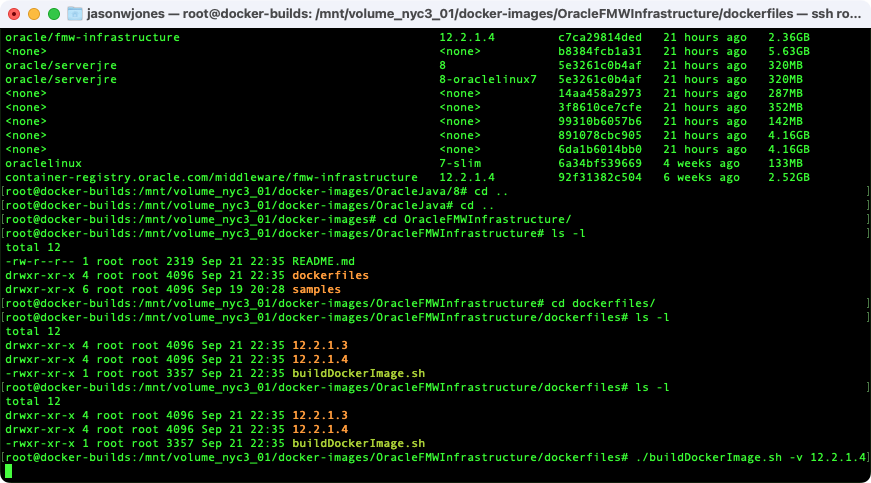
Navigate over to the docker-images/OracleFMWInfrastructure/dockerfiles folder, and then run the command ./buildDockerImage.sh -v 12.2.1.4:
Building the FMW image
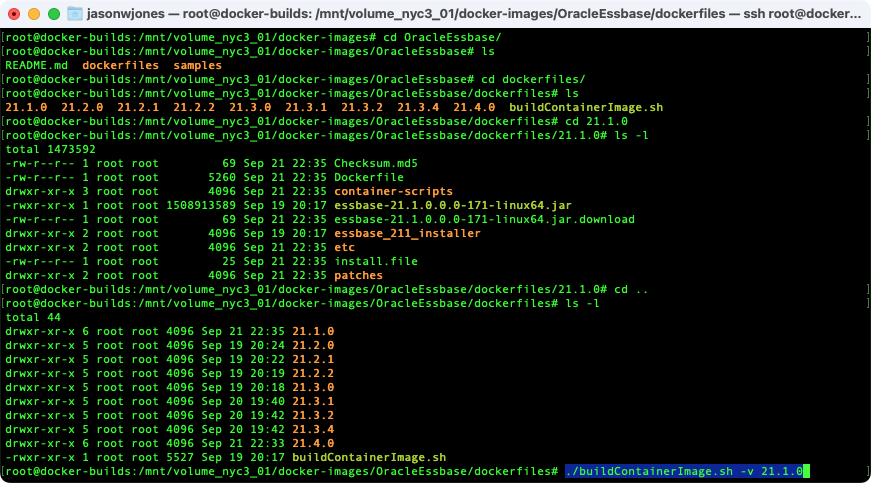
This will take a few minutes (on this system it took 276 seconds), and then you should have the FMW image built locally. Now we can head over to the Essbase folder. Navigate to docker-images/OracleEssbase/dockerfiles. At this point you should only have two things there, a folder named 21.1.0, and a script called buildContainerImage.sh. On my system there are other folders, which I’ll discuss in a moment. Similar to what we just did with the FMW build, we’re going to run the buildContainerImage.sh script with a version flag in order to build the Essbase 21.1 image. Run the command ./buildContainerImage.sh -v 21.1.0 as in the following:
Building the Essbase 21.1 image
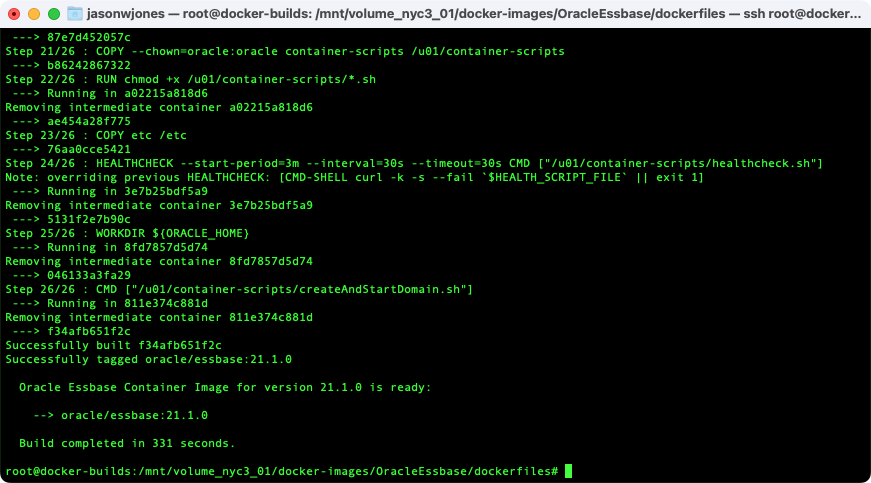
You’ll see a bunch of output for awhile. Basically what is happening is that a miniature Linux VM with WebLogic on it is being run in the background, and then the series of commands to copy, extra, install, and configure Essbase 21.1 on are being run on it. So it’s basically a console Essbase install where a response file is being used (instead of doing a console install interactively, or using the installer GUI). If all goes well, then at the tail end of the output, you should see something like the following:
Essbase image successfully built
At this point, we’ve now built an Essbase 21.1 image that exists on this local machine only. You can see in the output what we wound up with an image named oracle/essbase:21.1.0. In Docker parlance, this identifies an image with the repository named “oracle”, an image name of “essbase”, and an image tag of “21.1.0”. At this point, we can run the image on this machine. If you want to publish this image to your own container registry so that your colleagues can use it without having to go through the hassle of building it, there is another step you must take. I’ll cover that below. Let’s go ahead and run this image now and after that I will talk about patching to newer Essbase 21 versions, publishing, and more.
Start an Essbase 21 Container From Your New Image
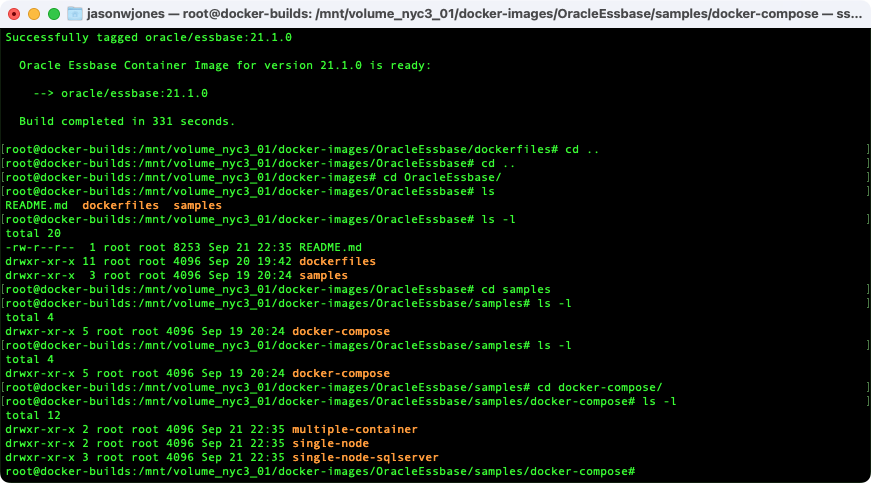
Again, at this point we have an Essbase image that we built, but not a container (a running image). Presumably what you want is to have an actual Essbase server you can do things with. The Oracle repository that we cloned, in addition to having the Docker files that we used to build the image, also contains some samples to help us run an image. In the OracleEssbase folder, you’ll see the samples folder. In there, you’ll see the docker-compose folder. Finally, inside of that you will see three other folders:
Provided samples
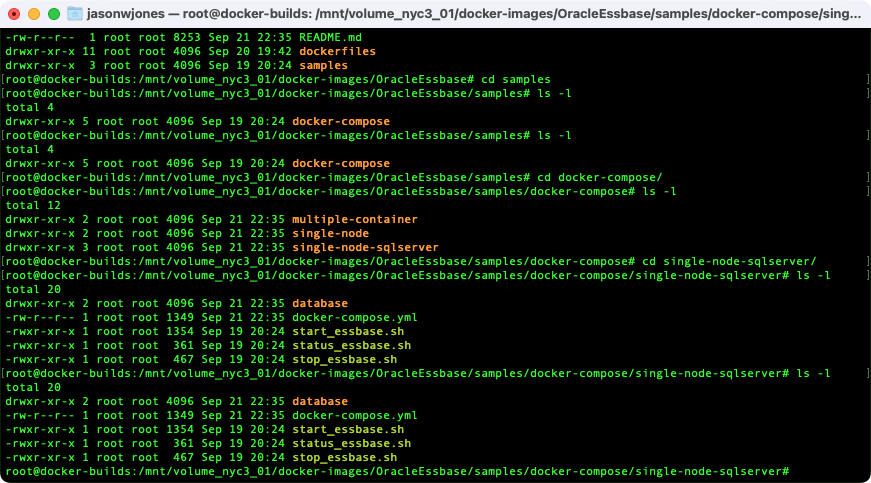
These samples are based on the Docker Compose technology. This tool is often used by developers to run servers that have multiple services. In our case, we have two: an Essbase service (i.e., a server with just Essbase on it), and a relational database (which contains all of the schemas that the Essbase server uses to store information). I will go ahead and say that 99% of my experience using the Essbase 21 Docker Compose files is with SQL Server, using the files provided in the single-node-sqlserver. The other folders contain samples with slightly different configurations. I like the SQL Server configuration because that’s what I used when I developed all of the Essbase 11.1.2.4 Docker stuff, so I’m more comfortable with it, and secondly, SQL Server Docker instances come up very fast. Additionally, SQL Server has public images available so it’s one less thing we have to build here. So we’ll go in to the single-node-sqlserver folder and look around:
Contents of the SQL single node example folder
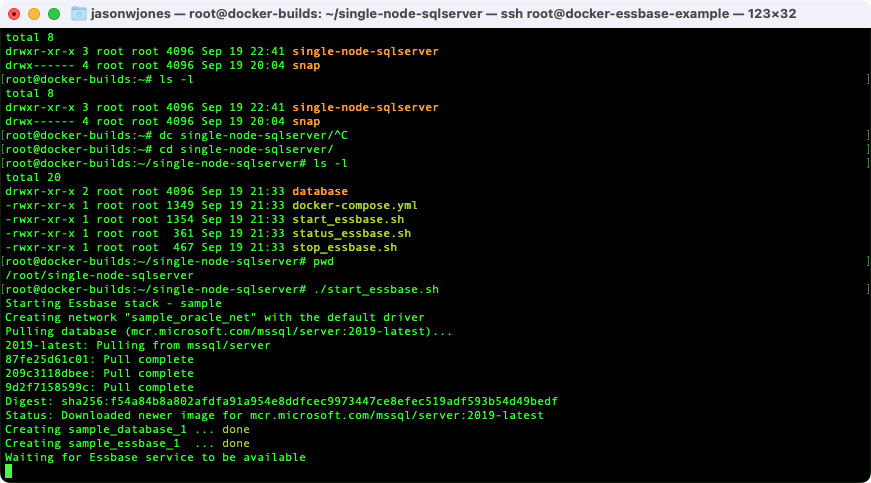
There are a couple of convenient scripts here for starting and stopping things. Let’s kick off the start_essbase.sh script. The first time you do this, if you don’t already have the Microsoft SQL Server Docker image locally, then the Docker image is going to pull it from the Microsoft Container Registry. This is a one-time thing; afterwards, you’ll have a local copy that will be used on subsequent executions. Once that’s done and the next steps proceed, you should see the following, indicating that it’s waiting for the Essbase service to be available:
Waiting for Essbase service
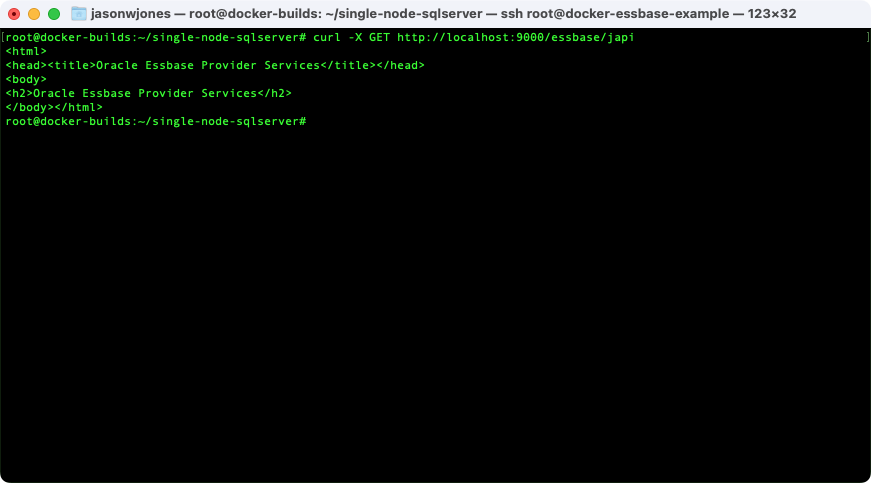
Basically, there’s a script that’s on a loop and it’s pinging the Essbase service on the WebLogic server and waiting until it gets a valid response, indicating that the service has come up. The amount of time that this takes seems to vary. On my home Xeon server, it can be 30 seconds to a few minutes. On some cloud servers I’ve used, it can take substantially longer (I think sometimes the startup can really drag on with some of my cloud servers because of some weird DNS/networking issues, but I’m not totally sure). In any case, eventually you should see the output say Essbase service is ready at http://localhost:9000/essbase, indicating the the Essbase service is running. Of course, since I’m running this all on a remote server, trying to access localhost doesn’t do me much good. However, if I want to do a quick sanity test and see if I can reach, say, the Essbase APS server (one of the middle tier nodes that Java clients talk to), I could run a simple local curl command to see that I get something back, such as running curl -X GET http://localhost:9000/essbase/japi:
Checking the Essbase APS service
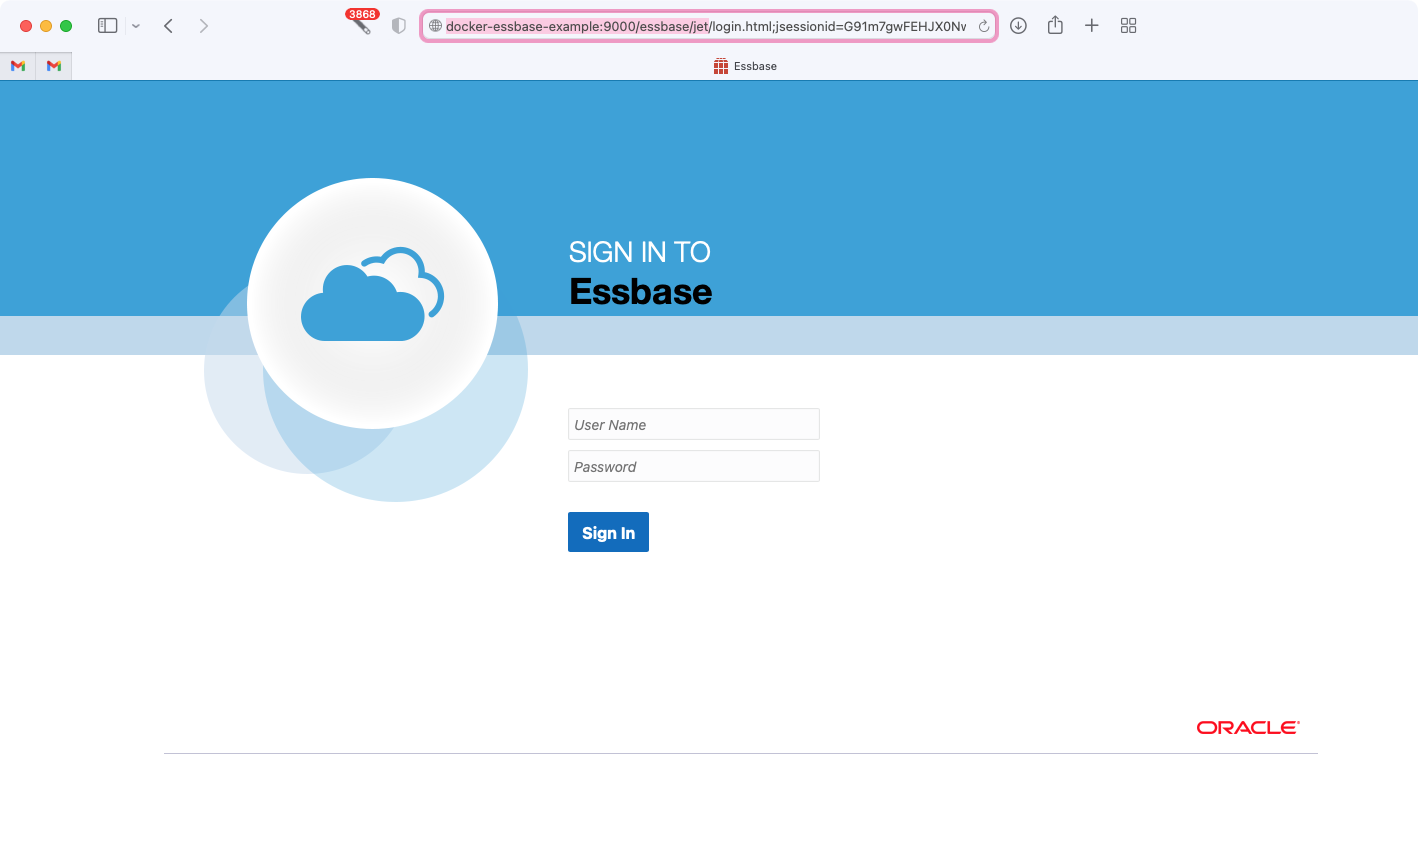
This might be a nice and quick test just to make sure it’s up, and if you are unable to access the Essbase web services/interface remotely but you are able to get to things locally, that might tell you if you have a firewall issue you need to sort out. Let’s try and login by navigating to the Essbase sign-in URL, located at http://server:9000/essbase/jet:
Essbase login page
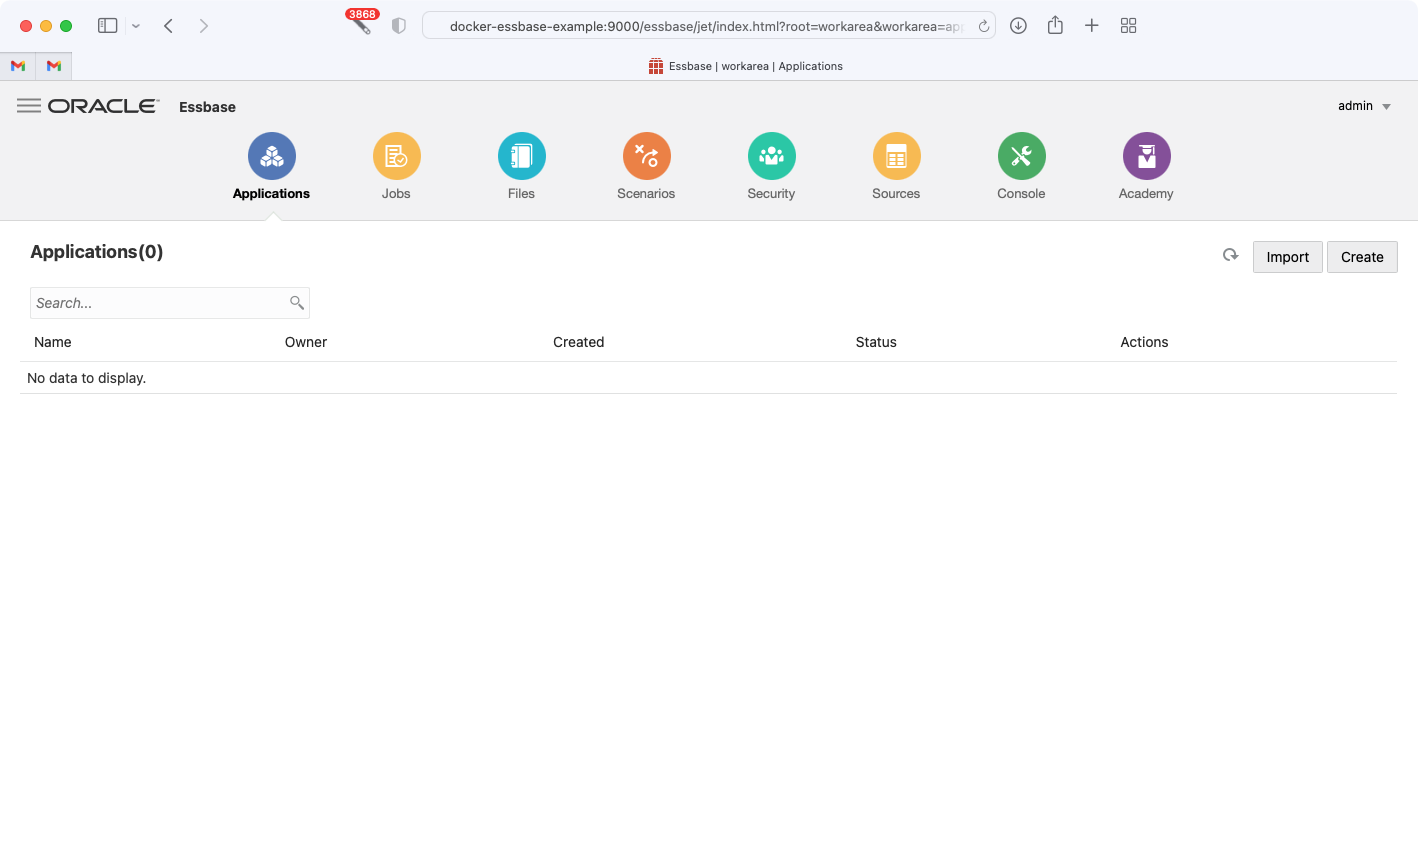
The default (although configurable) credentials to login to these servers is username admin and password welcome1. Sure enough, we are logged in and looking at our server with exactly zero applications right now:
Essbase web UI
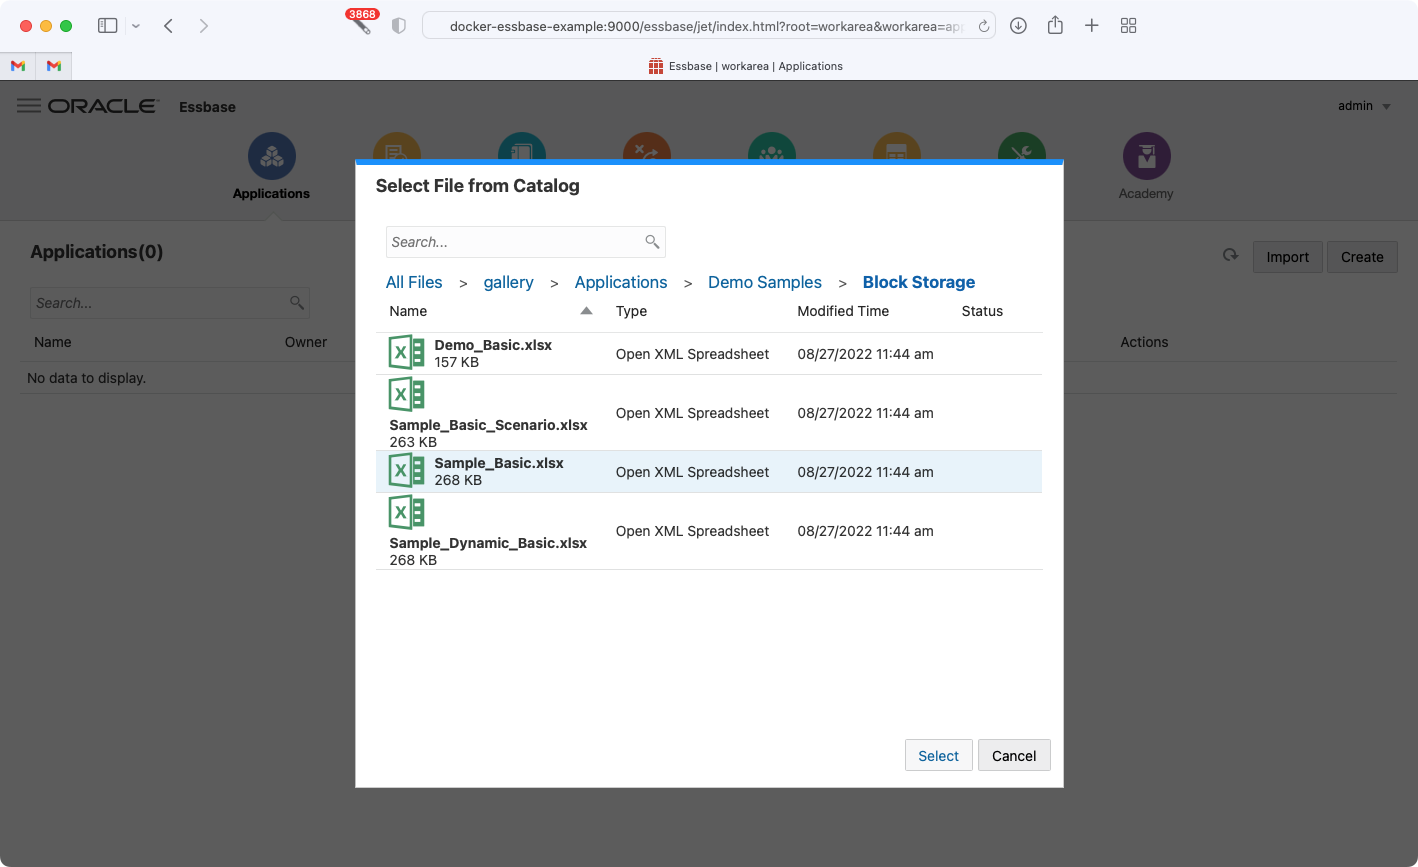
I won’t go in to laborious detail since it is better covered elsewhere, but if you want setup the classic Sample Basic application, you can click on Import, then navigate through to the Gallery and demos and find the Sample_Basic.xlsx file, as shown below:
Importing Sample Basic
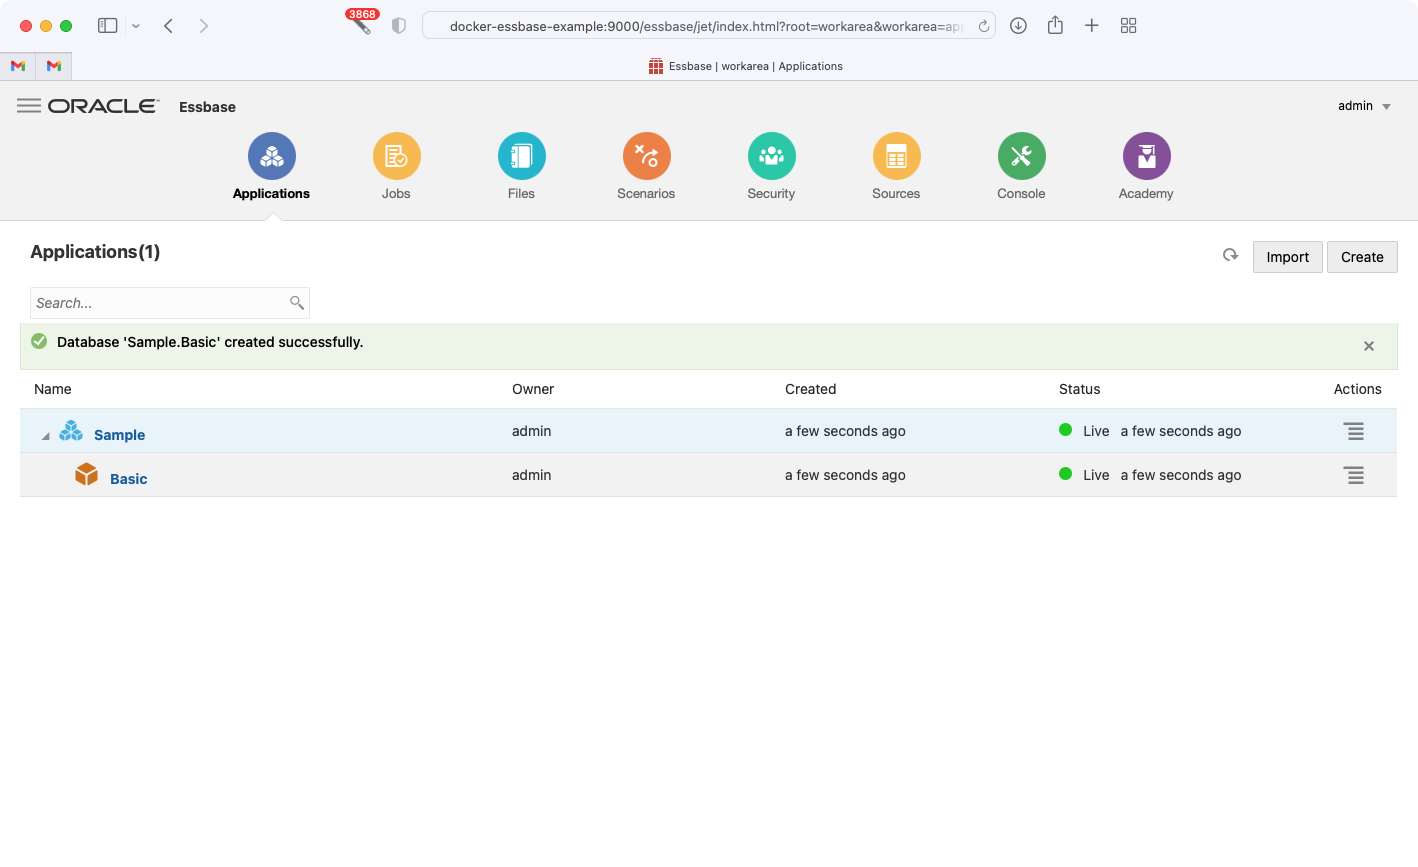
Afterwards, we have a live Essbase application/database (cube):
Essbase server after having imported Sample Basic
There you have it, we have now built our very own Essbase image and started it up. Similar to how we started it up, you can see the stop_essbase.sh script to shut it down. There’s not really a lot going on in the script, it’s just basically calling the Docker Compose system with the stop command to shut the two containers (the SQL Server and the Essbase server) down at the same time. You could kill the containers using a docker command or your GUI tool but it’s a lot more graceful to shut them down properly. Here’s the thing, though: if you stop the server with the stop script, and then start it back up with the start script, that’s basically a whole new server – and any databases you may have imported or created will be gone. Keep that in mind for the moment.
Okay, so we have a built and working Essbase 21.1 Docker image. That totally works fine and will probably suffice for most of your needs. But you might need or want a 21.2, 21.3, or newer image. The next section will talk about the process for doing this, which is pretty similar to what we just did.
Optional: Patching to Essbase 21.3 and Beyond
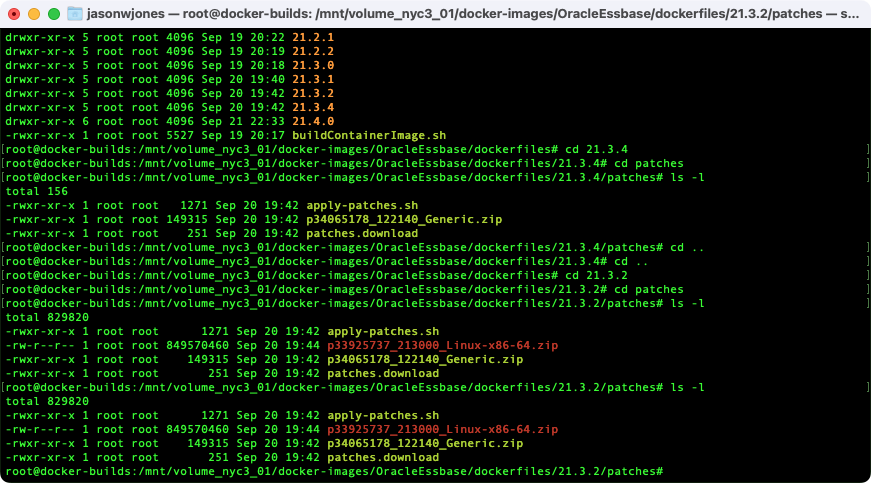
Let’s say we want to build an a Docker image of an Essbase 21.3.4 server. We are basically going to start with 21.1 server and then patch it up to the level we want. We can patch a 21.1 server to 21.2, or we can patch it up to 21.3, or 21.4, or whatever. The key thing to note is that we don’t have to apply all of the in-between patches. In other words, we can go straight from 21.1 to 21.3 without having to do the 21.2 patches. The process for building the image is basically the same as before, but we’re going to go download the patch we need from My Oracle Support (MOS). You may have noticed that in your OracleEssbase/dockerfiles folder there is a folder named 21.1.0 (although in my example, there are folders for 21.2.0 and others). The way the architecture of the buildContainerImage.sh script works is that we’re going to pass in the version flag to build, and then it’s going to look in a subfolder of the same name.
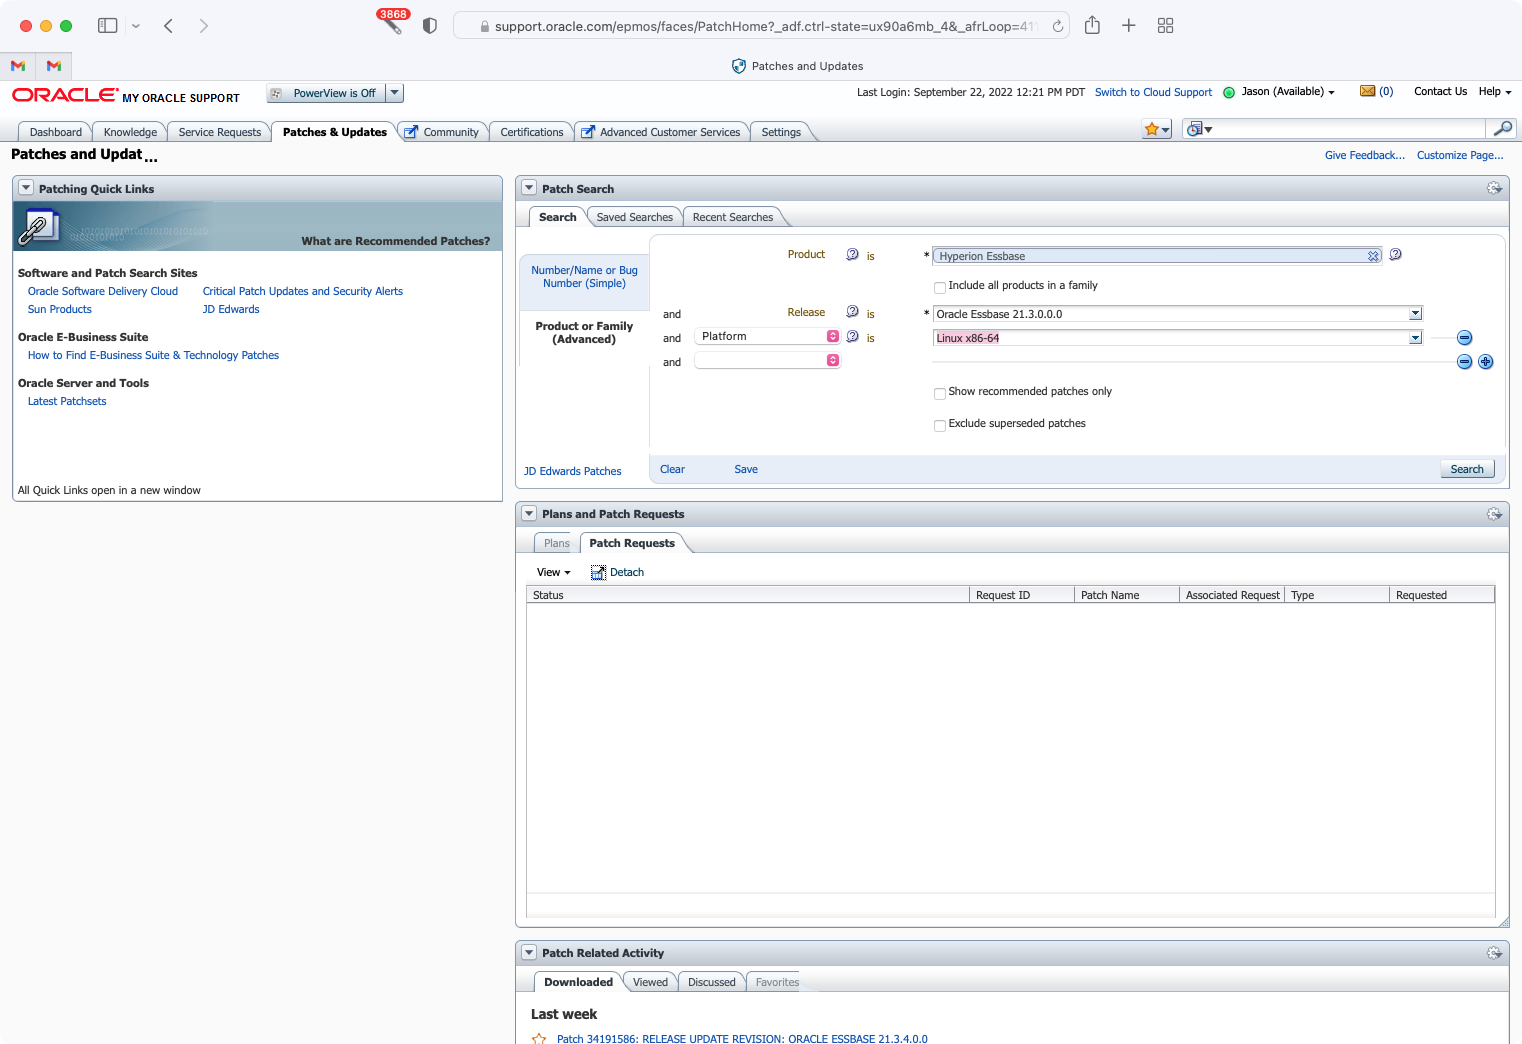
So first of all, let’s make a copy of the 21.1.0 folder named 21.3.4. You can accomplish this with the cp Linux command, such as cp -R 21.1.0 21.3.4. This will make a copy of the folder, including that 21.1 install media, and hopefully your Oracle Virtual Directory patch that we staged earlier. We will then add in the Essbase patch from Oracle. The easiest way (that I know of) is to login to MOS, navigate to Patches & Updates, and then in the Patch Search window, select Product or Family (Advanced). Then configure the Product, Release, and Platform as Hyperion Essbase, Oracle Essbase 21.3.0.0.0 (or whatever version at the time of this writing), and Linux x86-64 respectively, as in the following screenshot:
Searching for an Essbase 21.x patch
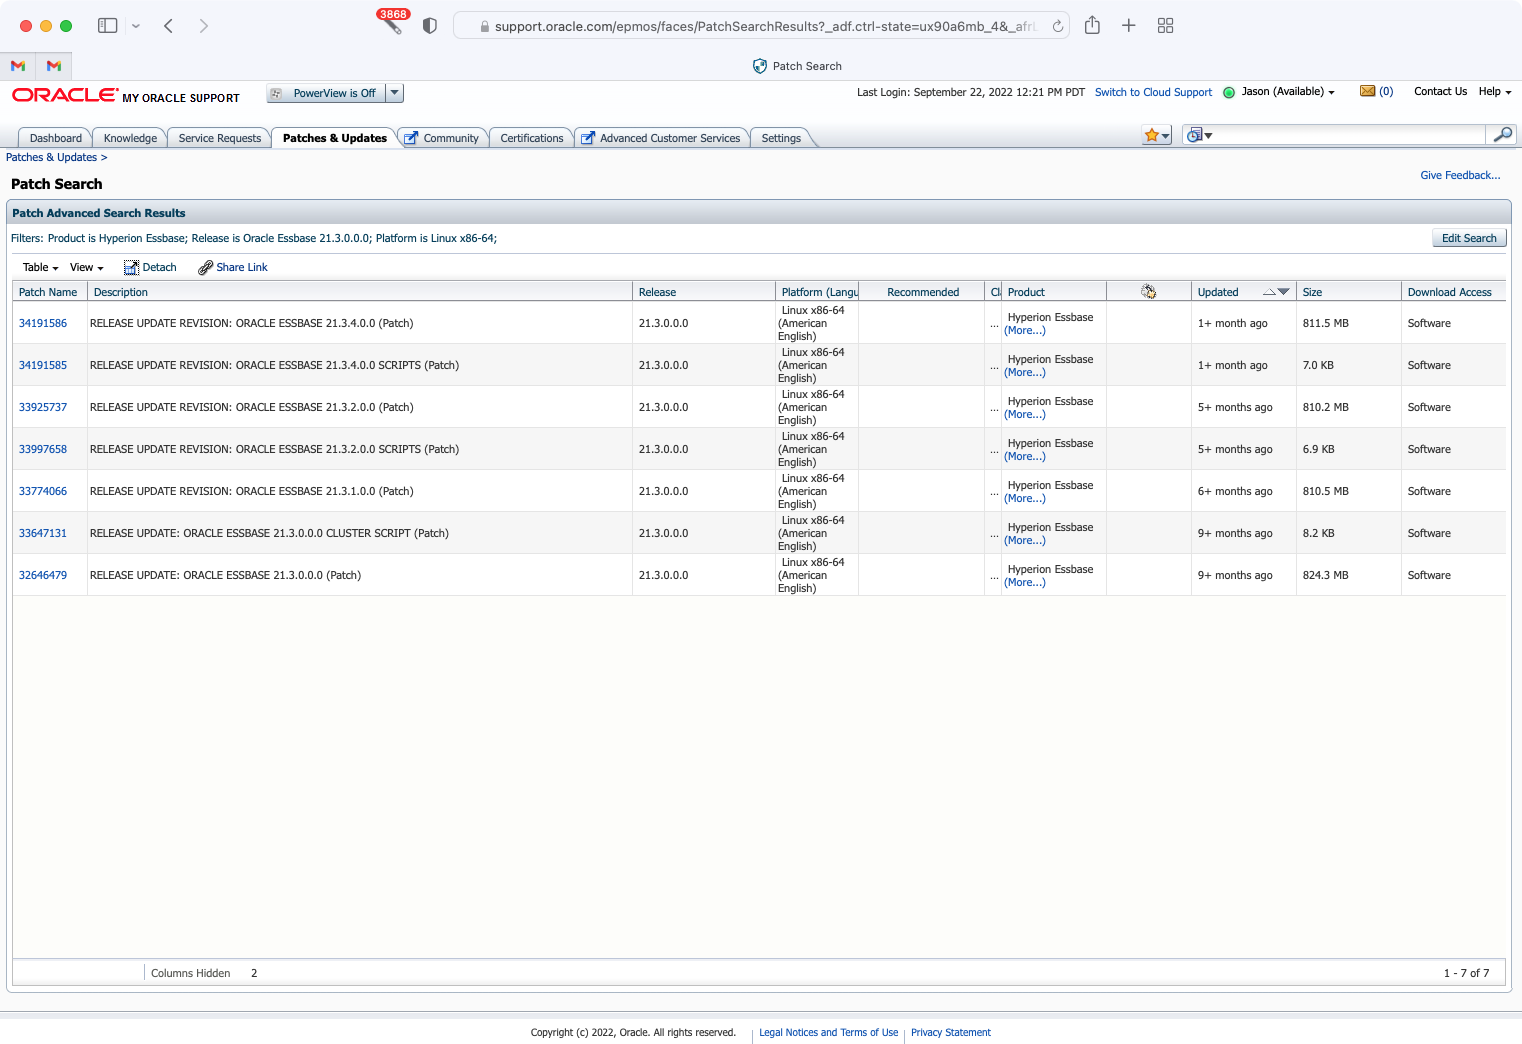
The list of patches will look like the following:
Overview of patches available for 21.3.x
The file we want for patching to [in this case] Essbase 21.3.4 is in the firs trow. Note that there are a couple of “SCRIPTS” patch types. You don’t need those. I believe that much of the development going on in these minor patch updates is to dial in Essbase clustering support, and the script patches are only needed if you’re planning to do that. I am hoping to have my team look at these scripts later on so we can do some testing with clustering, but that’s for another day. After downloading, stage the patch file in the patches/ folder so that it looks something like this (note this is a screenshot from 21.3.2):
Staging patch files for Essbase 21.3.2
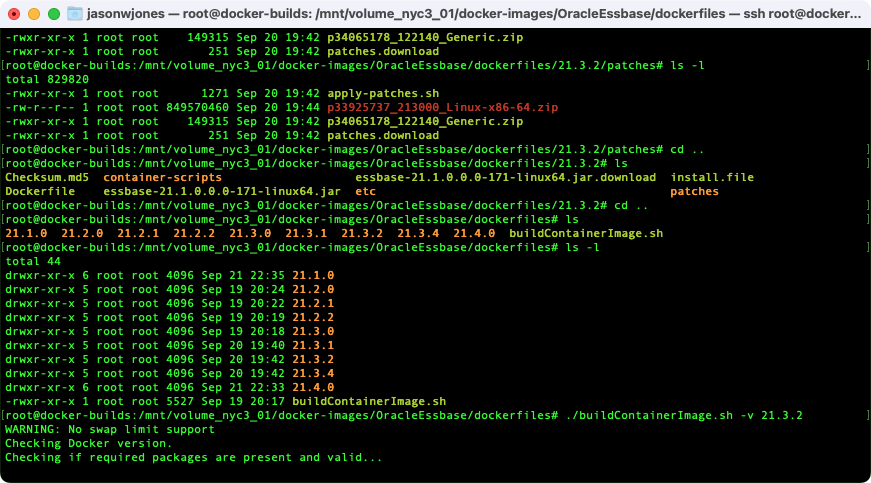
Note the patch file starting with p3392. As with before, we still have the directory patch in there, right below it. Now we can build the image, much as we did before, by using the buildContainerImage.sh script, but this time specifying the version:
Building a patched version of Essbase
Again, the version flag tells the build script which folder to work in, but it also controls the tag that will be used with the resulting image. Whereas before we built an image named essbase with the tag (version) 21.1.0, we are now going to end up with an image of the same name but a different tag, in this case, 21.3.2 (my apologies for bouncing around a little bit with the versions such as 21.3.2, 21.3.4, and 21.4 – the process is exactly the same, so don’t worry about the particulars too terribly much).
If you are a software company such as us, you may find yourself wanting or needing to build all of the different point releases of Essbase 21 in order to download the Java JAR files, to do testing, and other things.
Running a Patched Version of Essbase With Docker Compose
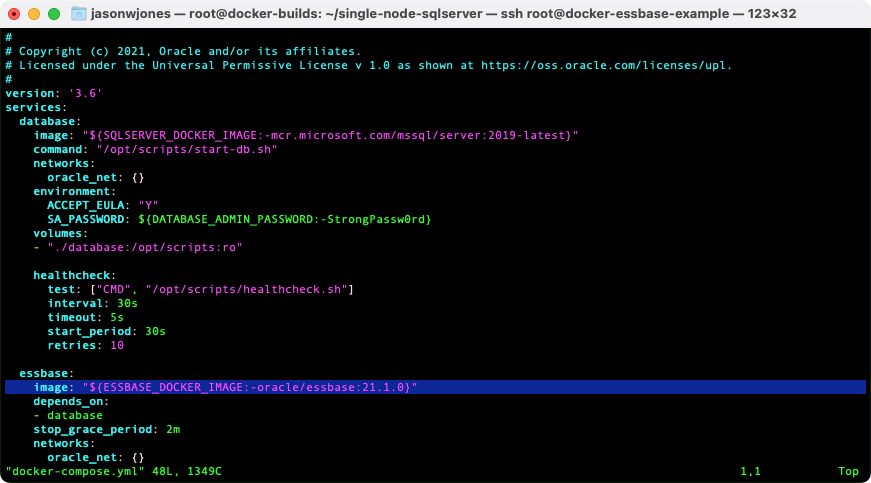
Now that you’ve built a patched version of Essbase, you might want to actually run it, right? We can use the Docker Compose scripts we used before (in the single-node-sqlserver folder), but we need to make an adjustment. When you use the start_essbase.sh [convenience] script, basically what it’s doing is using Docker Compose, and what Docker Compose does is it looks for a file named docker-compose.yml to figure out which services you want to bring up. In our case, that’s basically a Microsoft SQL Server container and our Essbase container. Let’s take a quick peek at that file though:
Docker Compose file for SQL Server and Essbase 21
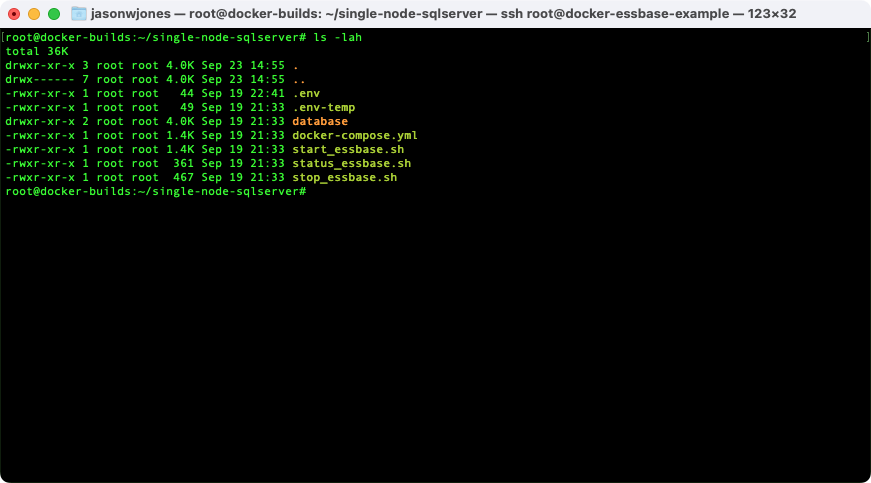
Note the highlighted line starting with image: this is the line of the Compose file that provides some details on the Essbase container that should run. The configuration value for the image name has a value of “${ESSBASE_DOCKER_IMAGE:-oracle/essbase:21.1.0}“. You can read this as the following: the value of image should be the contents of variable $ESBASE_DOCKER_IMAGE, and if that’s not set, then default to the value of oracle/essbase:21.1.0. So, everything is totally fine here if we just want to run our 21.1.0 image. But we want the 21.4.0 image, so we either need to edit this file manually or we need to provide a different value for the ESSBASE_DOCKER_IMAGE variable. There are actually quite a few ways we can do this, but the way I’m going to do it here is that we will provide our own variable values in a file named .env. Let’s run a directory listing that will show hidden files (on Linux systems, files starting with a dot are “hidden”) using ls -lah so you can see that I just have a .env file in the same folder as these other files:
Showing all files, including hidden ones
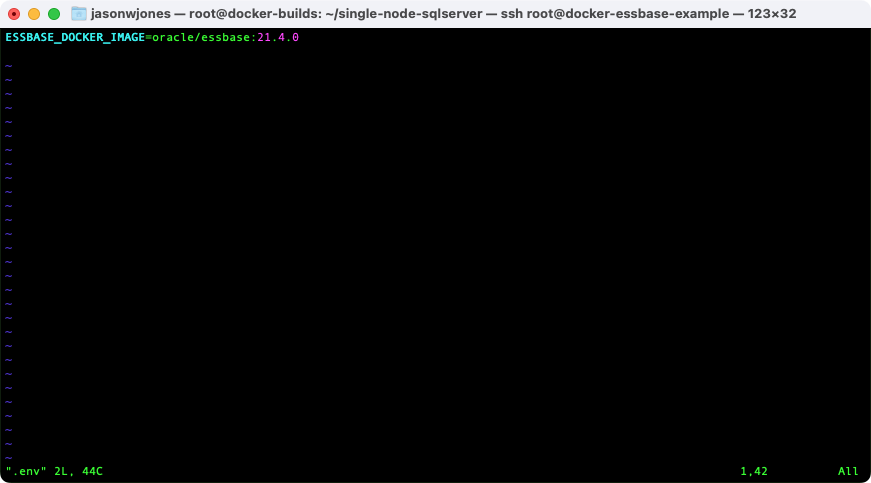
Now I’ll use vi to edit the .env file (vi .env), and we can see the following contents of the file:
Contents of .env file
With this file in place, when I go to run start_essbase.sh (which, again, just runs docker-compose), it’ll consult the .env file and set the value of the ESSBASE_DOCKER_IMAGE variable to the value I specified. I like the approach of specifying a variable value in the .env file because it’s one less thing to remember in a command line, among other reasons. For example, you may want to distribute out a small set of files (start scripts and the compose file) to your colleagues so they can easily start their own local Essbase 21 server for testing and development).
Sharing With Others / Container Registry Overview
So far we’ve built our own Essbase 21 image and we’ve even built a patched version of the image so we can enjoy the latest and greatest features. This is all well and good for our local machine or perhaps some remote server. Now you kind of need to think about your next steps. If you are going to just stand up a simple Linux server as I have done, then you can call it good and just use that server to host Essbase 21 for whatever testing and development purposes you want.
However, you may have a more elaborate use case which is that you want anyone in your organization to be able to use the image, without having to go through the trouble of building it themselves. What you might want is to push this image to your container registry. I’m not going to go into exhaustive detail about this, but I will point out that here at Applied OLAP, we’re doing both: central test servers as well as the ability for people to run their own local image. This lets developers use a set of scripts to run a local Essbase server easily based on the images that have been built and pushed up to the registry. The short version of this process is that after building the image, we then tag it with a different name so that it we can push it to our repository, essentially this command:
docker tag oracle/essbase:21.4.0 appliedolap/essbase:21.4.0
Followed by a push command:
appliedolap/essbase:21.4.0
Some of our people have Windows versions of the start scripts (i.e. Windows versions of start_essbase.sh). I am looking into the feasibility of sharing those scripts or even better, getting them integrated in to Oracle’s repository. If you’ve made it this far and you want a copy, just contact me and I’ll send what we have over.
Common Essbase URLs
There are a handful of URLs that are useful on your Essbase server (I’ll write these in terms of localhost but you’ll need to edit them accordingly). Those of you that have been in the Essbase world for a long time probably know these, but those of you coming here because your company is currently endeavoring to check the box for Essbase support in your product and need to stand up a quick Essbase server so you can hit the XMLA endpoint may find this useful:
Essbase JET UI: The modern, web-based interface that allows you to see your Essbase applications, create new ones, manage existing ones, and more. Kind of like EAS for the web, and less ugly
Essbase REST API Swagger/OpenAPI: A web-based interface for testing the Essbase REST API as well as downloading the JSON definition file that you may be feeding in to a tool to generate bindings in your language of choice
Essbase APS: Endpoint to configure the Dodeca Essbase connector (APSUrl) or for Essbase Java API connectivity that is going through APS instead of embedded mode
I’m working on a few things and some future blog posts and as with many of the things I am doing these days, I am using a Dockerized Essbase server. If you or your company has successfully followed the steps as laid out in the docker-essbase GitHub repository, then you have a Docker image for an Essbase server. There are a few ways to actually run this image. Generally you will want to run the Docker Essbase server from its “compose” file. The compose file is a YAML syntax file that specifies how to tie multiple docker images into a server. In this case those multiple Docker images are the Essbase image/container itself and a Microsoft SQL Server image/container that houses the relational databases that Essbase requires.
The compose file that is part of the docker-essbase project works just fine, but there is a slightly different you can run the server that might be a good option for you or your coworkers. If you push your Essbase image up to a Docker image registry (such as Docker Hub although there are others such as on AWS or Azure), then you can make it available to your colleagues/coworkers to use without them having to clone the docker-essbase repository or build the image themselves. The compose file looks like this:
As noted in the comments for the file, this example assumes you have a .env file or have otherwise defined the variables for SQL_PW, EPM_PW, and REGISTRY. Registry is just your organization or user name on Docker Hub.
This compose file is just a little from the one in the docker-essbase project. One, it doesn’t bother to try and build the Essbase Docker image, it simply references one that you have pushed up to a registry. This example also assumes that the image name is essbase and it has been tagged as latest (at the time of this writing my latest tag corresponds to a Docker Essbase image that is patched to version 11.1.2.4.033).
The rest of the comments in the gist/code example indicate how you can run the server in detached state, follow the logs, pull up the EAS launcher, and run/login to a MaxL session.
One way you can use this file would be to push up your built Essbase Docker image to a private registry, then give access to that image to your employees and give them this compose file (or put it in a GitHub repository or whatever) and they can then start an entire Essbase server on their machine (assuming Docker is installed) with a single command.
As I’ve mentioned in previous blog posts and various presentations, this ability has been an incredibly useful development tool for me. Part of the reason that it has been useful is that I treat these servers as completely throwaway objects, which is to say, when I’m done using it, I just stop it and it goes away. The next time I start it up, Sample/Basic and friends are loaded anew as if nothing happened. So this let’s me make cube copies, mess with outlines and other things and not have to worry about messing anything up.
That said, you may want to treat your Docker Essbase server as something that’s slightly less ephemeral. You can do this (so you’re treating the container essentially like a VM), although it’s not a use case that I have a ton of experience with. If you treat your Docker Essbase container more like a VM, I’d be curious to hear what your workflow looks like and any other thoughts you may have.
Addendum
Variables
There are multiple ways with Docker Compose to specify variable values such as those used in the above file. A simple way to do so is with a .env file in the same folder. It might look like the following:
In the above and in my case, the value of REGISTRY is my organization’s Docker Hub ID. This value might be more detailed if you have a registry on another provider and you therefore have to specify a ‘fully qualified’ registry path. Additionally, the value of SQL_PW is one that I have gotten in the habit of using for Microsoft SQL Server because it requires a complex password with uppercase and lowercase letters, numbers, symbols, and length. EPM is less stringent, although you still can’t get by with just ‘password’ as WebLogic needs something ever so slightly more secure (note that the password ‘password’ is fine for Essbase itself, but the Docker Essbase image just uses the same password for both Essbase and EPM for simplicity).
Ports
The above Compose file maps only port 9000. This is the “compact deployment” port for an EPM server, when you have EAS, APS/Smart View Provider Services, Workspace and Shared Services all running in WebLogic on this one port. This means that connections to Smart View are over port 9000, Java API connections through APS are on port 9000, and more. As presently configured, you cannot connect to Essbase via embedded mode. You would need to add in port 1423 and the port range starting at 32768. You could, if you wanted to, also add in port 7001 and start up the WebLogic container and then login to manage WebLogic. Just for the sake of simplicity I have omitted those ports here (but the whole list can be found in the docker-essbase GitHub project).
Dodeca Spreadsheet Management System customers have been asking for HFM support for quite some time (some for years!) – and now we have it. For the last few months we have been testing out the new Dodeca HFM Connector with very compelling results. In order to understand how to use this new connector in your existing Dodeca environment, it’s important to understand a bit about how this connector works, and how to deploy it. I’ll cover this and more in this blog post.
Architecture
Dodeca is generally deployed with two major components: the Dodeca server itself and an Essbase web services component. Internally we generally call these the “metadata servlet” and the “Essbase servlet”, respectively. They are traditional Java servlets that can be deployed in WebLogic, Tomcat, or your preferred servlet container. The metadata servlet is absolutely essential as it is the heart of your Dodeca system. The Essbase servlet (or connector, if you will) is used by the Dodeca client to communicate with an Essbase server – our desktop client doesn’t communicate with an Essbase server directly. The Dodeca Essbase servlet is written in Java and uses the Essbase Java API to communicate with an Essbase server. This allows Dodeca to work with just about any version of Essbase, including Essbase on the cloud. It’s not uncommon for customers to deploy multiple versions of the Dodeca Essbase servlet simultaneously in order to use multiple differently versioned Essbase servers in Dodeca at the same time. For instance, you might deploy Dodeca Essbase servlets for a System 9 server, an 11.1.2.4 server, and an Essbase 19c/OAC Essbase server all at the same time. You could even develop a view in Dodeca that uses data from all three of these connections on the same grid (and of course you can even put relational data on the same view as well).
That brings us to the new Dodeca HFM Connector – the way that we’ve implemented this is that Dodeca thinks it’s talking to a normal Dodeca Essbase servlet – but there isn’t an Essbase server/cube on the other end, it’s in fact an HFM application. Setting aside for a moment why we might want to do this, what does this mean for organizations that want to use HFM with Dodeca?
It means the following things:
Any version of Dodeca can now use HFM as a data source – no upgrade necessary (although you might want to upgrade anyway)
Since Dodeca supports multiple Essbase connections in a single view and thinks that your HFM data is just Essbase data, you can combine Essbase and HFM data in the same view
All your favorite Dodeca functionality such as commentary, drill-through, Workbook Scripts and more just works
Installation
The Dodeca HFM Connector is developed as a standalone web component as opposed to being added to an existing WebLogic/Tomcat instance. In the future we may add a traditional servlet deployment option, but the standalone approach has been very effective for Drillbridge, so we are using it here as the default choice. Setup is pretty straightforward, but there are a couple of special steps during installation that you need to make sure you perform.
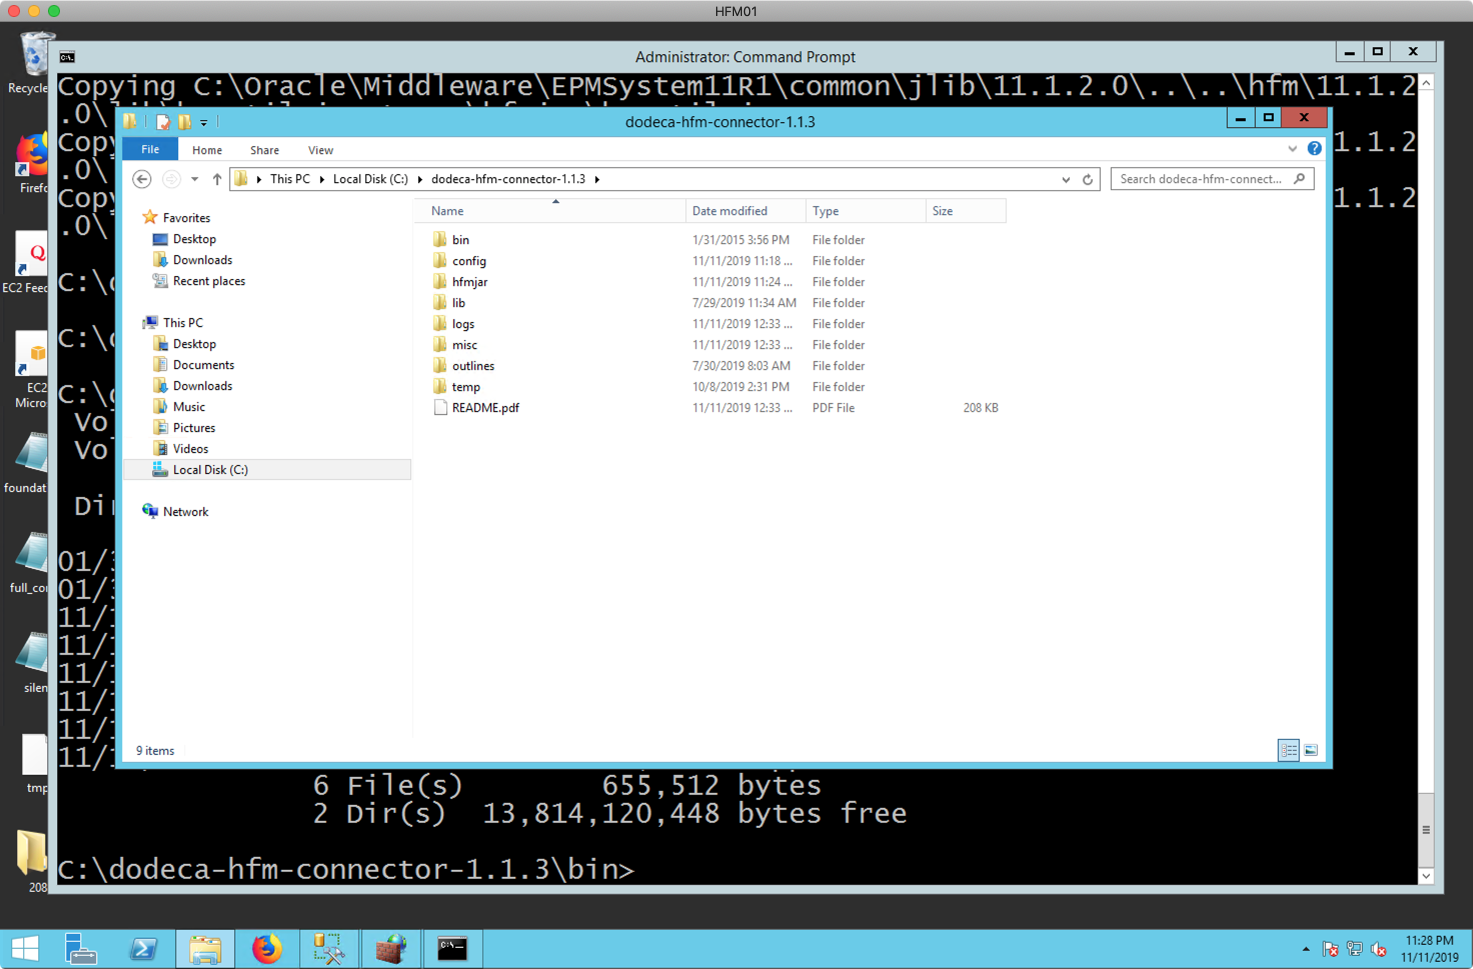
First, extract the files from the zip into the location you want to locate the connector. In this example I’m just installing it on the C: drive of a server:
Dodeca HFM connector directory structure
The extracted folders include the following:
bin: binaries for running and installing the connector
config: configuration files and where you add your own reg.properties file
hfmjar: where you need to add the HFM Java JAR files from your HFM server
lib: the Java libraries that the Dodeca HFM Connector uses itself
logs: log files
misc: miscellaneous files/utilities not needed during runtime
outlines: the HFM connector will store outline caches here (if any)
temp: temporary files used during execution
README.pdf: notes on how to install and more
There are two major steps you need to perform to setup the connector: you need to get the HFM Java JAR files from your HFM server, and you need to get your reg.properties file from your EPM server.
The HFM Java JAR Situation
Developing Java programs with HFM is a little different than I typically see compared to other systems. In a more traditional deployment, you would have one or a handful of Java JAR files. This is the case when working with the Essbase Java API – there are 3-4 JAR files you need that you can just copy and add to your Java project and then be on your way.
Developing Java programs that work with HFM is ostensibly the same process – but not quite. Theoretically you can just bring in the epm_j2se.jar and epm_hfm_web.jar files and call it a day. And if I were developing a single Java program that ran on the HFM server itself, then that might be okay. There are several somewhat unorthodox things about the HFM JAR situation, though.
One, there’s nothing actually in the aforementioned JAR files – but they contain references to other JARs on your EPM system. And those JARs contain references to other JARs, and so on – it’s a long list, and deep. In fact, the full list of referenced JARs is almost 400 files. So that sort of rules out just copying and pasting a couple of files around. The other nuance to this JAR situation is that it would require me to locate my component (the HFM connector) on the HFM/EPM server itself, which isn’t necessarily a dealbreaker – but my customers have indicated a strong desire to be able to put the HFM connector on an arbitrary server and to not be forced to locate it on the existing HFM/EPM server.
Enter Jarnivore
The Dodeca HFM Connector ships with a Java program called Jarnivore (located in the misc/ folder mentioned earlier). Jarnivore is a command-line tool that provides several capabilities for working with a set of JAR files like HFM’s. The most notable capability is that given one or more primordial JAR files, it’ll follow the references inside of them and collect every single dependent JAR file. It can then print out the list/tree or copy the files to a folder you specify.
As the HFM connector does not ship with HFM JARs itself, it is imperative that you use Jarnivore to “extract” the HFM JARs from your server and copy them into the hfmjar/ folder where the connector is installed. This accomplishes a couple of things for you: one, you will end up with a set of JAR files that is completely matched to your HFM environment (including the exact patch version you are on), your exact version of Hyperion Shared Services, and last but not least: it lets you install the HFM connector on essentially any server you want. You can run the HFM connector on a Linux server even if your HFM server is installed on Windows.
Do note that the HFM connector itself requires Java 1.8, although Jarnivore only requires Java 1.6 or later. Your HFM server already has Java installed on it (somewhere, at least), so you can use the existing install of Java on your HFM server to run Jarnvore.
Running Jarnivore
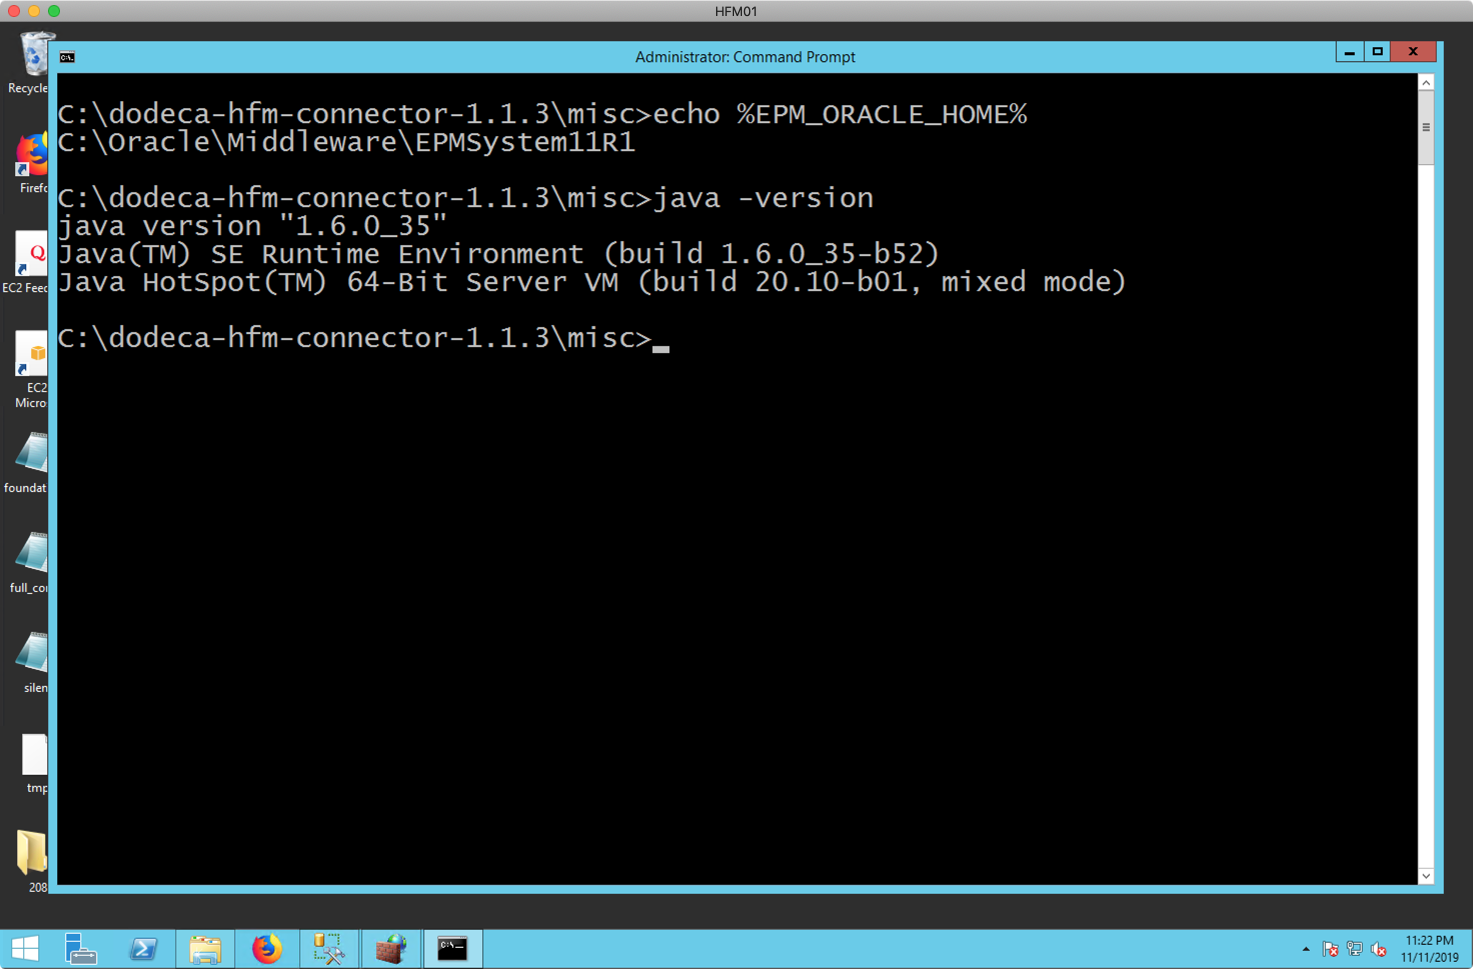
Let’s take a look at running Jarnivore to pull out the HFM JAR files by first launching a terminal on the HFM server. First I am going to verify that the EPM_ORACLE_HOME environment variable is set by just attempting to print it out:
Checking EPM environment variables and Java version
Right after I validated the value of EPM_ORACLE_HOME, I then run java -version to check that Java is on the current PATH and is at least version 1.6. Again, since EPM ships with Java 1.6, you should have at least that version available, although it’s not a guarantee that it’s on the path. If you don’t have Java on the path, you can just fully-qualify the reference to Java using its full folder and filename, but I find it’s easier to just add the folder containing java.exe (or just java on Linux) to the PATH and be able to reference it without any folders.
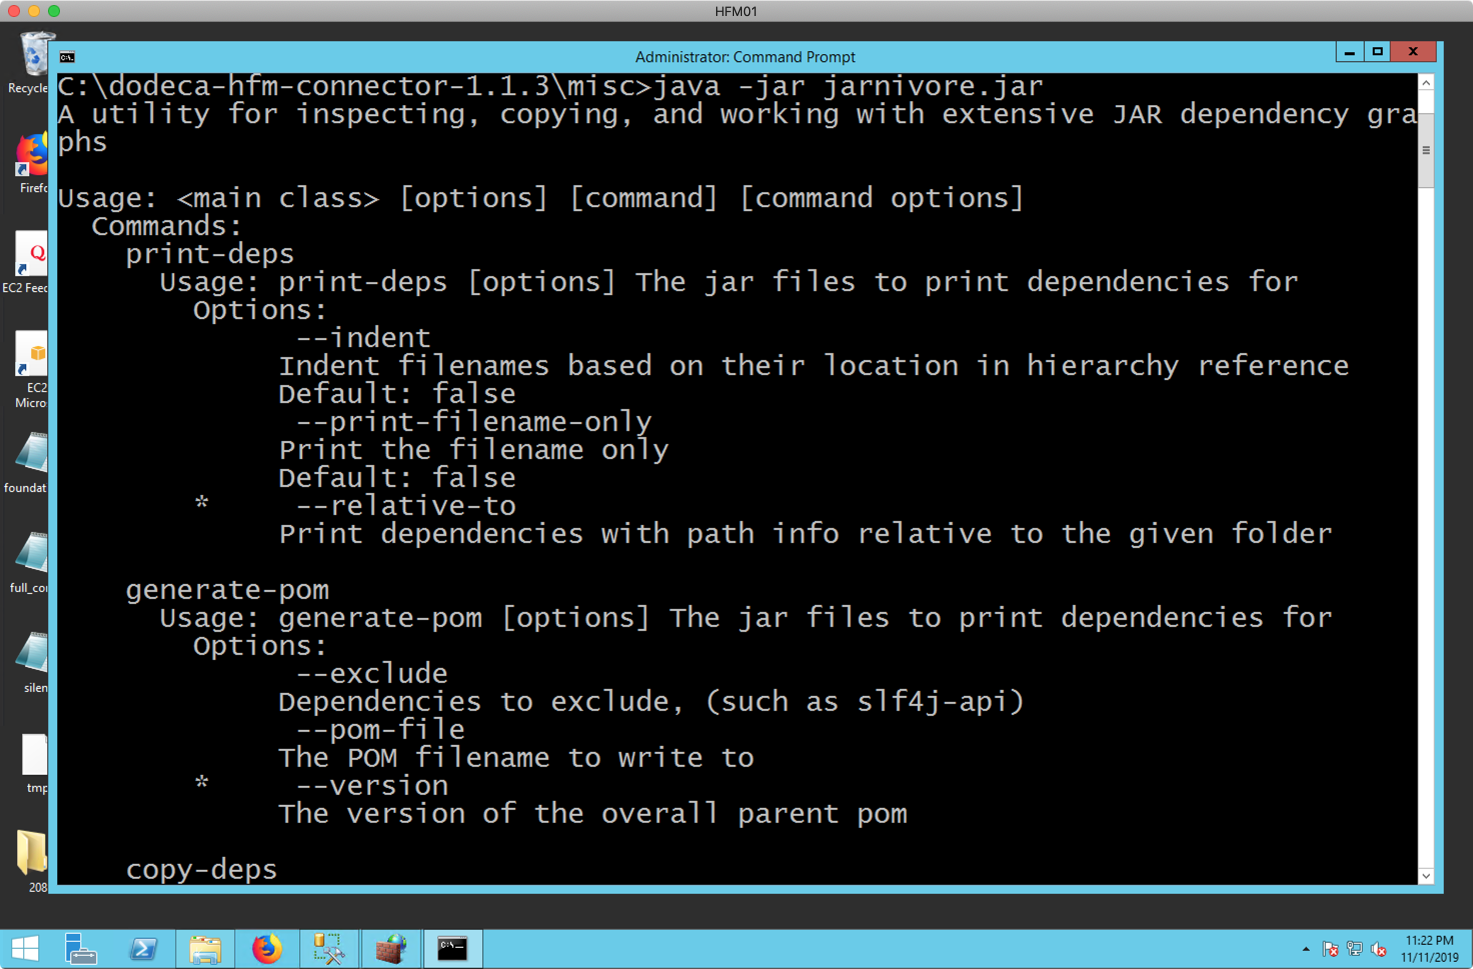
You can run Jarnivore without any parameters and it’ll print out some usage information:
Running Jarnivore without any parameters
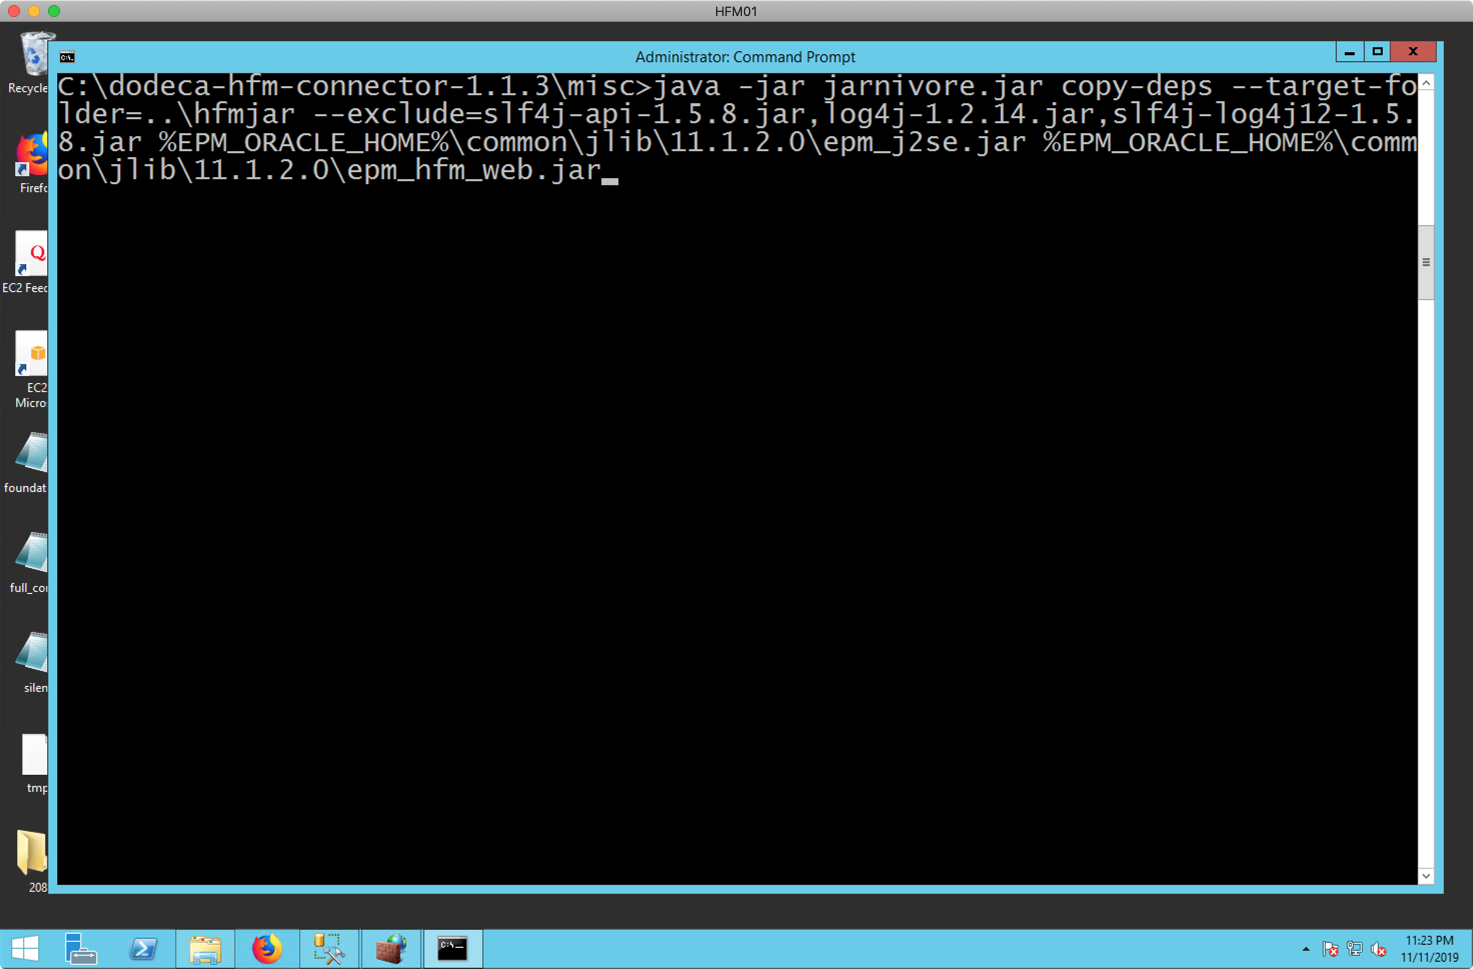
The above screenshot shows that there is a print-deps command (a command to print the JAR reference/dependency tree in hierarchical format), to generate a POM file (don’t worry about it, just used internally), and the copy-deps command, which is what we want (to copy all of the found dependencies into a single folder). Given that the EPM_ORACLE_HOME environment variable is properly set and Java is available on the PATH, we can run the following single-line command from the misc/ folder in order to copy all of the found HFM dependencies into our hfmjar/ folder:
Let me break this command down a bit. Again, it’s a single line. From left to right:
java: run Java itself
-jar: tells the Java executable that the next parameter will be a runnable JAR file that we want to run
jarnivore.jar: the Java JAR file we want to run
copy-deps: this is the first parameter to Jarnivore itself. Jarnivore has several commands it supports, and the one we want here is called copy-deps in order to copy all of the found dependencies into a specified folder
–target-folder=..\hfmjar: specifies that the target folder (where to copy the found JAR files is up one folder and in the hfmjar subfolder. Again, recall that we are running this command while our current working directory is the misc/ folder itself, so we need to specify a path relative to the current one. You can specify any folder you want here and then copy the files over in one operation, or you can just put the JARs directly where they need to go.
–exclude=slf4j-api-1.5.8.jar,log4j-1.2.14.jar,slf4j-log4j12-1.5.8.jar: this tells Jarnivore NOT to copy the files if they match one of the specified names here. This part of the command may change slightly in the future, but right now is required. These JAR names are all related to various Java logging systems. Since the HFM connector provides its own, we need to specifically exclude these from the HFM jar set so that we don’t have conflicts. The HFM connector provides its own appropriate JAR files such that the rest of the HFM JAR files are “happy” and not missing any required functionality.
%EPM_ORACLE_HOME%\common\jlib\11.1.2.0\epm_j2se.jar %EPM_ORACLE_HOME%\common\jlib\11.1.2.0\epm_hfm_web.jar: last but most certainly not least, we specify the HFM JAR files to start scanning. These are the two main HFM JARs that you may know from experience working with the HFM Java API. While neither of these JAR files contains any actual code, they essentially point to all of the other JARs that you need. Jarnivore will start its scanning with these two, follow all of the references and sub-references, exclude anything in the exclusions list, and then copy everything over to the specified folder.
For convenience and ease of use, we can use the %EPM_ORACLE_HOME% environment variable to save some typing as well as make this more portable. Before execution, the pasted in command looks like this in the command window:
A command to copy and collect JAR files out of an HFM system
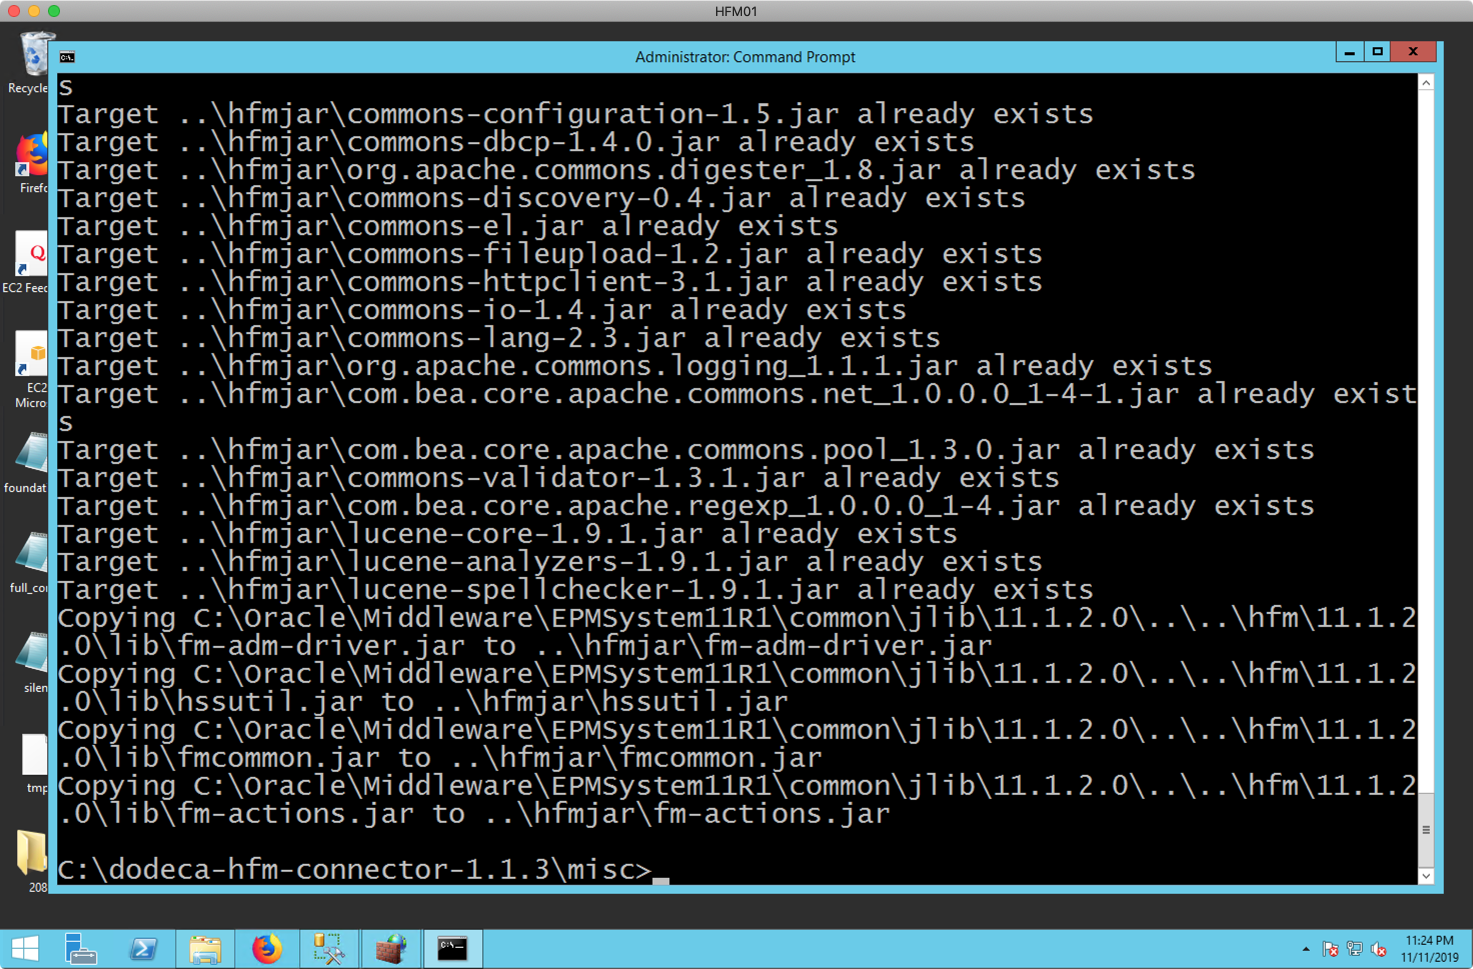
After executing, the tail end of output will look like the following:
Results of Jarnivore JAR extraction execution
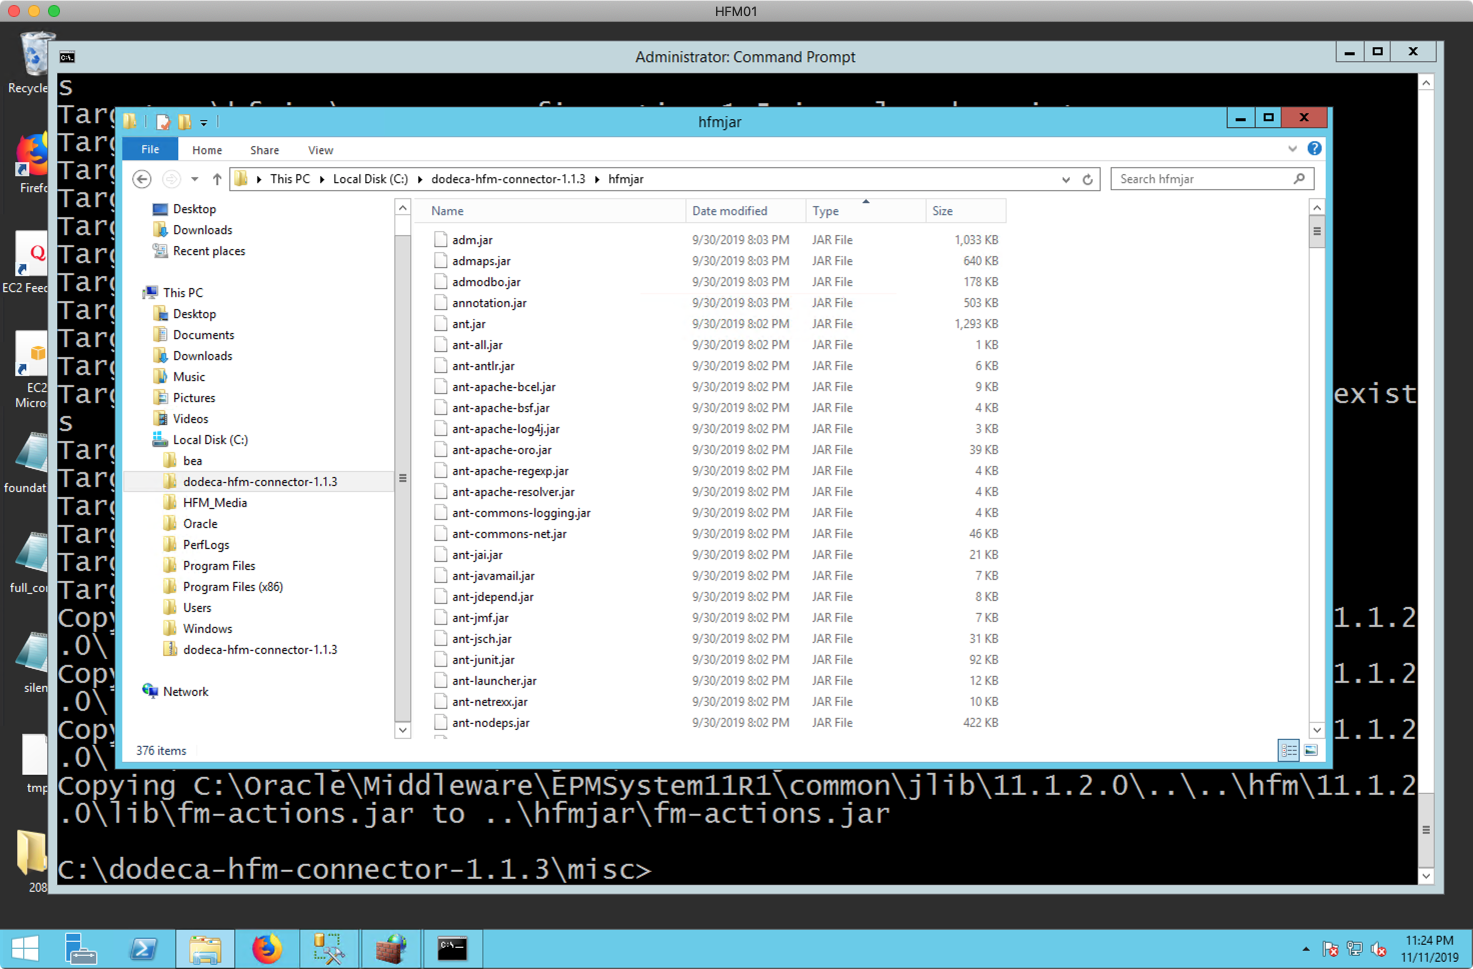
More importantly, if I go to my hfmjar/ folder, I should see something like the following:
Contents of Dodeca HFM Connector hfmjar folder after copying JARs
With the HFM JAR files in place, we need to get our reg.properties file in place. The reg.properties file is a configuration file on your EPM server. It contains the connection information to your Shared Services database. The HFM API startup sequence looks for this file, uses its information to connect to Shared Services, and then connects to your HFM server.
This startup sequence (connecting to a database and then the web service) is a bit unorthodox. Again, it’s neither bad nor good, but the more common configuration would be a “pure” web service without having to mess with the database. From a network security standpoint – and therefore a HFM connector deployment standpoint – you should make a note that the HFM connector needs to have network access to the Shared Services relational database on whichever port it uses (the default SQL Server port is 1433). If you’re unsure of what port your database is using, you can find this in the reg.properties file itself, as the first parameter is your JDBC URL (jdbc.url), and it contains a full JDBC URL that includes the server and port.
By default, you will be able to find your reg.properties file in %EPM_ORACLE_HOME%/../user_projects/config/foundation/11.1.2.0/reg.properties. For example, in a default install to the C: drive, this file might be at C:\Oracle\Middleware\user_projects\config\foundation\11.1.2.0.
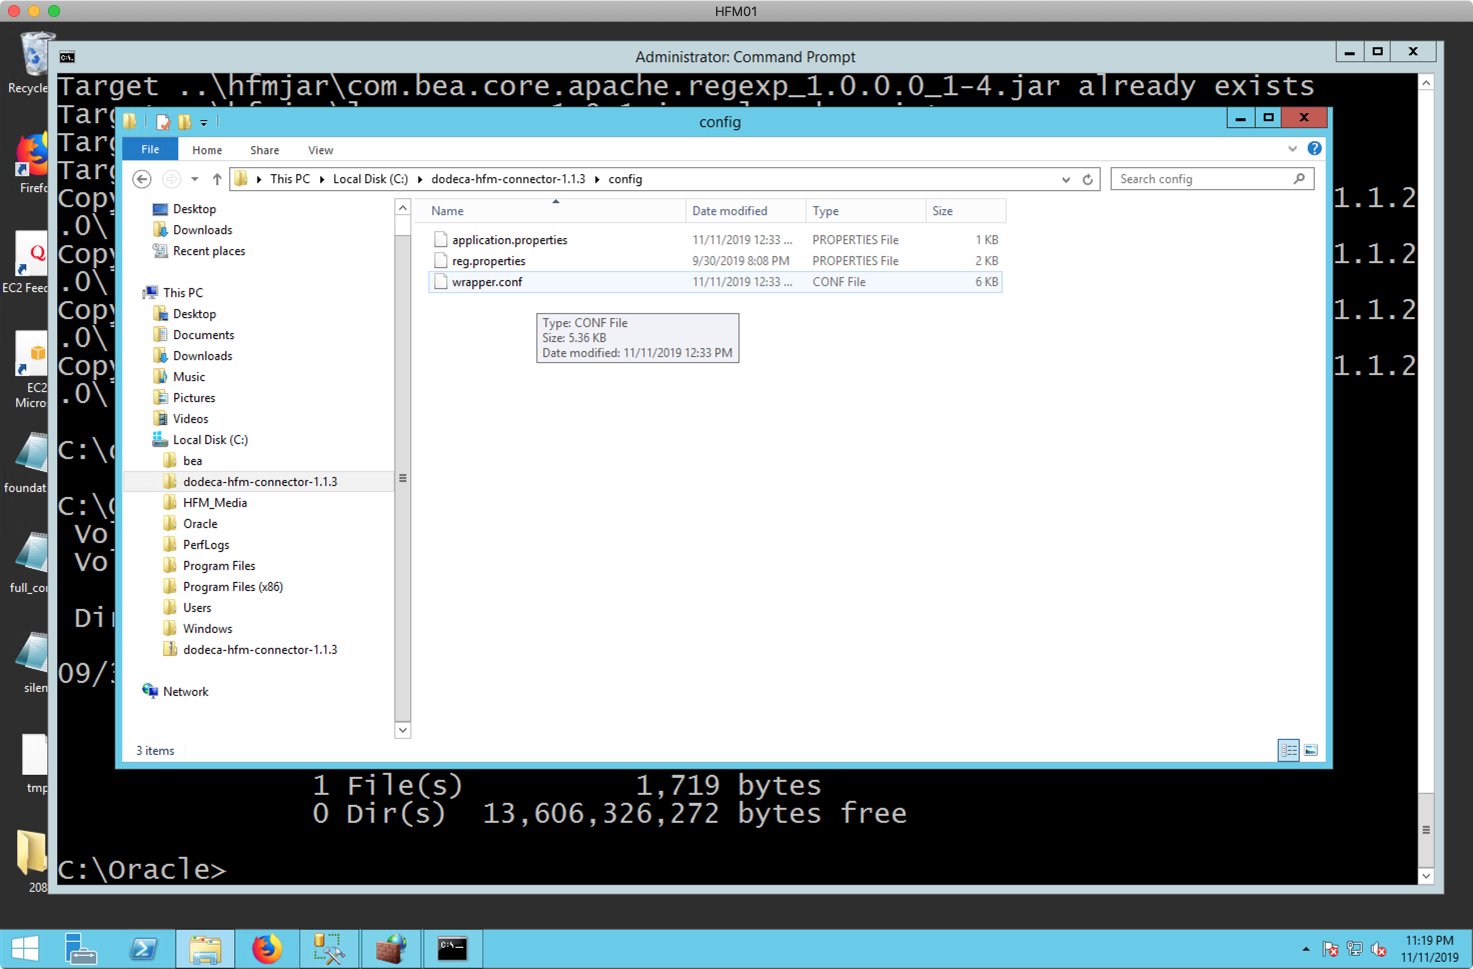
Just copy it into the Dodeca HFM connector’s /config folder and you should now be set to start it up:
Dodeca HFM Connector config folder after placing in reg.properties
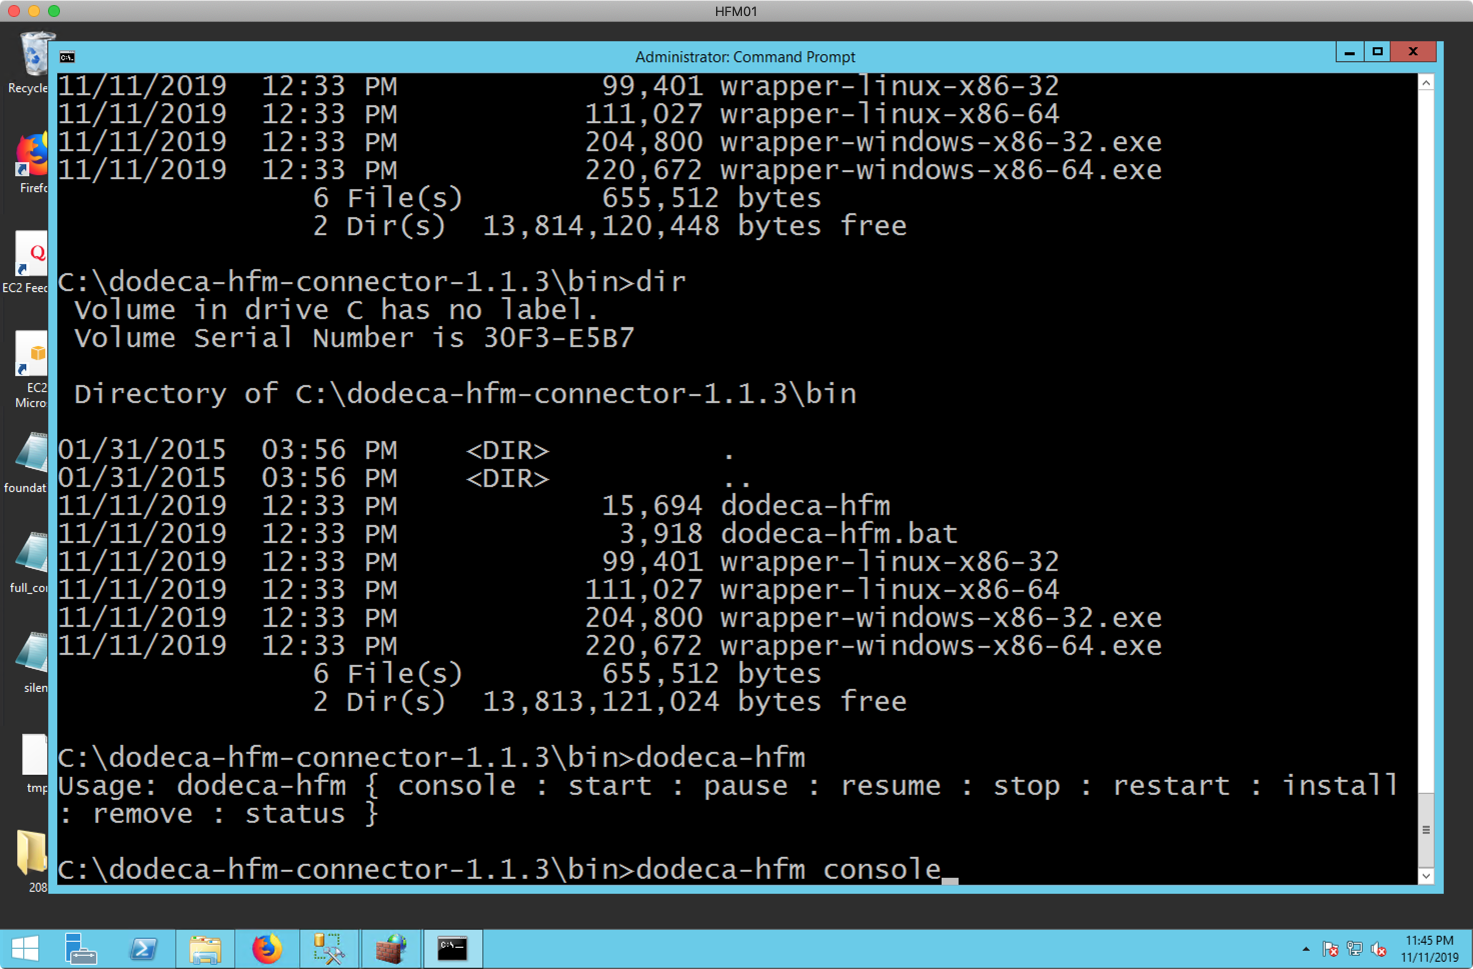
You can now start the Dodeca HFM Connector in “console” mode (by running dodeca-hfm console in the /bin folder) to test things out:
Launching Dodeca HFM Connector
Console mode is a quick and easy way to watch the output of the service startup and make sure that nothing goes wrong. If you see a normal looking startup then you know that Java is installed correctly and of a suitable version, that you put your HFM JAR files in properly, and the reg.properties file was valid. After it starts up, you can leave it running in the command window or you may choose to stop it (Ctrl+C) and run the dodeca-hfm install command to install it as service. After installing you can then launch your new Windows service or just run dodeca-hfm start to start the service yourself. The Dodeca HFM Connector supports Linux too, but do note that each Linux system has its own nuances for installing the actual service (I almost always end up having to Google it depending on whether I’m on Ubuntu, Red Hat, or something else).
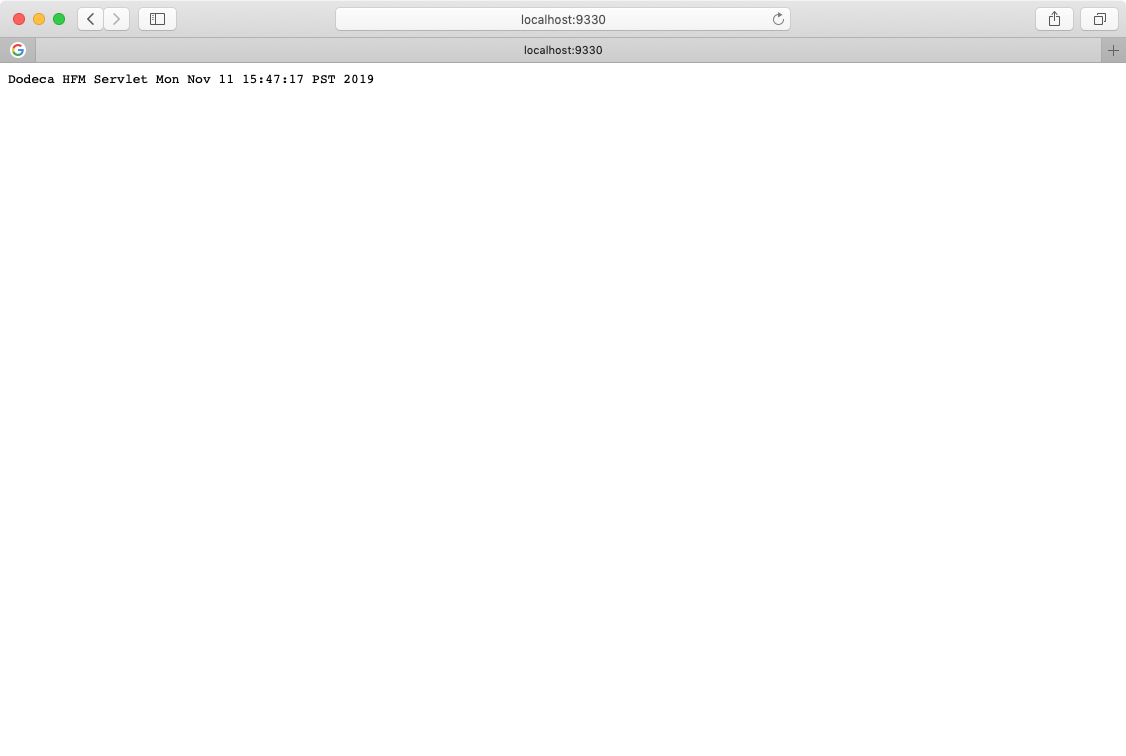
After the service successfully starts up, you can launch a browser to localhost or the server name on port 9330 to see if the service is indeed running:
Verifying that Dodeca HFM Connector is running
Configuring a Dodeca HFM Connection
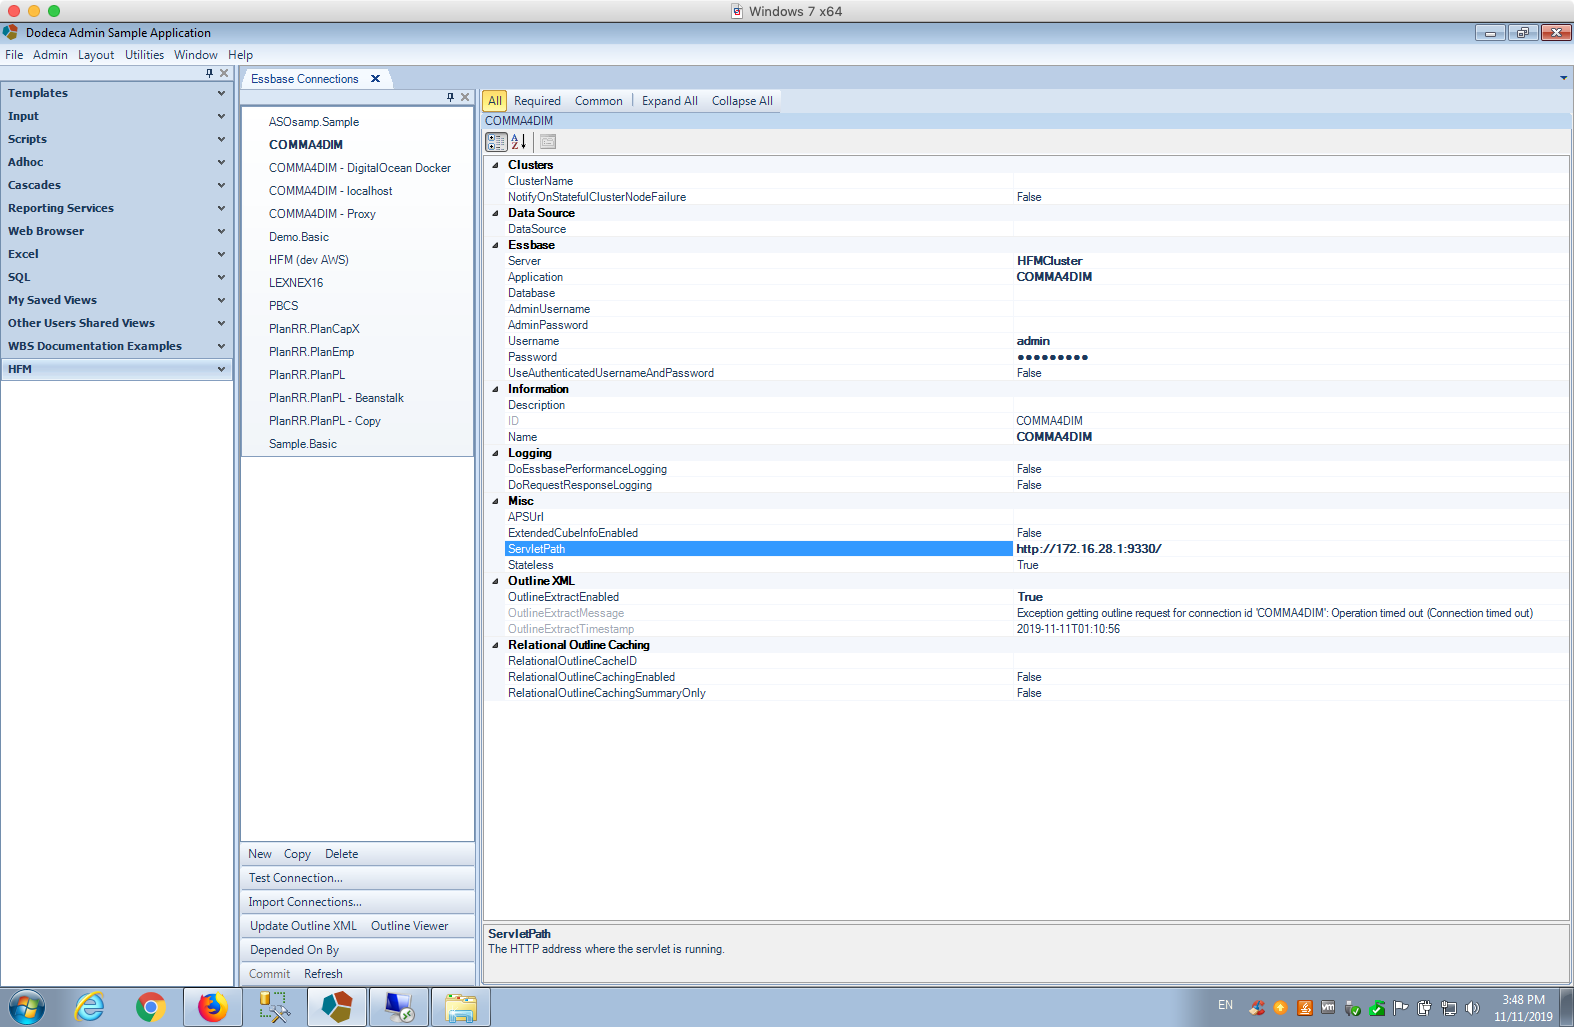
We’re now ready to go into Dodeca and setup an HFM connection. Again, recall that Dodeca just thinks this is a normal Essbase connection, so we are going to go to the Essbase Connections dialog to create the connection:
Configuring an HFM connection in Dodeca
The notable settings here are Server, Application, Username, Password, and ServletPath. You do not need to set any other settings for now. The settings work as follows:
Server: this is actually your HFM Cluster name, not the physical server name. The HFM connector knows what your actual server name is based on what the HFM API pulls out of your Shared Services database upon connecting using the reg.properties file – so it just needs the cluster here. This is often HFMCluster but may be something like DEV_HFM/PRD_HFM or similar, depending on your environment.
Application: your HFM application name. Leave the Database setting blank.
Username: you do not have to specify a username here, but you can. If left blank then your Dodeca security settings come in to play and each user will just use their own credentials to connect. I like to set a username here to test with initially.
Password: same situation as with Username
ServletPath: this is web path to the Dodeca HFM Connector relative to the clients that will be accessing it. At its simplest, this will be a value as shown in the screenshot, meaning that it’s http:// followed by the URL of the server where the HFM connector is installed, the port, and a trailing slash. Depending on your environment, this may change to use HTTPS, and/or a context path. You may wish to configure the HFM connector “behind” your Oracle HTTP server so that requests to, say, https://youroracleserver:19000/dodeca-hfm/ are being forwarded to the HFM connector. The choice is yours and is more of an infrastructure preference for you and your team.
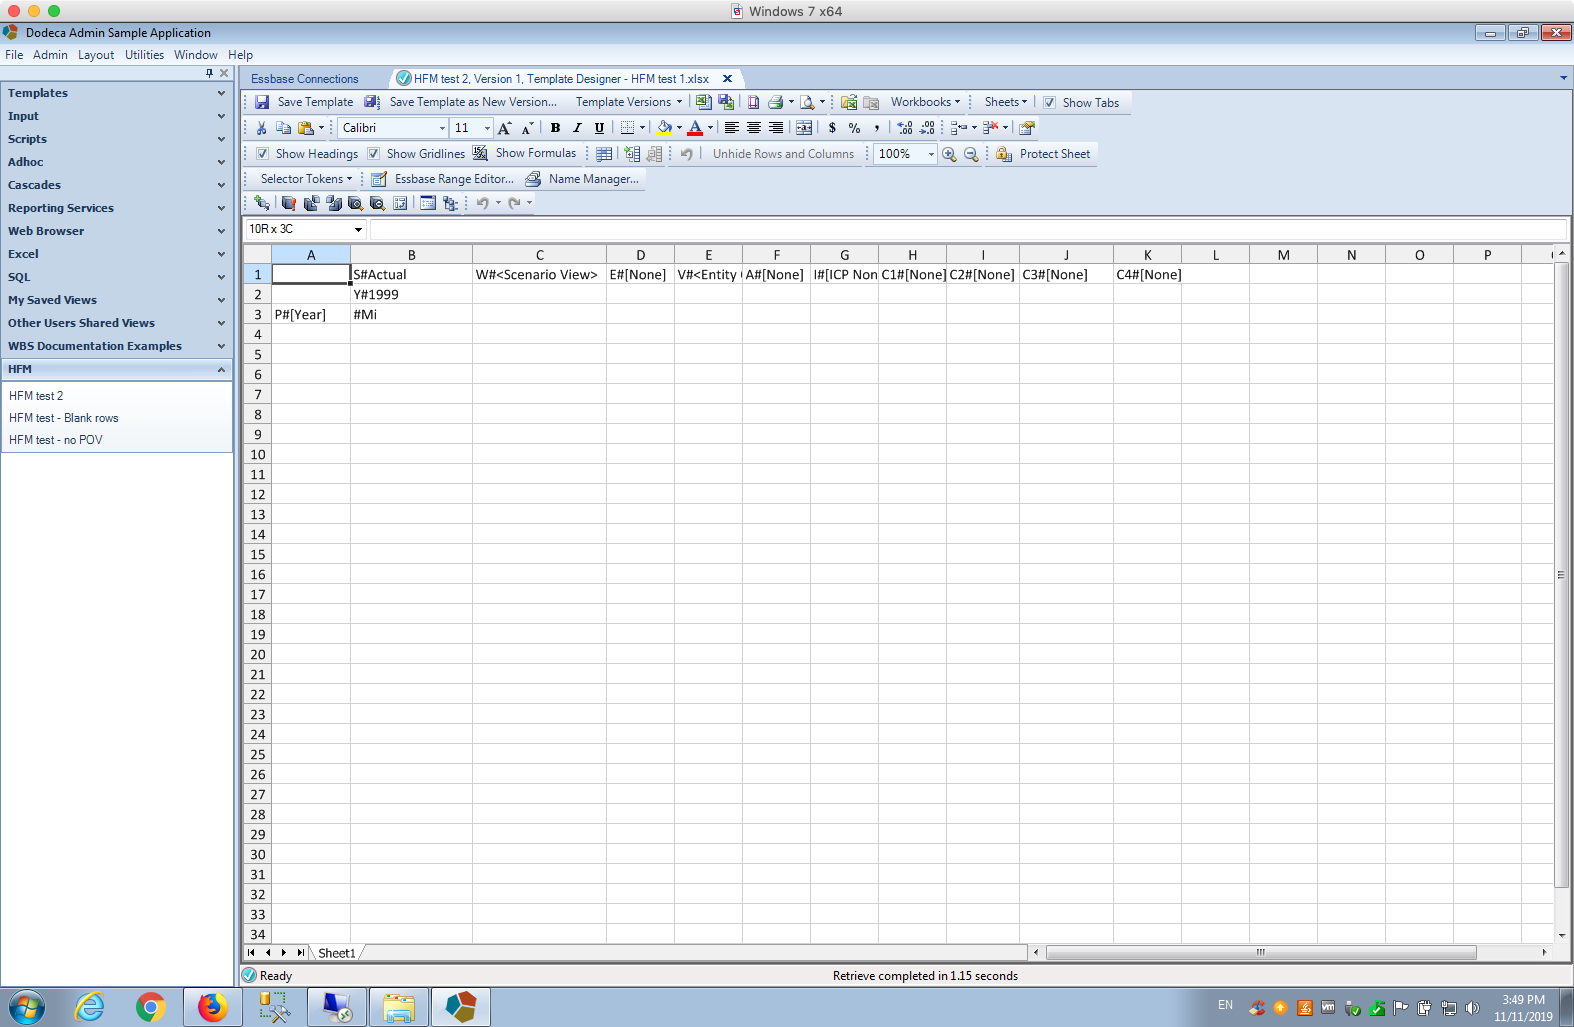
After configuring the connection, I recommend that you use the Test Connection… button to test it and hopefully see a positive result. After the connection is working, it’s just a matter of using it in a Dodeca view as you would use any other Essbase connection. You can create view and then do a normal ‘default’ retrieve to get back an ad hoc grid:
Default retrieve from COMMA4DIM HFM application
By default, the Dodeca HFM Connector conceptualizes your HFM application as having an outline with perfectly unique members. In order to accomplish this, the member names are prefixed with their “dimension short name” to create fully-qualified members. The connector provides several synthetic alias tables that you can use to instead show the member name, member description, or member name and description, as you might be used to seeing in the HFM interface. For example, let’s turn on aliases and use the table with names and descriptions:
Turning on aliases with Dodeca HFM connector view
Note that basic ad hoc operations are supported: pivot, zoom in, keep only, remove only, and so on. I am calling this “simple” ad hoc as the ad hoc operations aren’t exactly what you might get in Smart View (nor are they meant to be at this time), but they are sufficiently capable of helping design a report for your users in Dodeca, giving you one-stop shopping in Dodeca to create views based on HFM data.
Next Steps
These are exciting times for Dodeca customers, who have been clamoring for HFM support for a long time. Many of our customers are looking to, among other things, build reports and views in Dodeca on top of their HFM data and combine it with data from Essbase, relational databases. There are countless use cases for this connector to streamline existing processes that are very manual right now. I will be posting more information about the connector as it continues to evolve in the future. If you would like to test, use, or demo the new HFM connector, please contact Applied OLAP for more information.
Drillbridge 3.4.6 will be publicly released soon. It contains a couple of enhancements to give developers even more control over the way their queries are generated.
For each token, you can now optionally specify the “token join text” as well as certain “line removal members”.
Token Join Text
Drillbridge has supported upper-level drill for many years – the ability to drill on an upper level such as YearTotal or Q1 or Total Entities and generate a SQL query based on all of the members below it. This has even worked with PBCS for years as well, providing an easy way to implement drill-through from upper-levels from PBCS too. How this generally works is that Drillbridge will fetch the level-0 descendants of the drilled member and then concatenate them together to use in you SQL IN clause. For example, consider the following Drillbridge query:
SELECT * FROM SAMPLE_BASIC_TRANSACTIONS WHERE
    STATE = '{{"name":"Market","expression":"#Market","sampleValue":"Washington"}}'
    AND MEASURE = '{{"name":"Measures","expression":"#Measures","sampleValue":"Sales"}}'
    AND SCENARIO = '{{"name":"Scenario","expression":"#Scenario","sampleValue":"Actual"}}'
    AND PRODUCT = '{{"name":"Product","expression":"#Product","sampleValue":"100-10"}}'
    AND SUBSTRING(TX_DATE, 6, 2) IN {{"name":"Year","expression":"#monthToTwoDigits(#Year, 'en')","drillToBottom":true,"sampleValue":"Year","overflow":"OR TX_MONTH IN %%OVERFLOW%%","overflowAt":3}}
ORDER BY
    TX_DATE
There’s nothing too fancy going on in this query. Well, okay, a little bit. This query is based on our favorite database, Sample/Basic. You can see that the query from the SAMPLE_BASIC_TRANSACTIONS table takes into account the value from the Market, Measures, Scenario, Product, and Year dimensions (recall that in Sample/Basic, Year is the time dimension and its children are quarters).
This query has really simple mappings for all of the dimensions except the Year (time) dimension, which is where things get interesting. In this example, the contents of the TX_DATE column are values such as ‘2019-10-22’ – that is, a pretty standard year-month-day format with hyphens. The incoming values from the cube, however, will be month names such as Jan, Feb, Mar. This example uses the built-in Drillbridge function #monthToTwoDigits to convert the month names to two digits. This is a function that has been built-in since the earliest versions of Drillbridge. Yes, you can convert dates using SQL, but every database has its own particular syntax. Having this built-in makes report development much easier, particularly in this example where we are also doing a drill to bottom operation. Let’s take a look at what happens when we drill on some intersection that includes Jan for the member in the Year dimension:
SELECT * FROM SAMPLE_BASIC_TRANSACTIONS WHERE
    STATE = 'Washington'
    AND MEASURE = 'Sales'
    AND SCENARIO = 'Actual'
    AND PRODUCT = '100-10'
    AND SUBSTRING(TX_DATE, 6, 2) IN ('01')
ORDER BY
    TX_DATE
Since drillToBottom is enabled for this token, Drillbridge gets the level-0 descendants of the drilled member (in this case it simply yields the drilled member itself as it has no children and is itself a level-0 member), applies the expression/function to each item (converting Jan to 01), surrounds each item with quotes, then surrounds the whole thing with parentheses. We end up with a valid SQL query that combines native SQL (the SUBSTRING function) on the TX_DATE column (extracting the two digit month) and checks if it’s IN the specified values. Now let’s drill on an upper-level member (Qtr1) and see what we get:
SELECT * FROM SAMPLE_BASIC_TRANSACTIONS WHERE
    STATE = 'Washington'
    AND MEASURE = 'Sales'
    AND SCENARIO = 'Actual'
    AND PRODUCT = '100-10'
    AND SUBSTRING(TX_DATE, 6, 2) IN ('01', '02', '03')
ORDER BY
    TX_DATE
Drillbridge was given Qtr1, went out to the Essbase outline, saw that the level-0 descendants were Jan, Feb, Mar, applied the expression/function, then joined them all together. With the new custom join text option turned on (and some custom join text specified, such as a semicolon in the following example), we get this:
SELECT * FROM SAMPLE_BASIC_TRANSACTIONS WHERE
    STATE = 'Washington'
    AND MEASURE = 'Sales'
    AND SCENARIO = 'Actual'
    AND PRODUCT = '100-10'
    AND SUBSTRING(TX_DATE, 6, 2) IN ('01'; '02'; '03')
ORDER BY
    TX_DATE
Historically, Drillbridge has always assumed the text to join things together with was a comma, because that’s what all SQL IN clauses take. The custom join text gives you full control over this now, though. This probably won’t be useful in SQL queries, but it is useful for the Forwarding Link report type in Drillbridge, which generates a URL to send the user to rather than a SQL query. This report type is generally used to send a request over to an image server, OBIEE, or some other system. Now that you can specify custom text, many more options are opened up and accommodated.
Line Removal Members
Building on the previous example, let’s say that you drilled on Year instead of Qtr1. You would get the following query:
SELECT * FROM SAMPLE_BASIC_TRANSACTIONS WHERE
    STATE = 'Washington'
    AND MEASURE = 'Sales'
    AND SCENARIO = 'Actual'
    AND PRODUCT = '100-10'
    AND SUBSTRING(TX_DATE, 6, 2) IN ('01', '02', '03', '04', '05', '06', '07', '08', '09', '10', '11', '12')
ORDER BY
    TX_DATE
As with before, Drillbridge went out to the outline, found the descendants, mapped them with the expression, and generated the query for us. The interesting thing about this case, though, is that now in this context, the filter on date is essentially useless, since all of the months are included in 01 through 12. I’ll point out that this example is for demonstration purposes and while it’s not incredibly contrived, I have seen many datasets with a 00 or 13 month (to represent starting/ending balances) that this wouldn’t work on – but the principle still applies. In any case, Drillbridge had to go to the work of consulting the outline for the members (not a huge deal), and then made the SQL database do the work of applying the IN clause. For only 12 members, this isn’t necessarily a huge performance consideration. But many organizations performing drill to bottom on doing it on dimensions with thousands of members.
Drillbridge now supports a new option per token called “line removal members”. The way it works is that if a member is drilled on is in the list of line removal members, then Drillbridge will remove the entire line with the token on it, as well as skip the member resolution process. For instance, considering the previous example, if the user drills on the Year member, then we just don’t even care about that particular clause in the WHERE statement. For instance, let’s say that the line removal members in the Year token is the comma-delimited list of “Year, Test, All Periods” – meaning if the drilled member in the Year dimension is either a member named Year, a member named Test, or a member named All Periods, then kill the whole line. And sure enough, if we drill on Year we get this query:
SELECT * FROM SAMPLE_BASIC_TRANSACTIONS WHERE
    STATE = 'Washington'
    AND MEASURE = 'Sales'
    AND SCENARIO = 'Actual'
    AND PRODUCT = '100-10'
ORDER BY
    TX_DATE
Properly setting up this feature may involve crafting your query in a slightly different way than you might otherwise. Since the whole line is removed, you may need to consider the placement of your AND clause. In this case, since AND was the first part of the line, we’re good remove it (as opposed to AND being on the end of the prior line). Also, if we only had one predicate in the WHERE clause then it might be necessary to add the “dummy” clause (1=1) – this is a pretty common thing to see in SQL as it always evaluates to true.
The line removal members feature can only be used in certain circumstances but in cases where your users may be drilling from the “top of the house” it could offer potentially enormous performance benefits for your query execution time.
Hi all – I haven’t been blogging as much as I would like to lately (there’s a lot going on!) but I do want to write a quick note. I’m running for the ODTUG Board of Directors. You can check out my campaign statement, goals, and short biography over there along with the other fine candidates.
Briefly, I have been involved with ODTUG in one way or another for almost a decade and a half. It’s an organization that I respect and look up to – and I would love the opportunity to bring my energy and skills to the cause of improving this organization even more.
If you are eligible to vote for the ODTUG board (i.e. you are a member in good standing) and believe I would be a good addition to the board, then I ask that you please vote for me. Voting closes soon, so check your inbox for a mail from “association voting” from a week or so ago – it has the instructions and your unique ID to cast your vote.
The Oracle Essbase on Docker open source project continues to evolve and be refined. For some background, please check out the original announcement. Briefly, this open source project gives you the ability to combine Oracle’s Essbase installer files along with the Docker technology to build a lean, mean, fully configured Essbase server (for development and testing purposes).
The following improvements have been made:
Ability to apply patches
Out of the box configuration of SQL ODBC data source (for load rules)
Further reductions in image size and number of Docker layers
Add convenience variables
Patches
This is the major feature in this release. The previous version of the Dockerfile would generate a perfect Essbase 11.1.2.4 server – version 11.1.2.4.000 to be precise. I’ve now added the ability to also include patches and have them be applied in an arbitrary order. For instance, the typical files that you need to combine with the scripts in this project would be Oracle’s installation media for EPM 11.1.2.4, which is Foundation-11124-linux64-Part1.zip, similar files for Parts 2, 3, 4, and updated Java JDK files. You can now include a folder named /patches with a subdirectory for a given patch level that contains the patches from Oracle. For example, here is my cloned docker-essbase Git repository to which I have added the EPM installation files from Oracle:
-rwxrwxr-x 1 jason jason        442 May 31 02:05 apply_patches.sh
 -rwxrwxr-x 1 jason jason       6057 May 31 02:15 config-and-start.sh
 -rw-rw-r-- 1 jason jason        966 Jan  7 20:57 deploy-landing.sh
 -rw-rw-r-- 1 jason jason       1020 May 17 02:25 docker-compose.yml
 -rw-rw-r-- 1 jason jason       7377 May 23 15:25 Dockerfile
 -rwxrwxr-x 1 jason jason 1368259501 Dec 28 21:25 Essbase-11124-linux64.zip
 -rw-rw-r-- 1 jason jason      13700 May 17 02:24 essbase-config.xml
 -rw-rw-r-- 1 jason jason        939 Jan  3 19:28 essbase-install.xml
 -rwxrwxr-x 1 jason jason         47 Jan  3 19:29 essbash.sh
 -rwxrwxr-x 1 jason jason        177 Jan  3 19:20 follow-essbase-logs.sh
 -rwxrwxr-x 1 jason jason 1174052554 Dec 28 21:22 Foundation-11124-linux64-Part1.zip
 -rwxrwxr-x 1 jason jason 1516370785 Dec 28 21:22 Foundation-11124-linux64-Part2.zip
 -rwxrwxr-x 1 jason jason  980505762 Dec 28 21:22 Foundation-11124-linux64-Part4.zip
 -rwxrwxr-x 1 jason jason 1529284475 Dec 28 21:22 Foundation-11124-Part3.zip
 -rw-r--r-- 1 jason jason  145798191 Feb  6 20:14 jdk-7u211-linux-x64.tar.gz
 -rw-r--r-- 1 jason jason  153530841 Jan  8 06:47 jdk-7u80-linux-x64.tar.gz
 -rwxr-xr-x 1 jason jason     611504 Dec 31 21:19 jtds12.jar
 -rw-rw-r-- 1 jason jason       1058 Mar 18 18:21 LICENSE
 -rw-rw-r-- 1 jason jason        607 Jan 15 05:42 load-sample-databases.msh
 -rw-r----- 1 jason jason       1312 May 31 02:16 odbc.ini
 drwxrwxr-x 4 jason jason       4096 May 14 21:50 patches
 -rw-rw-r-- 1 jason jason      14792 Mar 20 17:23 README.md
 -rwxrwxr-x 1 jason jason        523 Jan  9 19:03 restart.sh
 -rwxrwxr-x 1 jason jason         51 Jan  9 18:57 run.sh
 -rw-rw-r-- 1 jason jason       5049 Jan  9 19:48 SimpleJdbcRunner.java
 drwxrwxr-x 2 jason jason       4096 Mar  4 16:23 start_scripts
 -rw-rw-r-- 1 jason jason         80 Jan 14 20:03 start-scripts.sh
 -rw-rw-r-- 1 jason jason        148 May 31 02:19 welcome.sh
Notice the /patches folder. In my case it contains two subfolders:
drwxrwxr-x 2 jason jason 4096 May 14 21:50 000
drwxrwxr-x 2 jason jason 4096 May 31 02:01 031
Inside the 031 folder I have the patches for EPM 11.1.2.4.031 downloaded from Oracle, although I have prepended them with 01-, 02-, 03- and so on in order to force them to be applied in a particular order. There are multiple patches because in total they update the Essbase server itself, EAS, APS, and runtime files. Here is the contents of my 031 folder:
-rw-r--r-- 1 jason jason 61727995 May  7 15:12 01-p29260080_111240_Linux-x86-64.zip
 -rw-r--r-- 1 jason jason  9542502 May  7 15:12 02-p29260133_111240_Generic.zip
 -rw-r--r-- 1 jason jason 71810346 May  7 15:12 03-p29260160_111240_Linux-x86-64.zip
 -rw-r--r-- 1 jason jason 13241287 May  7 15:57 04-p29260067_111240_Linux-x86-64.zip
 -rw-rw-r-- 1 jason jason      629 May 31 02:01 README.txt
The Dockerfile now has a build argument called PATCH_LEVEL that accepts a three-digit code to indicate which folder of patches to apply. So to build the Essbase image for patch level 031, I can run the following:
docker build --build-arg PATCH_LEVEL=031
How we’re using this internally is that we now create the image for any given patch level and then just tag it accordingly. For instance, we can run any given version of Essbase by using a container name of essbase:11.1.2.4.031 or just essbase:latest as the case may be (which currently points to .031).
Out of the box SQL ODBC Configuration
In order for Essbase load rules to load data from a SQL data source (especially on Linux) a little bit of file configuration needs to be performed. This is the odbc.ini file. Now, on startup, this file is configured with the proper database name and credentials, allowing you to use it in a load rule. For the time being I just configured the default database to be the HSS database that is created during configuration. This gives you a working database and configuration that works for testing or playing around and you can use it as the basis of a ‘real’ ODBC connection.
Further Image Size Reductions
The very original version of the Docker Essbase image from two years ago (and from my first presentation on this!) was around 40GB (!). This was the old ‘monolithic’ image that included a full install of an Oracle RDBMS as well as taking an image size hit because of copying over the large Essbase installation zip files. When this project went open source, it was after one of the major improvements was made to it, which was to use docker-compose to separate out the relational database from the Essbase server. Further, I configured the image to use an ‘off the shelf’ Microsoft SQL Server (on Linux) Docker image, which simplified setup/configuration since there isn’t/wasn’t a comparable Oracle Docker image. This got the image size down to 10GB or so. Also as part of the open source project I used Docker’s relatively new ‘multi-stage build’ feature in order to break the image build in to two major pieces. This allowed me to avoid the penalty from copying over the Essbase installer .zip files. All this got the image size down to around 6GB.
From there the image size has slowly been whittled down a bit here and a bit there. The entire system has been consolidated down to a single Java JDK (versus three full copies) and numerous files and directories that are obviously unneeded (probably) have been deleted. In this latest version of the image, a few more things are tossed overboard in the interest of having a smaller image size. The overall image size has been sitting around 4GB for the last few months but I found a few more patch storage locations that aren’t needed. That’s kind of the great thing about Docker: these images are meant to be used and thrown away. So it’s not like we need to keep around some inventory of patches in case we need to rollback (rollback? More like roll out a new image!).
Summary / See You At Kscope
I’ll be presenting on Docker & Essbase at Kscope19 in Seattle later this month. I’ll cover how to get up and running with your own Docker Essbase instance in the easiest way possible, as well as general updates and other fun things going on in this realm. Hope to see you there!
A colleague of mine (my favorite Oracle infrastructure specialist, Joe Malewicki of iArch Solutions) that specializes in infrastructure contacted me the other day with a somewhat unusual request. Is there an easy way to “prove” that the Essbase XMLA provider is indeed up and running?
Sure – hit it with curl! The following script shows a simple example that will execute an MDX query on Sample.Basic by using curl to post an XMLA request with an MDX query. I have parameterized the URL, username, and password although you could hard-code them if you need to:
I am very pleased to announce the availability of the new open source docker-essbase project to use Essbase with Docker. I have been working with Docker over the last couple of years and have found it to be a very compelling technology. I gave a presentation on Docker & Essbase, and this year I will be presenting Docker & Essbase at Collaborate19 in April and at Kscope19 in June.
The docker-essbase project is an open source project licensed under the very friendly MIT open source license. You are free to use, copy, and modify the files in this project.
First of all, a little background on Docker: Docker is a “container” technology. You’re most likely already familiar with virtual machines that emulate an entire operating system. You can think of Docker as a virtual machine for a single application. If you’ve ever worked with VMs then you might see some immediate appeal in this approach. When I first came into contact with Docker, Essbase immediately came to mind as a use case because of all of the quirks I’ve experienced using Essbase VMs.
What are those quirks? Here are a few:
Large image size: My Essbase VMs tend to weigh in at 40-80GB, depending on what all is installed.
Difficulties starting up services: When moving between networks, such as from home to a client network to the coffee shop or wherever, I frequently run into networking issues that are hard to troubleshoot and usually resolved by restarting the entire VM (and hoping for the best).
Tendency to destabilize over time: Typically Essbase VMs are used to develop and test ideas and often that means tweaking Sample/Basic or creating a bunch of one-off cubes/scripts.
Not much in the way of convenience features: Sometimes running MaxL scripts is a chore because the MaxL command isn’t on the system path, and other little one-off things that generally weren’t set or set properly.
Some of these issues can be mitigated by simply creating a snapshot of your virtual machine that you can revert back to. But that doesn’t do anything for our image size issues. On the other hand, Docker offers some very interesting benefits including:
The Docker Essbase image is defined in terms of a Dockerfile and scripts. A Dockerfile defines a Docker image, which is to say that the Dockerfile and associated scripts essentially define how an Essbase image is built. We can treat the Dockerfile as code, and we can version it.
We can define multiple versions of Essbase images: For a software company this is quite useful as we’re able to have different images for different patch levels of Essbase and easily switch between them.
Smaller footprint: the Dockerized Essbase image is much smaller than a traditional VM.
It’s important to point out that while there is significant overlap between Docker and traditional VMs, Docker isn’t really meant to be a better VM. In fact, one of the most useful aspects of using Essbase on Docker is that I can and do often throw away my container when I’m done with it and just start up a new one when I need to use it. That said, you can treat it a little like a VM and indeed I have developed some of the related scripts to startup Essbase as gracefully as possible when you resume a stopped (paused) image.
Evolution from “Generation 1” Docker Essbase image to Current State
At my first talk on Docker with Essbase I showed what a “monolithic” Essbase image: an image with an Oracle relational database installed on it as well as a full Essbase installation. This image weighs in at around 40GB. This would be common for a VM but quite large for a Docker image. Furthermore, it’s not really the way that a Docker image “likes” to be configured. I mentioned at the time that the most pressing to-do item for the Docker Essbase image was simply to get away from the bundled relational database and instead switch to a composed Docker image.
A composed image is what it sounds like: it’s much more idiomatic in Docker to compose or tie together multiple disparate Docker images into a cohesive whole, rather than attempting to put everything in one image. In this next generation image I am relying on a Microsoft SQL Server on Linux Docker image (provided by Microsoft). This greatly simplifies the Essbase image by allowing me to skip having 3.5+ GB of Oracle RDBMS installers and the need to install that database first. The Microsoft SQL Server on Linux image is fantastic – it comes up fast, and more importantly, is available “off the shelf”. The DB2 image provided by IBM is also fantastic.
Switching from Oracle to SQL Server was the single biggest bang-for-buck improvement to the image size and simplicity, quickly followed by moving to a “multi-stage” build. You can read more details on this over on the public GitHub repository but in short, this technique allows me to essentially not take a hit to the image size when it comes to temporary files. This allows me to trim the image down by doing the Essbase install in one stage and then copying the essential files over in another stage. I’ve also done many other things to trim the image size:
Consolidate down to a single JDK (instead of 2/3)
Remove various unused 32-bit files
Remove unneeded patch files
Remove unused Merant ODBC drivers/docs
Remove other files we can live without
Additionally, several convenience settings and actions are performed at startup: load and calculate the sample databases, add startMaxl.sh to the system path, create a symlink for the import_export folder, and more.
The result is this: the final image size is just under 4GB (3.96GB last I checked). You get a “vanilla” Essbase server, automatically loaded sample databases, some convenience features on the command line, all fired up and ready to go. You can throw it away when you’re done with it, or just stop the services and come back to your tests later.
Who this is for
I think this image will be most useful for developers and consultants. As an independent software vendor whose flagship software works with Essbase, it’s very useful for testing purposes.
Who this isn’t for
Please note that this Docker project only assumes and installs Essbase – it doesn’t have do Planning, FR, or any of the other tools. An intrepid developer could, though, use these files as a basis for supporting Planning and other technologies.
Also, to be very clear, this image isn’t meant to run in production or to take the place of your Essbase servers, virtual or otherwise.
How to get started
Please note that if you are already familiar with Docker you may be used to being able to pull an image from the global Docker hub or another repository and get up and running right away. For example, you could run the Microsoft SQL Server on Linux from Microsoft with just a single command, assuming you have Docker installed already. That’s not quite the case here. In this case you’ll have to build the Essbase image first, using the files in this GitHub repository combined with the Essbase installation media that you download from Oracle yourself. After the first build that creates the Essbase image locally, you’ll then have the ability to run it.
Altogether, you’ll need Docker installed on your machine, the Essbase installation media, Java installation media, and of course the files in this open source project repository.
The following shell examples show that I am on a Linux server, testing that Docker is installed/available, checking my current directory, and checking the version of Git that is available:
jason@docker1:~/docker-essbase-demo$ docker --version
 Docker version 18.06.1-ce, build e68fc7a

jason@docker1:~/docker-essbase-demo$ pwd
 /home/jason/docker-essbase-demo

jason@docker1:~/docker-essbase$ git version
git version 2.17.1
The next thing to do is pull down the files from the Git repository using the clone command:
After the Git repository files are cloned, you need to add in the Essbase 11.1.2.4 installation media. This includes these files:
Foundation-11124-linux64-Part1.zip
Foundation-11124-linux64-Part2.zip
Foundation-11124-linux64-Part4.zip
Foundation-11124-Part3.zip
Essbase-11124-linux64.zip
I also recommend you download the latest version of the Java 7 JDK, also available from Oracle. Note that the version in use is higher than what is publicly available on Oracle’s download site, you will need to get this version from Oracle’s download site after logging in:
jdk-7u211-linux-x64.tar.gz
The file listing should now look like this:
jason@docker1:~/docker-essbase$ ls -l
total 6707580
-rwxrwxr-x 1 jason jason       5281 Mar  4 16:25 config-and-start.sh
-rw-rw-r-- 1 jason jason        966 Jan  7 20:57 deploy-landing.sh
-rw-rw-r-- 1 jason jason        953 Mar  4 16:52 docker-compose.yml
-rw-rw-r-- 1 jason jason       7070 Mar  4 16:49 Dockerfile
-rwxrwxr-x 1 jason jason 1368259501 Dec 28 21:25 Essbase-11124-linux64.zip
-rw-rw-r-- 1 jason jason      13648 Jan 11 02:39 essbase-config.xml
-rw-rw-r-- 1 jason jason        939 Jan  3 19:28 essbase-install.xml
-rwxrwxr-x 1 jason jason         47 Jan  3 19:29 essbash.sh
-rwxrwxr-x 1 jason jason        177 Jan  3 19:20 follow-essbase-logs.sh
-rwxrwxr-x 1 jason jason 1174052554 Dec 28 21:22 Foundation-11124-linux64-Part1.zip
-rwxrwxr-x 1 jason jason 1516370785 Dec 28 21:22 Foundation-11124-linux64-Part2.zip
-rwxrwxr-x 1 jason jason  980505762 Dec 28 21:22 Foundation-11124-linux64-Part4.zip
-rwxrwxr-x 1 jason jason 1529284475 Dec 28 21:22 Foundation-11124-Part3.zip
-rw-r--r-- 1 jason jason  145798191 Feb  6 20:14 jdk-7u211-linux-x64.tar.gz
-rw-r--r-- 1 jason jason  153530841 Jan  8 06:47 jdk-7u80-linux-x64.tar.gz
-rwxr-xr-x 1 jason jason     611504 Dec 31 21:19 jtds12.jar
-rw-rw-r-- 1 jason jason        607 Jan 15 05:42 load-sample-databases.msh
-rw-r----- 1 jason jason       1411 Jan 14 20:54 odbc.ini
-rw-rw-r-- 1 jason jason      15313 Jan  9 21:50 README.md
-rwxrwxr-x 1 jason jason        523 Jan  9 19:03 restart.sh
-rwxrwxr-x 1 jason jason         51 Jan  9 18:57 run.sh
-rw-rw-r-- 1 jason jason       5049 Jan  9 19:48 SimpleJdbcRunner.java
drwxrwxr-x 2 jason jason       4096 Mar  4 16:23 start_scripts
-rw-rw-r-- 1 jason jason         80 Jan 14 20:03 start-scripts.sh
-rw-rw-r-- 1 jason jason         43 Jan  8 07:19 welcome.sh
jason@docker1:~/docker-essbase$
We can now perform the first time image build with Docker:
You’ll see a lot of text scroll by on your console. Docker will pull files from the cloud that it needs (such as the base OS image), then start building the image step by step by reading through the Dockerfile. This step will take awhile but it only needs to be done once:
Sending build context to Docker daemon  6.869GB
 Step 1/57 : ARG ORACLE_ROOT_DEFAULT=/opt/Oracle
 Step 2/57 : FROM centos:6.9 as media
  ---> e88c611d16a0
 Step 3/57 : ARG ORACLE_ROOT_DEFAULT
  ---> Using cache
  ---> 56b038ecf1e6
 Step 4/57 : RUN touch /var/lib/rpm/* && yum -y install unzip
  ---> Running in 38987aabe3fb
 Loaded plugins: fastestmirror, ovl
 Setting up Install Process
 Resolving Dependencies
 --> Running transaction check
 ---> Package unzip.x86_64 0:6.0-5.el6 will be installed
 --> Finished Dependency Resolution
================================================================================
Package          Arch              Version               Repository       Size
Installing:
  unzip            x86_64            6.0-5.el6             base            152 kTransaction Summary
Install       1 Package(s)
Total download size: 152 k
 Installed size: 324 k
 Downloading Packages:
 warning: rpmts_HdrFromFdno: Header V3 RSA/SHA1 Signature, key ID c105b9de: NOKEY
 Retrieving key from file:///etc/pki/rpm-gpg/RPM-GPG-KEY-CentOS-6
 Importing GPG key 0xC105B9DE:
  Userid : CentOS-6 Key (CentOS 6 Official Signing Key) [email protected]
  Package: centos-release-6-9.el6.12.3.x86_64 (@CentOS/6.9)
  From   : /etc/pki/rpm-gpg/RPM-GPG-KEY-CentOS-6
 Running rpm_check_debug
 Running Transaction Test
 Transaction Test Succeeded
 Running Transaction
   Installing : unzip-6.0-5.el6.x86_64                                       1/1
   Verifying  : unzip-6.0-5.el6.x86_64                                       1/1
Installed:
   unzip.x86_64 0:6.0-5.el6
Complete!
 Removing intermediate container 38987aabe3fb
  ---> 0dbb210931bf
 Step 5/57 : RUN mkdir -p /root/epmmedia/extracted
  ---> Running in 46f0adfd365f
 Removing intermediate container 46f0adfd365f
  ---> 997ff1f0f532
 Step 6/57 : WORKDIR /root/epmmedia
  ---> Running in 6afd053d8f0b
 Removing intermediate container 6afd053d8f0b
  ---> 7d3c7191629b
 Step 7/57 : RUN groupadd -f dba &&     groupadd -f oinstall &&     useradd -G dba oracle
  ---> Running in 7fa40b3cf4f5
 Removing intermediate container 7fa40b3cf4f5
  ---> 2f399bd90787
 Step 8/57 : ENV ORACLE_ROOT $ORACLE_ROOT_DEFAULT
I’ve clipped out steps 9 through 19 as they are particularly verbose. Continuing on:
Step 20/57 : ENV TMP /tmp
  ---> Running in 53283b9e1e82
 Removing intermediate container 53283b9e1e82
  ---> 3b51e21392b0
 Step 21/57 : COPY essbase-install.xml .
  ---> 9af674185fa7
 Step 22/57 : RUN sed -i "s|ORACLE_ROOT|$ORACLE_ROOT|g" $HOME/essbase-install.xml &&     $HOME/extracted/installTool.sh -silent $HOME/essbase-install.xml
  ---> Running in 37714c324e0a
 INFO:    File descriptor soft limit increased from 1024 to 4096.
 WARNING: You must manually configure the file descriptor limit to
          4096, or higher, in the login profile for the user that
          will start the applications being configured.
Installer Path check… Ok
 Checking if running under root account… Ok
 Current user is not root.
 EPMINS-01087: Checking if the file exist and have read permissions: /home/oracle/extracted/assemblies… Ok
 EPMINS-01087: Checking if the file exist and have read permissions: /home/oracle/extracted/jre… Ok
 EPMINS-01087: Checking if the file exist and have read permissions: /home/oracle/extracted/setup.jar… Ok
 Checking environment variables…
 Environment variable TMP would be used.
 Ok
 EPMINS-01087: Checking if the file exist and have read permissions: /home/oracle…
 Ok
     EPMINS-01099: User home have to exist for successful installation.
 EPMINS-01002: All installation prerequisites have been met. Starting EPM System Installer.
 sh: /usr/bin/ipcs: No such file or directory
 sh: /usr/bin/ipcs: No such file or directory
 /bin/cat: /proc/sys/net/core/wmem_default: No such file or directory
 sh: /usr/bin/ipcs: No such file or directory
 sh: /usr/bin/ipcs: No such file or directory
 /bin/cat: /proc/sys/net/core/wmem_default: No such file or directory
 sh: /usr/bin/ipcs: No such file or directory
 sh: /usr/bin/ipcs: No such file or directory
 /bin/cat: /proc/sys/net/core/wmem_default: No such file or directory
 sh: /usr/bin/ipcs: No such file or directory
 sh: /usr/bin/ipcs: No such file or directory
 /bin/cat: /proc/sys/net/core/wmem_default: No such file or directory
 sh: /usr/bin/ipcs: No such file or directory
 sh: /usr/bin/ipcs: No such file or directory
 /bin/cat: /proc/sys/net/core/wmem_default: No such file or directory
 sh: /usr/bin/ipcs: No such file or directory
 sh: /usr/bin/ipcs: No such file or directory
 /bin/cat: /proc/sys/net/core/wmem_default: No such file or directory
 sh: /usr/bin/ipcs: No such file or directory
 sh: /usr/bin/ipcs: No such file or directory
 /bin/cat: /proc/sys/net/core/wmem_default: No such file or directory
 sh: /usr/bin/ipcs: No such file or directory
 sh: /usr/bin/ipcs: No such file or directory
 /bin/cat: /proc/sys/net/core/wmem_default: No such file or directory
 sh: /usr/bin/ipcs: No such file or directory
 sh: /usr/bin/ipcs: No such file or directory
 /bin/cat: /proc/sys/net/core/wmem_default: No such file or directory
 sh: /usr/bin/ipcs: No such file or directory
 sh: /usr/bin/ipcs: No such file or directory
 /bin/cat: /proc/sys/net/core/wmem_default: No such file or directory
 sh: /usr/bin/ipcs: No such file or directory
 sh: /usr/bin/ipcs: No such file or directory
 /bin/cat: /proc/sys/net/core/wmem_default: No such file or directory

EPMINS-01032: Checking for available disk space in the /opt/Oracle/Middleware/EPMSystem11R1 directory.
 EPMINS-01033: The selected components require 6315 MB free disk space.
 EPMINS-01034: You have 744295 MB free disk space.
I’ve omitted some other output for brevity but you may notice that in the above step the actual EPM installation is being called, and then the actual Essbase image is starting to be built below:
After the last step, the image has now been successfully built. We can now run the image and create an actual container. You can do so by using the docker-compose command:
jason@docker1:~/docker-essbase$ docker-compose up --no-build --detach
 Creating network "docker-essbase_default" with the default driver
 Creating docker-essbase_db_1 … done
 Creating essbase             … done
 jason@docker1:~/docker-essbase$
Your shell should now return you to a normal prompt. You can run the included “follow-essbase-logs.sh” script (if on Windows open this script and run its command directly, docker-compose logs --follow essbase) to specifically attach and follow the console output from the Essbase container:
jason@docker1:~/docker-essbase$ ./follow-essbase-logs.sh
 Attaching to essbase
 essbase    | Starting up Essbase container, checking if configuration is needed
 essbase    | java version "1.7.0_211"
 essbase    | Java(TM) SE Runtime Environment (build 1.7.0_211-b31)
 essbase    | Java HotSpot(TM) 64-Bit Server VM (build 24.211-b31, mixed mode)
 essbase    | Performing first-time configuration
 essbase    | Unable to connect to database on attempt 1, waiting 5s before attempting again, will try 4 more times
 essbase    | Executing: DROP DATABASE IF EXISTS EPM_HSS, EPM_EAS
 essbase    | Executing: CREATE DATABASE EPM_HSS
 essbase    | Executing: CREATE DATABASE EPM_EAS
 essbase    | Running preconfig checks…
 essbase    | Running EPM_ORACLE_HOME…
 essbase    |     EPM_ORACLE_HOME environment variable value: /opt/Oracle/Middleware/EPMSystem11R1
 essbase    |     JAVA_HOME environment variable value: /opt/Oracle/Middleware/EPMSystem11R1/../jdk160_35
 essbase    | EPM_ORACLE_HOME succeeded
 essbase    | Running .oracle.products … .oracle.products  succeeded
 essbase    | Running Jars manifest …
 essbase    |     Time spent for manifests parsing: 111 ms
 essbase    |     Maximum jars depth achieved: 6, while restriction was: unrestricted
 essbase    |     Parsed 421 manifests
 essbase    |     Total jars and classpath entries encountered: 421
 essbase    |     Total not-existing referenced classpath entries count: 31
 essbase    |     Total classpath elements to check: 58
 essbase    | Jars manifest  succeeded
 essbase    | Running Environment variables …
 essbase    |     Environment variable TMP would be used
 essbase    | Environment variables  succeeded
 essbase    | Preconfig checks passed! Proceeding further
The console will stay on this message for awhile, since the EPM installer is performing a first-time configuration (setting up files, database tables, etc.). After a few minutes the installer will move on:
On the last line in the preceding section you see that it’s running the start.xml. EPM/Essbase on Linux uses an Ant file to start up services. After the service startup finishes, you’ll see some logs fly by as well as the output from the default MaxL script:
essbase    |
essbase    |  Essbase MaxL Shell 64-bit - Release 11.1.2 (ESB11.1.2.4.000B193)
essbase    |  Copyright (c) 2000, 2015, Oracle and/or its affiliates.
essbase    |  All rights reserved.
essbase    |
essbase    | MAXL> login "admin" "password1" on "localhost";
essbase    |
essbase    |  OK/INFO - 1051034 - Logging in user [admin@Native Directory].
essbase    |  OK/INFO - 1241001 - Logged in to Essbase.
essbase    |
essbase    | MAXL> import database "Sample"."Basic" data
essbase    |    2>     from server data_file "Calcdat"
essbase    |    3>     on error abort;
essbase    |
essbase    |  OK/INFO - 1054014 - Database Basic loaded.
essbase    |  OK/INFO - 1054014 - Database Xchgrate loaded.
essbase    |  OK/INFO - 1054014 - Database Interntl loaded.
essbase    |  OK/INFO - 1051061 - Application Sample loaded - connection established.
essbase    |  OK/INFO - 1054027 - Application [Sample] started with process id [2986].
essbase    |  OK/INFO - 1003040 - Parallel dataload enabled: [1] block prepare threads, [1] block write threads..
essbase    |  OK/INFO - 1003037 - Data Load Updated [67176] cells.
essbase    |  OK/INFO - 1003052 - Data Load Elapsed Time for [Calcdat.txt] : [0.12] seconds.
essbase    |  OK/INFO - 1241113 - Database import completed ['Sample'.'Basic'].
essbase    |
essbase    | MAXL> execute calculation default
essbase    |    2>     on "Sample"."Basic";
essbase    |
essbase    |  OK/INFO - 1012675 - Commit Blocks Interval for the calculation is [3000].
essbase    |  OK/INFO - 1012684 - Multiple bitmap mode calculator cache memory usage has a limit of [50000] bitmaps..
essbase    |  OK/INFO - 1012669 - Calculating [ Measures(All members) Year(All members) Scenario(All members) Product(All members) Market(All members)].
essbase    |  OK/INFO - 1012677 - Calculating in serial.
essbase    |  OK/INFO - 1012550 - Total Calc Elapsed Time : [0.069] seconds.
essbase    |  OK/INFO - 1013274 - Calculation executed.
essbase    |
essbase    | MAXL> import database "Demo"."Basic" data
essbase    |    2>     from server data_file "Data"
essbase    |    3>     on error abort;
essbase    |
essbase    |  OK/INFO - 1054014 - Database Basic loaded.
essbase    |  OK/INFO - 1051061 - Application Demo loaded - connection established.
essbase    |  OK/INFO - 1054027 - Application [Demo] started with process id [3065].
essbase    |  OK/INFO - 1003040 - Parallel dataload enabled: [1] block prepare threads, [1] block write threads..
essbase    |  OK/INFO - 1003037 - Data Load Updated [54468] cells.
essbase    |  OK/INFO - 1003052 - Data Load Elapsed Time for [Data.txt] : [0.1] seconds.
essbase    |  OK/INFO - 1241113 - Database import completed ['Demo'.'Basic'].
essbase    |
essbase    | MAXL> execute calculation default
essbase    |    2>     on "Demo"."Basic";
essbase    |
essbase    |  OK/INFO - 1012675 - Commit Blocks Interval for the calculation is [3000].
essbase    |  OK/INFO - 1012684 - Multiple bitmap mode calculator cache memory usage has a limit of [50000] bitmaps..
essbase    |  OK/INFO - 1012669 - Calculating [ Accounts(All members) Year(All members) Scenario(All members) Market(All members) Product(All members)].
essbase    |  OK/INFO - 1012677 - Calculating in serial.
essbase    |  OK/INFO - 1012600 - Member [Profit_%] attempts to divide by Missing, Invalid, or Near Zero value (Message will not repeat).
essbase    |  OK/INFO - 1012550 - Total Calc Elapsed Time : [0.042] seconds.
essbase    |  OK/INFO - 1013274 - Calculation executed.
essbase    |
essbase    | MAXL> import database "ASOsamp"."Sample" data
essbase    |    2>     from server data_file "dataload"
essbase    |    3>     using server rules_file "dataload"
essbase    |    4>     on error abort;
essbase    |
essbase    |  OK/INFO - 1054014 - Database Sample loaded.
essbase    |  OK/INFO - 1051061 - Application ASOsamp loaded - connection established.
essbase    |  OK/INFO - 1054027 - Application [ASOsamp] started with process id [3142].
essbase    |  OK/INFO - 1019061 - Reading Rule SQL Information For Database [Sample].
essbase    |  OK/INFO - 1019025 - Reading Rules From Rule Object For Database [Sample].
essbase    |  OK/INFO - 1003040 - Parallel dataload enabled: [1] block prepare threads, [1] block write threads..
essbase    |  OK/INFO - 1003051 - Data Load Elapsed Time for [dataload.txt] with [dataload.rul] : [1.68] seconds.
essbase    |  OK/INFO - 1241113 - Database import completed ['ASOsamp'.'Sample'].
essbase    |
essbase    |  WARNING - 1003065 - Data load stream contains [0] zero and [309615] #MISSING cells.
essbase    | MAXL> execute aggregate process on database "ASOsamp"."Sample"
essbase    |    2>     stopping when total_size exceeds 1.1;
essbase    |
essbase    |  OK/INFO - 1270045 - Successfully built [7] new aggregate views. Elapsed time [11.78] sec.
essbase    |  OK/INFO - 1243014 - Aggregates processed on database ASOsamp.Sample.
essbase    |
essbase    | MAXL> logout;
essbase    |
essbase    |       User admin is logged out
essbase    |
essbase    |
essbase    |   MaxL Shell completed
essbase    |
The included MaxL script that loads and calcs the default databases is pretty straightforward. Because the Essbase admin username and password are configurable and available as environment variables, we can reference them directly in the MaxL script to keep things clean:
/* invoked with startMaxl.sh */

login "$EPM_ADMIN" "$EPM_PASSWORD" on "localhost";

import database "Sample"."Basic" data
        from server data_file "Calcdat"
        on error abort;

execute calculation default
        on "Sample"."Basic";

import database "Demo"."Basic" data
        from server data_file "Data"
        on error abort;

execute calculation default
        on "Demo"."Basic";

import database "ASOsamp"."Sample" data
        from server data_file "dataload"
        using server rules_file "dataload"
        on error abort;

execute aggregate process on database "ASOsamp"."Sample"
        stopping when total_size exceeds 1.1;

logout;
exit;
Once the configuration and startup has been completed, you’ll now have a running Essbase server waiting for connection requests and can treat it as you would any other Essbase server. By default, the console will just follow various Essbase log files, such as:
essbase    | ==> /opt/Oracle/Middleware/user_projects/domains/EPMSystem/servers/EPMServer0/logs/EPMServer0.log <==
essbase    | ####   <3683b4d53745>   <> <> <> <1552933627482>  <83% of the total memory in the server is free>
In a typical Docker image, the last step/command runs a service or runs something and “waits”. If it didn’t, then the container would just be “done” and exit. In order to keep the container running, it’s very common to just have the last line in your script just run a tail command, which will watch the output of a file indefinitely. That’s exactly what’s going on here, although in this case the tail command is being used to watch several log files.
You should now be able to pull up the EAS console page by visting http://localhost:9000/easconsole and login to Workspace by visiting http://localhost:9000/workspace. To stop following the console (but to leave the Essbase server running) you press Ctrl+C.
Managing Your Containers With Docker Commands
You will likely want to use some Docker commands (or perhaps a GUI-based front end) to manage your running Docker containers. To list the running containers:
docker ps
You’ll see output similar to the following:
CONTAINER ID        IMAGE                                      COMMAND                  CREATED             STATUS              PORTS                                                                                                                                  NAMES

3683b4d53745        essbase:11.1.2.4                           "./config-and-start.…"   8 minutes ago       Up 8 minutes        0.0.0.0:1423->1423/tcp, 0.0.0.0:7001->7001/tcp, 0.0.0.0:9000->9000/tcp, 0.0.0.0:9443->9443/tcp, 0.0.0.0:32768-32778->32768-32778/tcp   essbase

a943411b0bc4        microsoft/mssql-server-linux:2017-latest   "/opt/mssql/bin/sqls…"   8 minutes ago       Up 8 minutes        1433/tcp                                                                                                                               docker-essbase_db_1
jason@docker1:~/docker-essbase$
You may want to stop your running Essbase server and SQL database:
You can see that now nothing is listed as running:
jason@docker1:~/docker-essbase$ docker ps
CONTAINER ID        IMAGE               COMMAND             CREATED             STATUS              PORTS               NAMES
jason@docker1:~/docker-essbase$
You can even connect to the Bash instance inside your Essbase container by using the included convenience script, essbash.sh. It’s just a handy way to run the command docker-compose exec essbase bash.
jason@docker1:~/docker-essbase$ ./essbash.sh
 Welcome to the Essbase Docker image!
Inside the Essbase container you can list the files and see what’s there, if you want:
$ ls -l
 total 672
 lrwxrwxrwx 1 oracle oracle     80 Mar 18 18:23 app -> /opt/Oracle/Middleware/user_projects/epmsystem1/EssbaseServer/essbaseserver1/app
 -rwxrwxr-x 1 oracle dba      5281 Feb  9 03:54 config-and-start.sh
 -rw-rw-r-- 1 oracle dba     13543 Mar 18 18:23 essbase-config.xml
 -rwxr-x--- 1 oracle oracle    172 Mar 18 18:24 exec.sh
 lrwxrwxrwx 1 oracle oracle     61 Mar 18 18:23 import_export -> /opt/Oracle/Middleware/user_projects/epmsystem1/import_export
 drwxr-xr-x 2 oracle oracle   4096 Mar  4 16:50 init-data
 -rwxr-xr-x 1 oracle dba    611504 Dec 31 21:19 jtds12.jar
 -rw-rw-r-- 1 oracle dba       607 Jan 15 05:42 load-sample-databases.msh
 drwxr----- 3 oracle oracle   4096 Mar 18 18:25 oradiag_oracle
 -rw-r--r-- 1 oracle oracle   3506 Mar 18 18:23 SimpleJdbcRunner.class
 -rw-rw-r-- 1 oracle dba      5049 Jan  9 19:48 SimpleJdbcRunner.java
 drwxrwxr-x 2   1000   1000   4096 Mar  4 16:23 start_scripts
 lrwxrwxrwx 1 oracle oracle     75 Mar 18 18:23 startWebLogicAdminConsole.sh -> /opt/Oracle/Middleware/user_projects/domains/EPMSystem/bin/startWebLogic.sh
 -rw-rw-r-- 1 oracle dba        43 Jan  8 07:19 welcome.sh
You can run the classic ps aux command to see what’s running on the Essbase Linux container:
I have to admit that classic, large enterprise applications don’t completely lend themselves to these modern containerization and cloud technologies. It took more than a bit of engineering to get this all working. There were also some challenges owing to being stuck on older WebLogic and Java instances. And my goodness, how many years ago did 11.1.2.4 show up? Nevertheless, building this container out has been incredibly useful and educational. I am excited to get this work out into the open so that others can benefit from it as well as be ideally positioned for future Essbase releases. Once I get my hands on the upcoming on-premises releases of Essbase I will use the development and lessons from this project in order to make Dockerfiles available for those as well.
How you can help
You can help simply by running the Essbase image and providing any feedback you have. I generally run this on a Mac or directly from a Linux server, either a physical server in my lab or on a Linux image running on the cloud. Several members of my team are using this on Windows with success (albeit with some quirks). You may even develop some enhancements to the script/files that you’d like to contribute – please feel free to do so by creating a pull request on GitHub.
The latest shipping version of Drillbridge Plus (3.4.2+) has a few new tricks up its sleeves for advanced handling of date values coming back from your SQL query.
Generally when you retrieve a date value with a relational query, the “right thing” happens automatically – i.e., the date value is displayed how you want it to be displayed. For those cases where you want more control over the output, you can use your database’s string/date formatting functionality to convert the date to a string and display it however you want.
The slight problem here is what if the date doesn’t come back how you want it and you then format it how you want it, usually what has happened is that the DATE/TIME/DATETIME/TIMESTAMP column is now just a string (such as VARCHAR). This looks fine on the normal Drillbridge results page, but when you download your report as an Excel file, Excel will just think it’s a string as opposed to a date.
So, for those cases where you want advanced control over how the date looks and you want to keep it as a date value when/if you download to Excel, there are now some advanced options for doing so. Reports now have two new options: Column date formats and Excel date formats.
First up is the Column date formats option. This option is a string that you can configure with a “map” value, where for any given column index you can specify a short Java date format string.
For instance, consider this unformatted timestamp value that shows up in a Drillbridge report:
In this case due to the column type, we’re getting a full timestamp but we don’t actually want it. You might be thinking that we could just CAST/CONVERT to a DATE format but this doesn’t always work, actually (it varies by database driver). You can try it, of course, and it may give you the results you want. But let’s set a column date format using a Java date format string. In this case, we’ll set the value of the column date format to 3=yyyy-MM-dd. This map notation specifies that the third column (columns start at 1) should use the date format yyyy-MM-dd. If we had two columns we needed to format then we could write 2=yyyy-MM-dd, 3=yyyy-MM-dd, and so on. With this new date format in place and without any other changes to the query, the results now look like this:
We’re not quite dialed in yet though because as it stands right now, when we go to download this as an Excel file, it’ll look like this:
Since it’s a date column type, Drillbridge has indeed set it as such on the Excel file, but it’s not quite as perfect as it could be. Over on the Excel date format option (under Excel Options on the Drillbridge report options) we can specify a map of Excel formats to use. Note, however, that these formats are Excel date formats, and are a little different than Java formats. We can use the value of 3=mm-dd-YY (a date format with a two digit month, hypens, and a two digit year), for example:
And now when we go to download the Excel file, Drillbridge will use our format to generate output exactly the way we want.
As with most other options in Drillbridge, these ones are entirely optional but they give you some additional power and flexibility you can reach for when you need it.