I have been really, really looking forward to writing this continuation in the Dodeca Data Input series, for a couple of reasons. For one, it’s a genuinely useful feature that Dodeca implements very well. But secondly, and perhaps more important, the ability to get and store this data from users is just an absolutely missing piece of functionality in the traditional Hyperion toolbox. So this is going to be a bit of a long article but will cover how relational data input in Dodeca works and why it’s so important.
As a quick recap, up to this point I’ve covered basic Essbase data input, cell/variance commentary, going under the hood to look at the audit log tables, and focused calc scripts that run after Essbase input. To this we will now add SQL/relational data input. To put it in context, relational database input is one of the tentpole Dodeca features, and stands next to other heavy hitter features such as Essbase input, comments, drill-through, and cascading reports. Now, all of the individual features of Dodeca are useful and interesting. And yet, I see relational data input as a feature that almost singlehandedly makes Dodeca greater than the sum of its parts.
Relational Data as Part of the Hyperion Toolbox
Before jumping in to the technical implementation of relational data input in Dodeca, I want to wax philosophical a bit on how important I think this feature is. It has the power to be a game changer for a lot of organizations.
My own experience with Hyperion/Essbase is from all angles: as a full-time Hyperion developer for multiple companies, as a consultant with multiple companies, working on dozens projects, and as an independent software vendor with a Hyperion product. Further, my computer science degree minor was in relational database algebra (yes, I’m a nerd). I wrote the innovative Drillbridge software that bridges the gap between Smart View, Planning, and Financial Reporting and relational data. I created an absolutely free version of the Drillbridge software that is fully functional and is downloaded daily and regularly put into production with zero assistance from myself.
So to say that relational data is near and dear or otherwise useful to me is an understatement. As with Dodeca’s robust and battle-tested middle tier component (the secret sauce/glue between the Dodeca client application and all Essbase/relational database servers), Drillbridge is written in 100% Java and contains a web interface for managing its configuration.
All that background is basically my long-winded way of saying that I’ve worked with Hyperion a lot, and if anyone should be qualified to find a way to get user input into a relational database, it’s the guy that programs in Java, writes CDFs for fun, and has created systems that literally take input from a user and put it into a relational database.
And yet, even with all of this experience, getting relational data from Hyperion users has traditionally been this absolute missing link. The situation with pure Essbase data has been a little better: you had lock and send or submit data with the classic add-in/Smart View. Of course, lock and send is not without it’s issues. It’s more of a power user thing, although as I’ve explored in the past, Dodeca can quite nicely provide some structure to the Essbase input process that makes things much more user friendly.
Essbase Relational Data Input Anti-Patterns
I seem to harp on this notion of anti-patterns a bit. An anti-pattern occurs when something is ostensibly designed incorrectly. This happens a lot in the Hyperion consulting world, for instance. A client might be having an issue with their system or performance, and they come to a consultant looking for assistance on that one particular symptom. Unfortunately, all too often, the performance or technical problem is essentially predicated upon a series of unfortunate business, technical, and design decisions (usually ones that can’t be easily/cheaply rectified). Or the company has otherwise accumulated a lot of technical debt – where band-aids have been put on a system in order to keep it hobbling along, without addressing the underlying design problem.
Armed with only Smart View or the classic add-in, but needing to get relational input from users, an intrepid (or masochistic) Hyperion developer might choose a few different routes to try and satisfy this, all of which are less than ideal for various reasons;
- Dummy members/dimensionality for pseudo relational input
- Text measures
- Enter supporting details/data to Excel spreadsheet, and email to admin or store on share folder/drive
- Custom VBA program/functionality to upload supplemental detail
- Custom software/web service for user to input data
All of these approaches have issues. Adding dummy members or attributes to a cube is less than ideal and “pollutes” the cube. Some additional functionality might be needed to pull that data out of the cube and marshall into a relational database. Sending emails and saving spreadsheets off to the local share drive is a disaster waiting to happen. I’ve railed on VBA solutions before. They are a mixed bag. Speaking as a consultant, they all too often turn into spaghetti code maintenance nightmares, fraught with glitches, security issues, and more. Lastly, a custom web service or software package might fit the bill, but it takes time and money.
Dodeca Does It (#dodecadoesit)
Let’s explore some what-ifs:
- What if users could input data using the same interface they are using for reporting and analysis
- What if we didn’t need to make a single change to our cube dimensionality and cube get relational input from the user
- What if it didn’t require any custom programming, save for the SQL statements themselves
- What if we could work with almost any major relational database technology on the planet
- What if this functionality was a first-class citizen in our software and worked out of the box?
- What if we could format the data to our heart’s content using a spreadsheet model that we already work with day in and day out?
Here’s the thing: Essbase ostensibly started its life not really caring at all about SQL/relational data. As has been wistfully recalled time and again, Essbase was the secret weapon sitting under your desk. The classic Excel add-in could magically slice and dice data. Over the years, Essbase – and users, whether they realized it or not – grew to have an increasingly important relationship with relational data.
Even the most experienced of Hyperion developers is often at a loss when it comes to providing their users a cohesive solution that can seamlessly work with relational and multi-dimensional data (or OLTP/OLAP if you prefer). And yet, this is a bread and butter feature of Dodeca. It feels almost hyperbolic to say, but I just can’t stress this enough.
Okay, enough with the abstract and architectural. Now let’s move on an actual implementation inside of Dodeca that writes back to a SQL table of our choosing.
Implementing Relational Data Input With Dodeca
For the remainder of this exercise, we’re going to work with a table called EMPLOYEES. It’s a very simple table that contains a employee ID, first name, last name, and a comment about a given employee. The employee ID must be unique (it’s the primary key). The other fields are just made of text. Thy MySQL table definition would look like this:
CREATE TABLE `EMPLOYEES` (
    `EMPLOYEE_ID` int(11) NOT NULL AUTO_INCREMENT,
    `FIRST_NAME` varchar(25) NOT NULL,
    `LAST_NAME` varchar(25) NOT NULL,
    `COMMENTS` varchar(255) DEFAULT NULL,
    PRIMARY KEY (`EMPLOYEE_ID`)
)
Also note that the EMPLOYEE_ID field is an AUTO_INCREMENT value. This is MySQL’s equivalent of a SQL Server identity column, or using a sequence in an Oracle table to generate the next unique value. Essentially what this means is that the database engine itself will take care of creating new values for us, so we don’t (in fact, we don’t want to) insert them manually or ourselves. However, we will be interested in the value that the database engine assigns to the rows we insert. You’ll see later how this is accomplished.
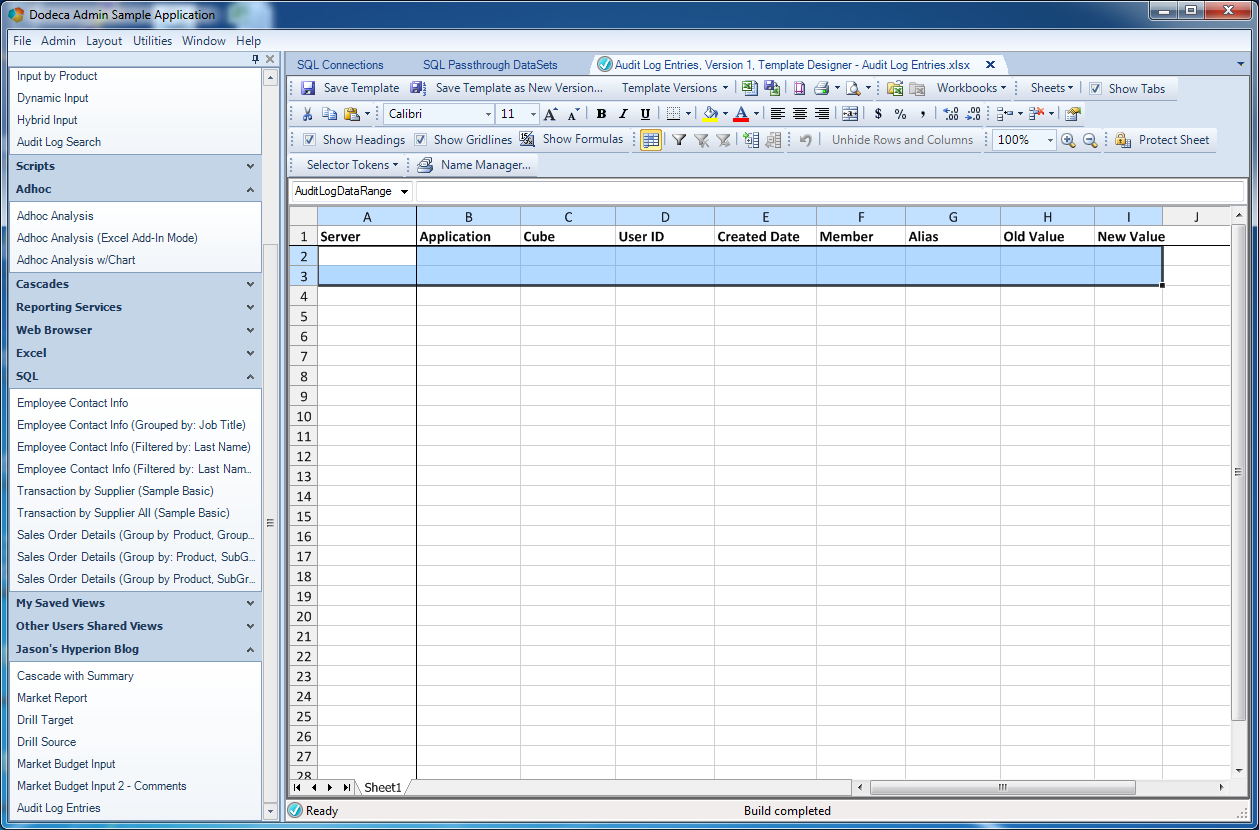
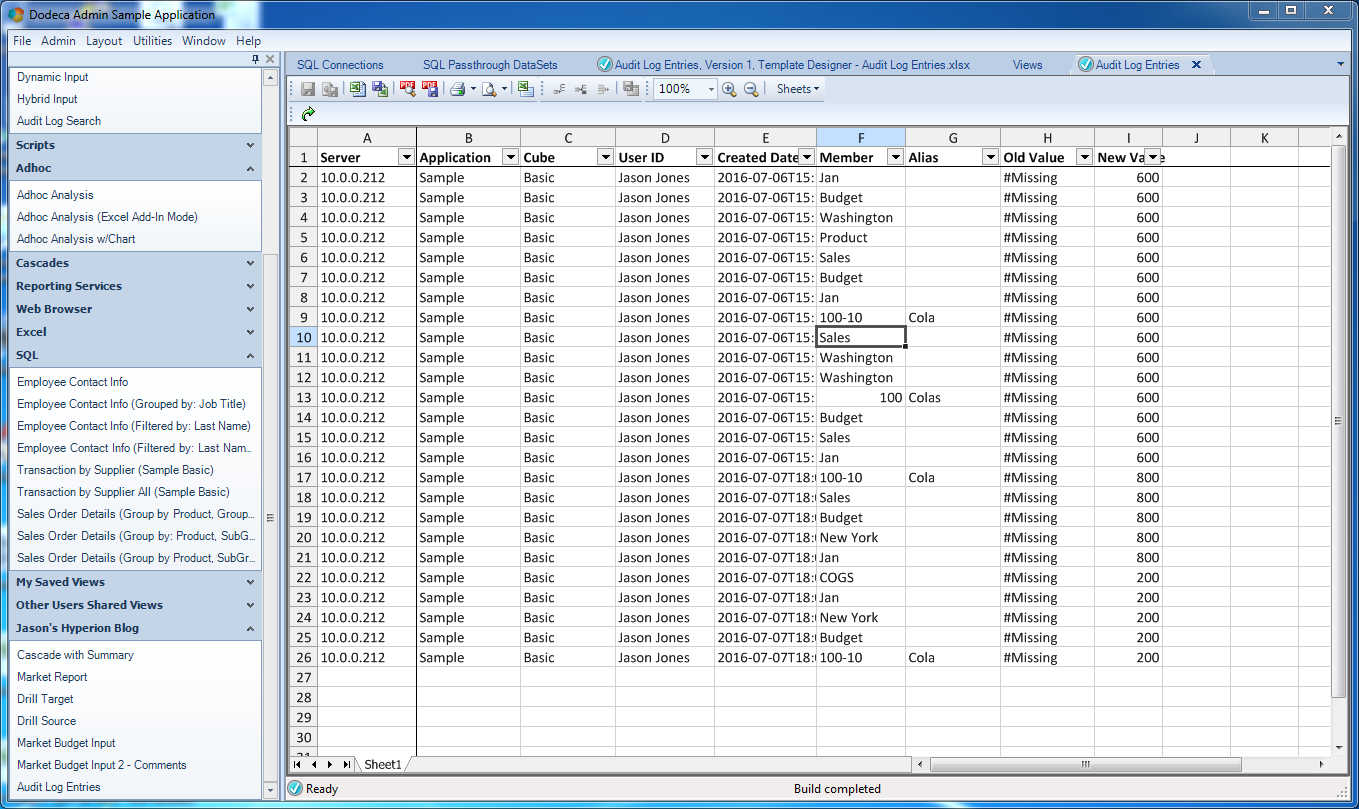
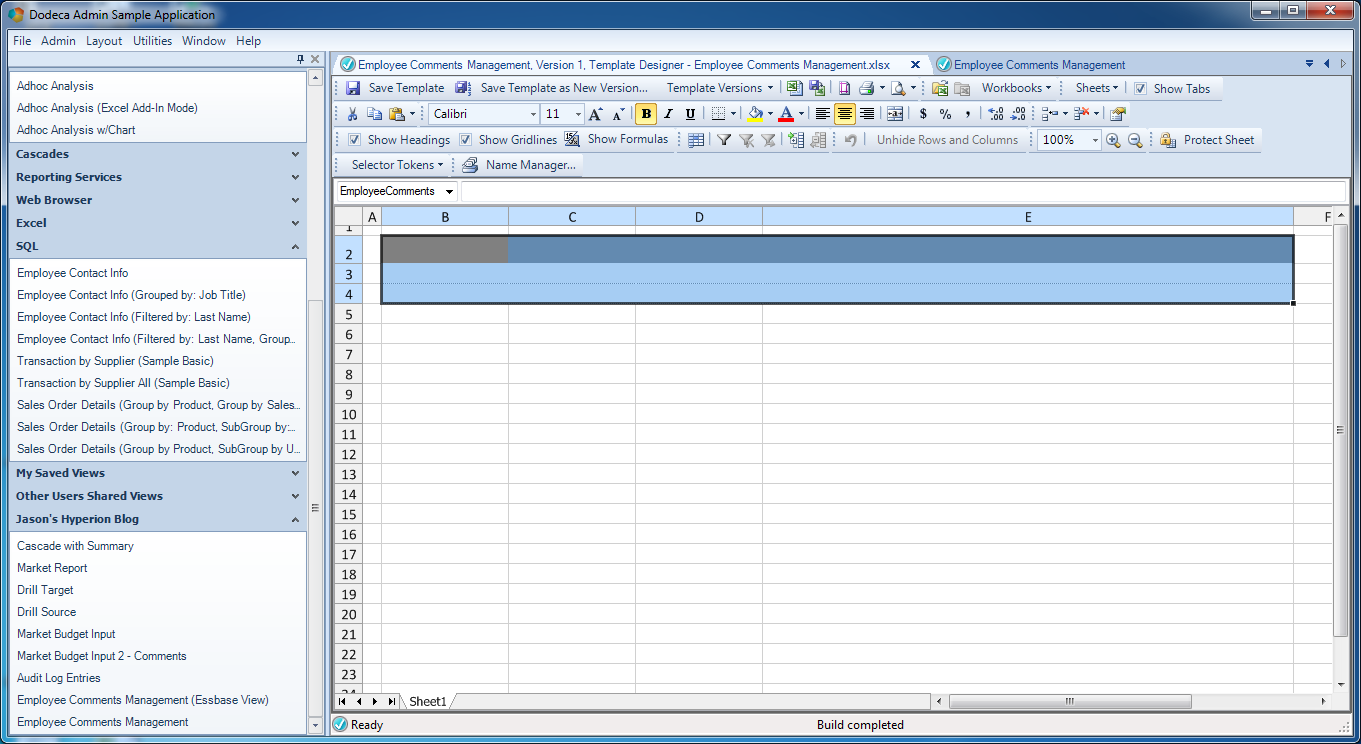
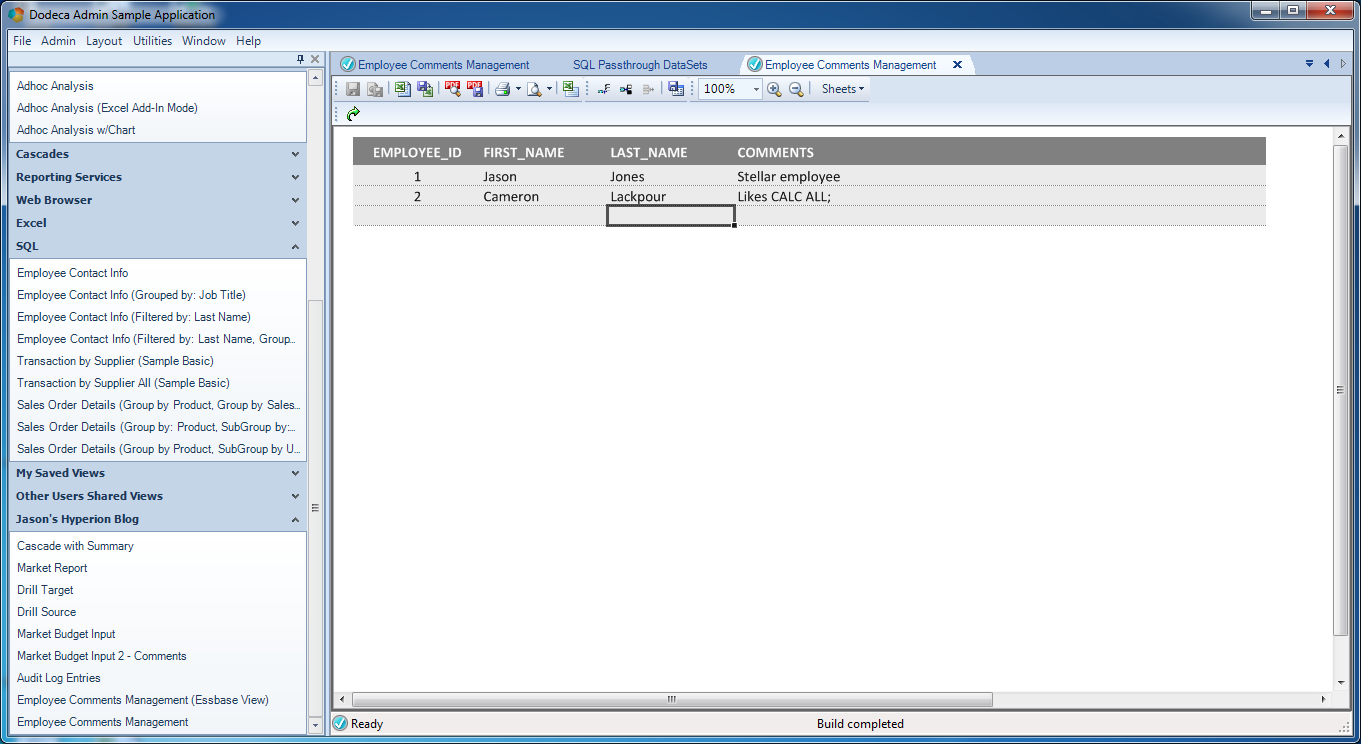
I went ahead and put in a couple of rows using a generic database tool and built a very simple Dodeca view that pulls back the data. Here’s a preview of that:
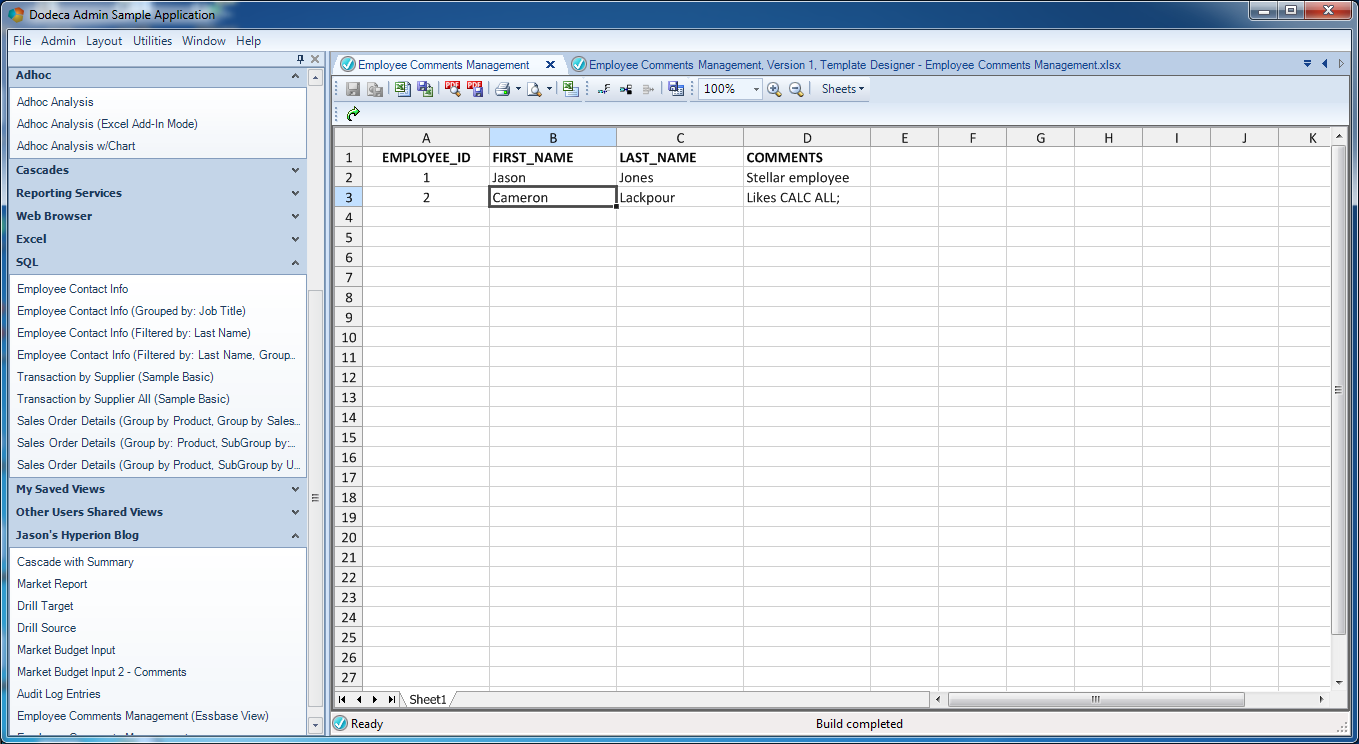
A basic Dodeca view with relational data
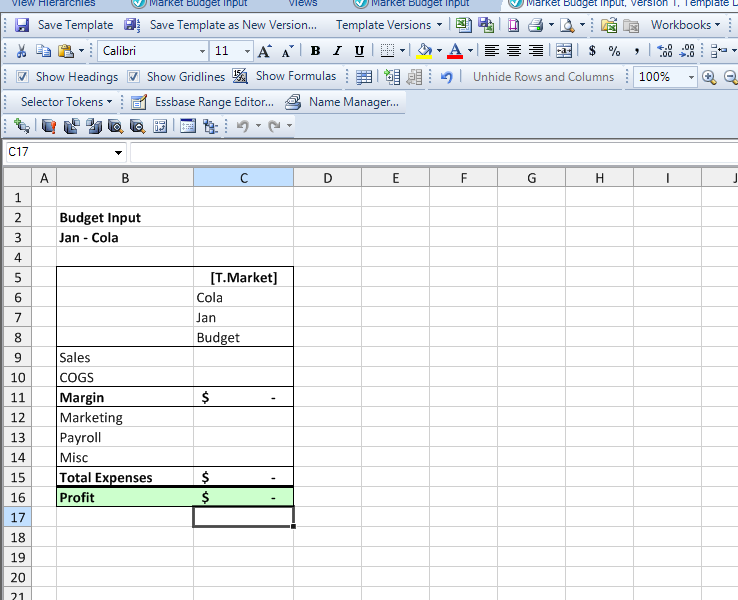
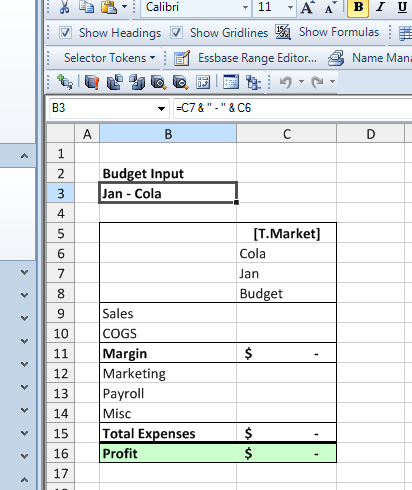
One of the blog posts leading up to this one was a quick crash course in how to put relational data into a Dodeca view, so if you’re fuzzy on that, then I suggest you take a look at that. But in a nutshell, here’s what is going on with respect to the template:
Basic template for relational view
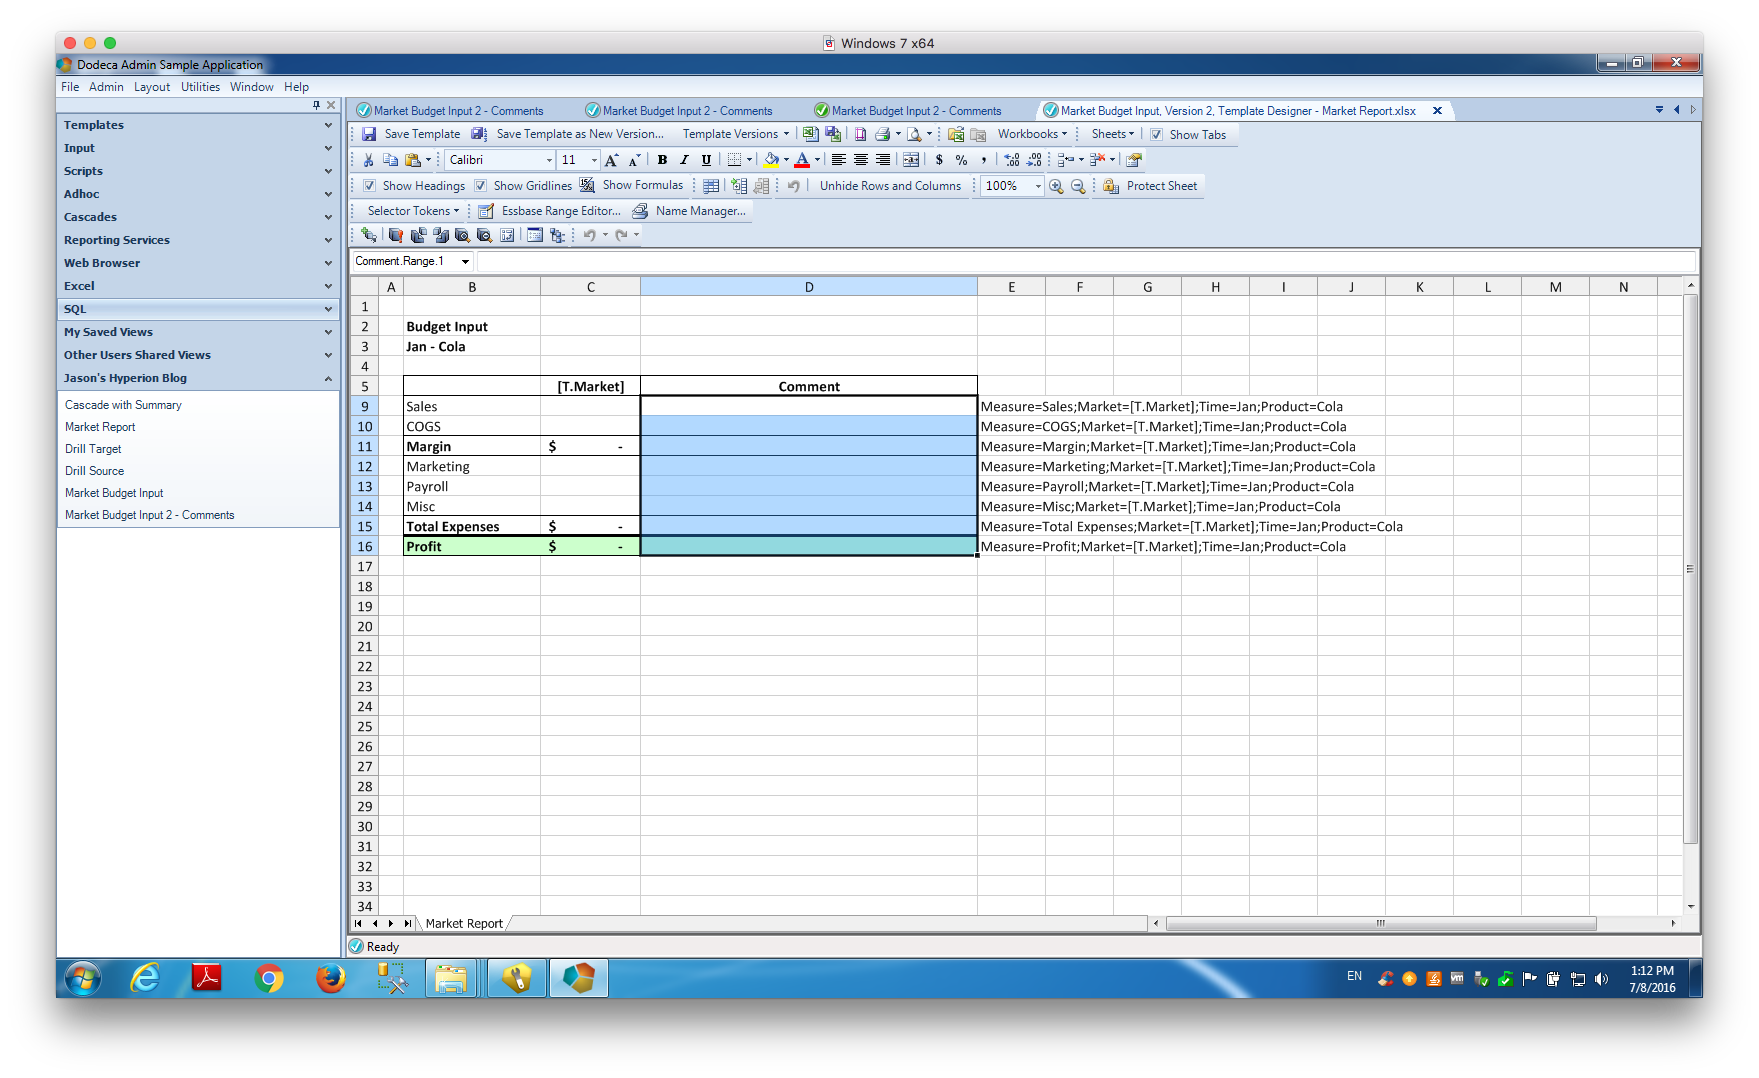
Things to note:
- The range that will be populated with data from the relational query is named EmployeeComments and contains four columns (one for each column we retrieve with the query)
- I turned on the option to return the headers from the query; those will be populated into the first row of the range. This can be turned off and custom headers can be supplied, but in this case I want to just use them
- I’ve applied some light formatting to spruce things up a bit: row 2 (the first row of the range) is grey with white text, and I added a spacer row/column to offset the table a little bit. I’m going to set the options on this view to not show row/column headers or the different tabs (again, just settings that I can easily update)
Note the Grid Properties settings that I’ve updated for the view, in order to enhance the visual appearance of the rendered view for the user. In particular, I’ve turned off grid lines (GridLinesVisible = False), headers for the cells won’t be displayed (RowAndColumnHeadersVisible = False), and tab names won’t be displayed (TabsVisible = False).
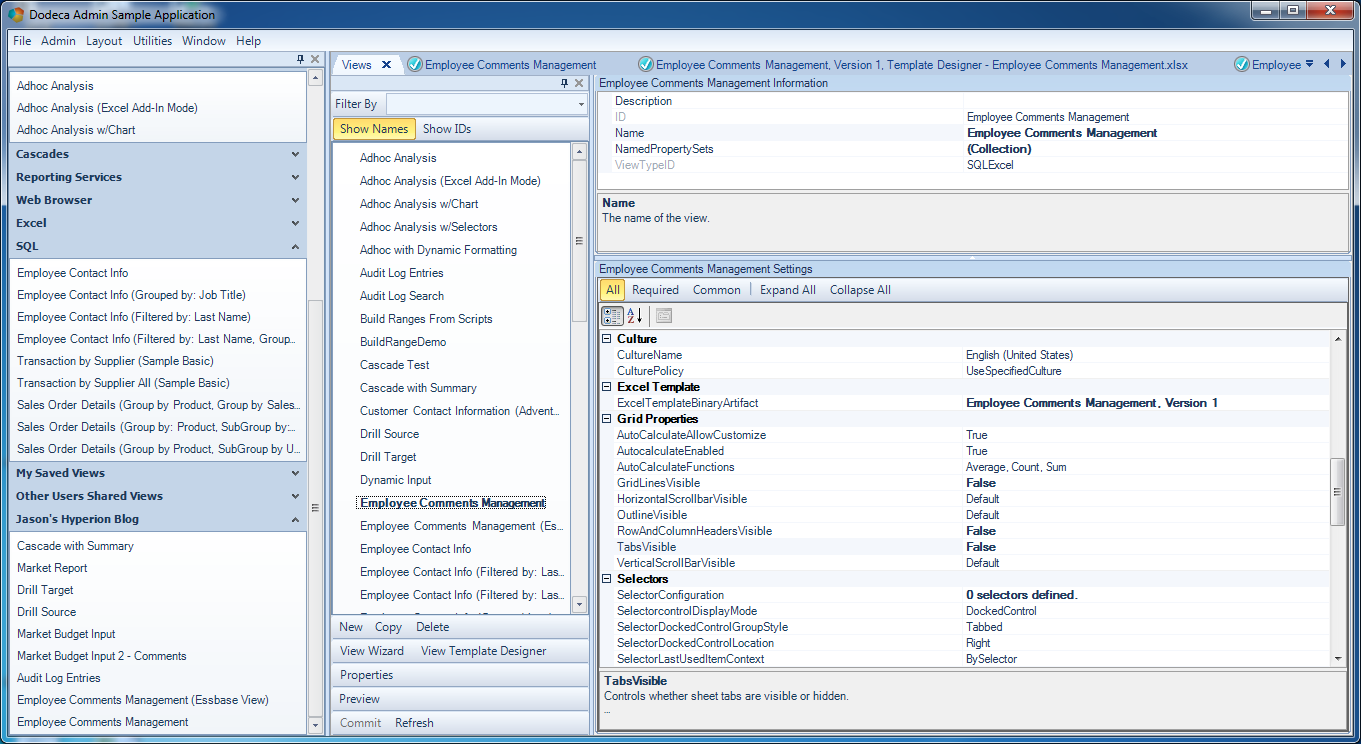
Updated Grid Properties for relational Dodeca view
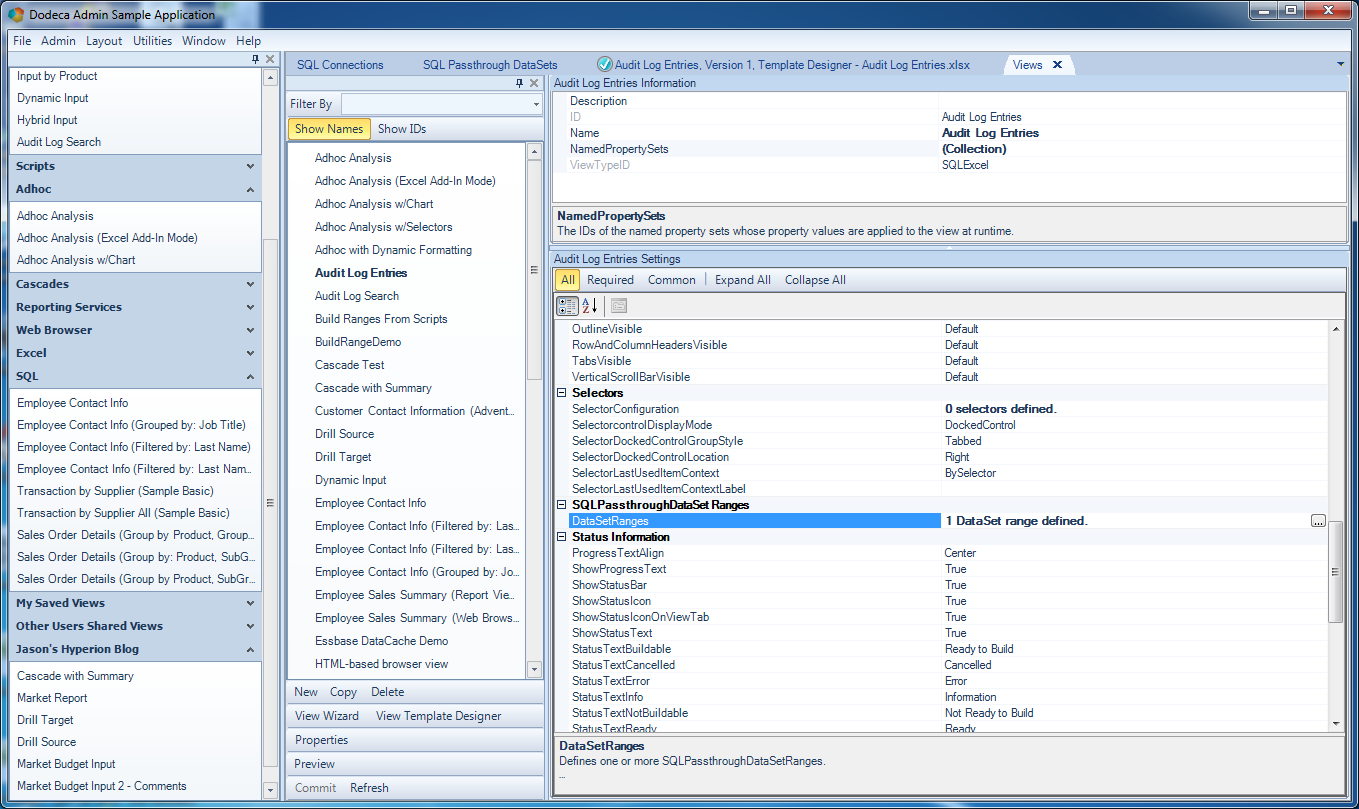
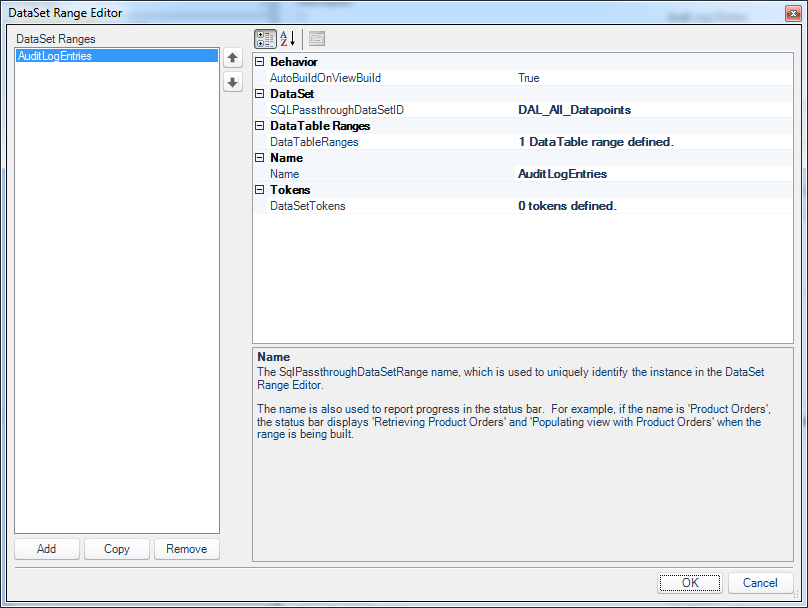
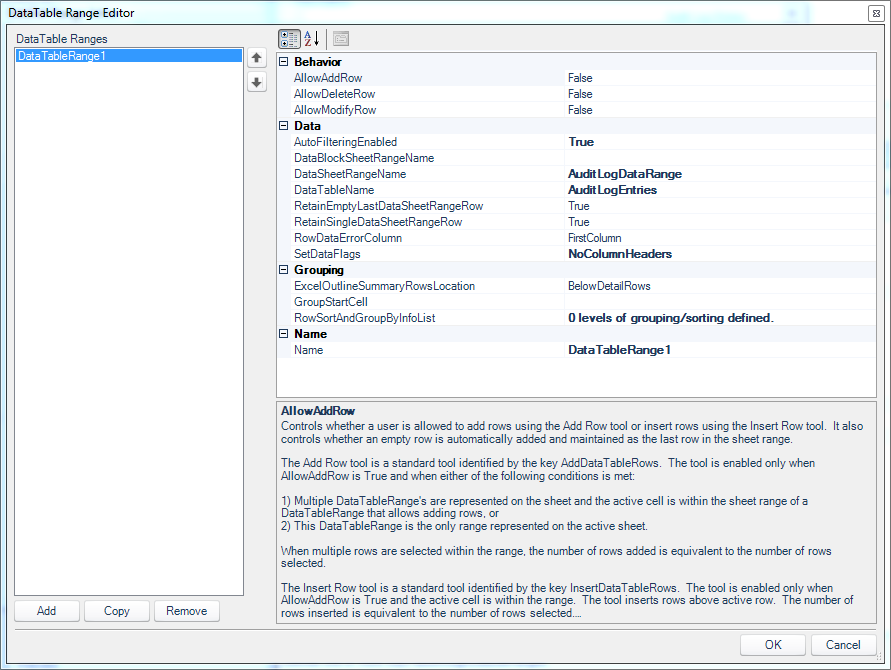
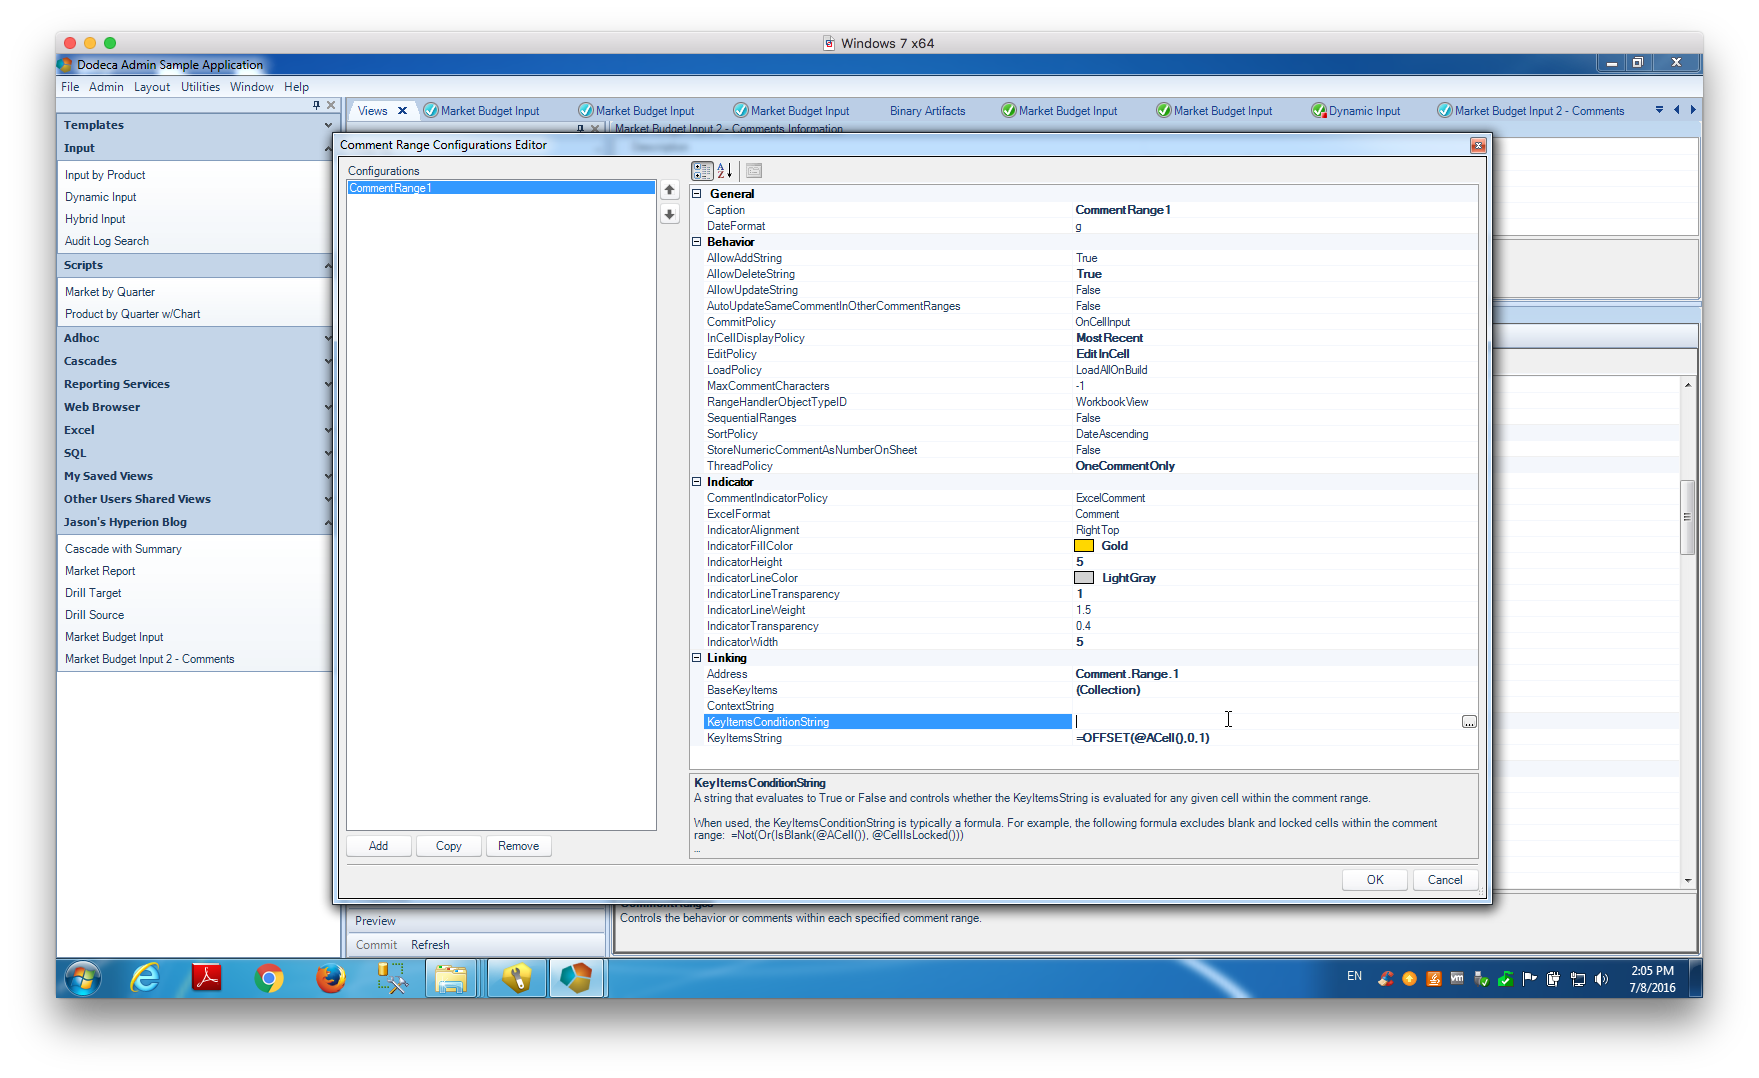
Next we need to use the DataTable Range Editor to tell Dodeca a little about how the SQL Passthrough DataSet we defined earlier is rendered into the named range on our sheet. In the previous post looking at this functionality, we got to leave many of the configuration values as their defaults. This time we need to set a few more things in order to allow user input in addition to viewing the data.
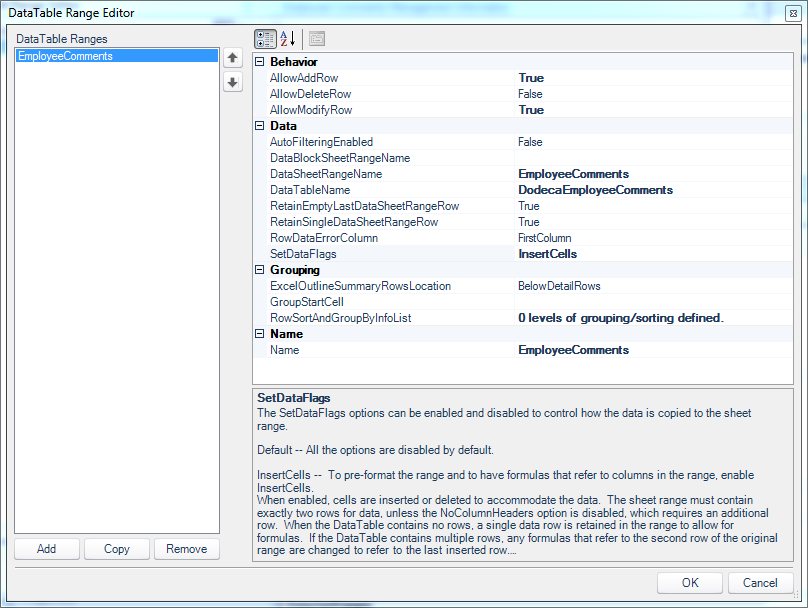
DataTable Range Editor associated with the SQL passthrough dataset on our view
Of particular note in this editor:
- The DataSheetRangeName is set to the named range from our Excel template (EmployeeComments)
- The SetDataFlags configuration value includes a value of InsertCells (note that the SetDataFlags parameter can accept multiple values; in this case we are setting just one of of them).
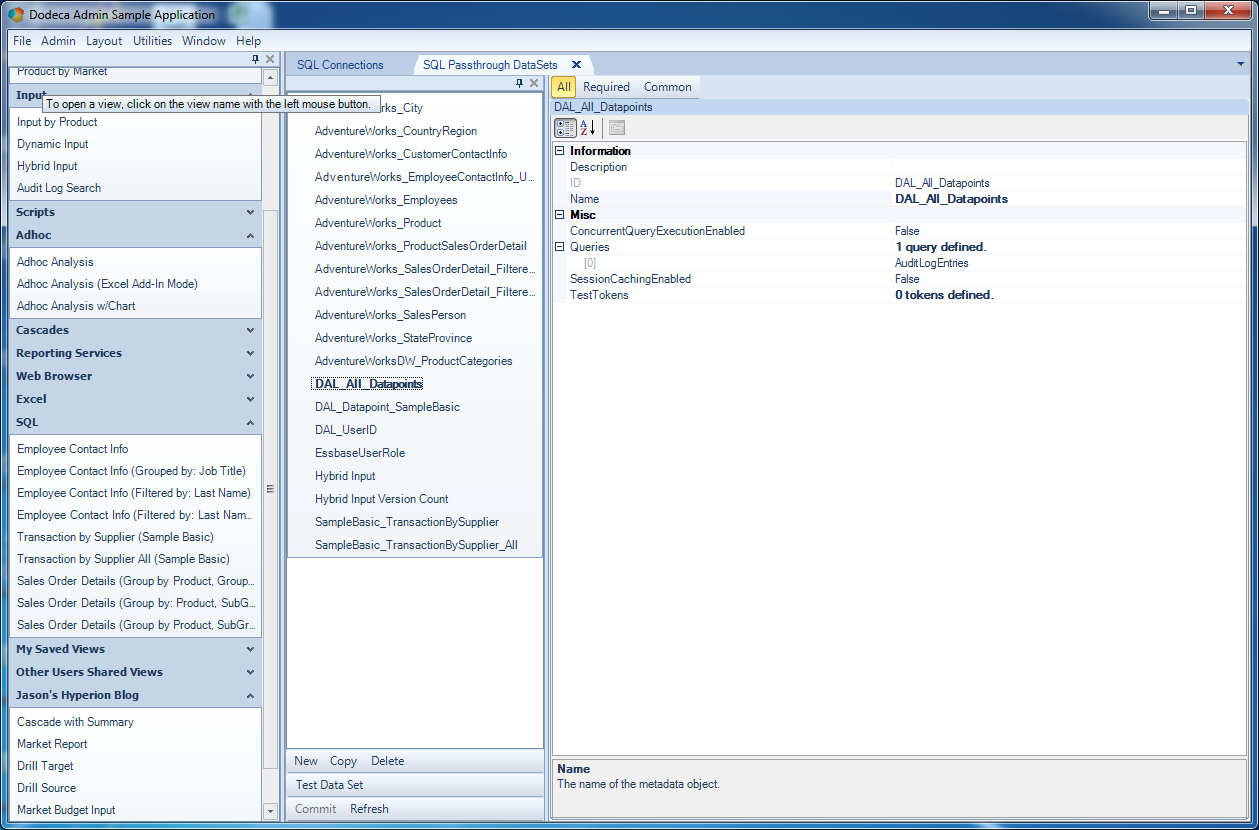
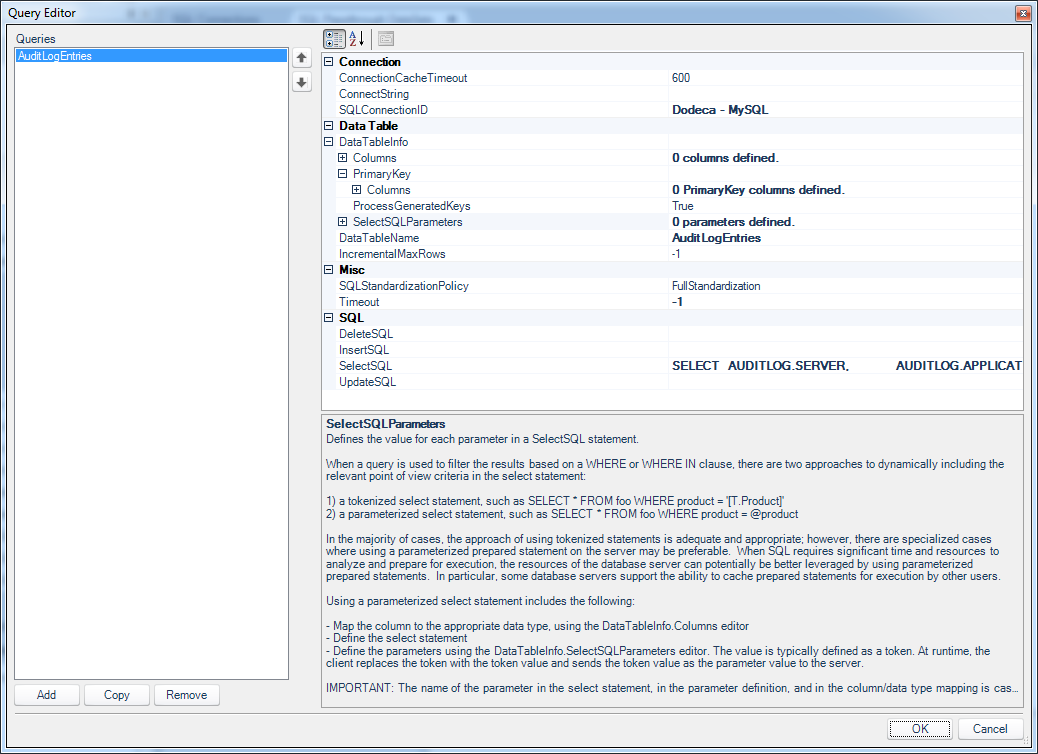
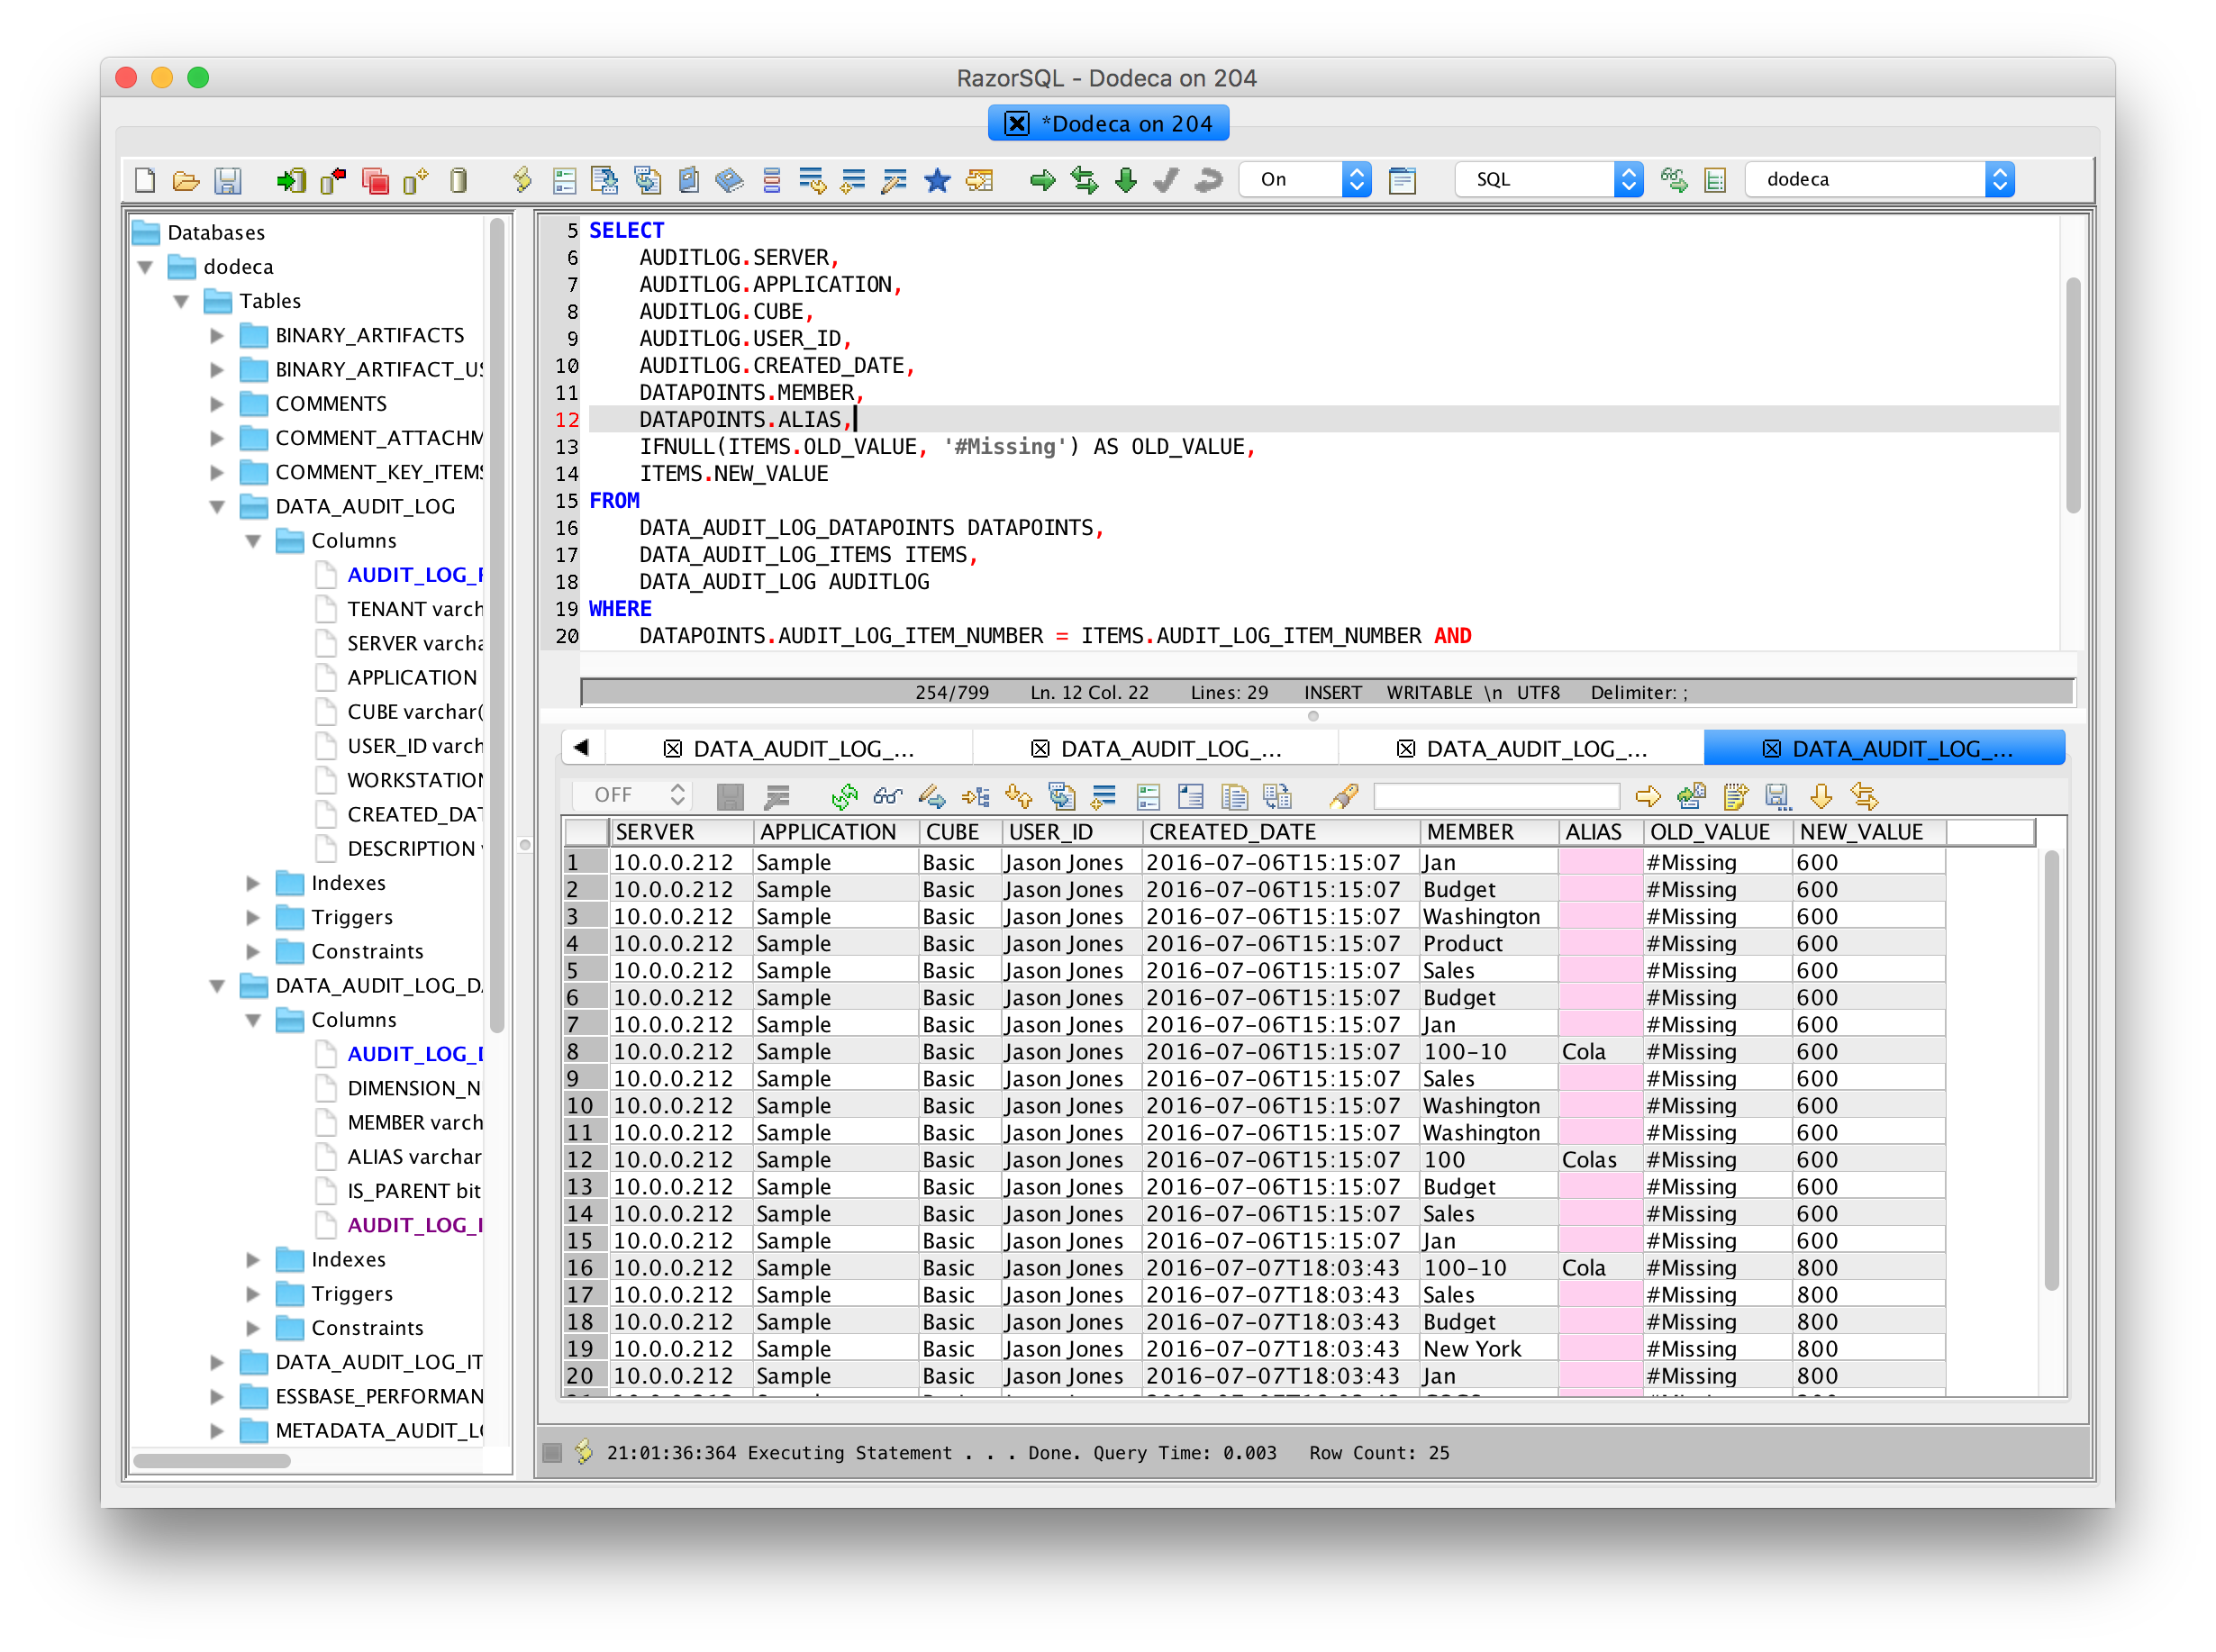
Now let’s cut over to the Query Editor associated with our SQL Passthrough DataSet and take a look at the configuration there:

Query Editor editing the SQL passthrough dataset for employees
Now, it looks like there is a lot going on here but it’s not too bad. Let’s walk through all of the things that are set in this query. Also remember that the this query configuration is associated with the SQL Passthrough DataSet itself. In other worse, this is the type of logic that we only need to configure in one place and we can then reuse across multiple views if we want (as opposed to having to reinvent this configuration/logic for each individual view).
The important aspects of this query configuration are the SQLConnectionID, DataTableInfo/Columns, and the values in the SQL configuration (InsertSQL, SelectSQL, and UpdateSQL):
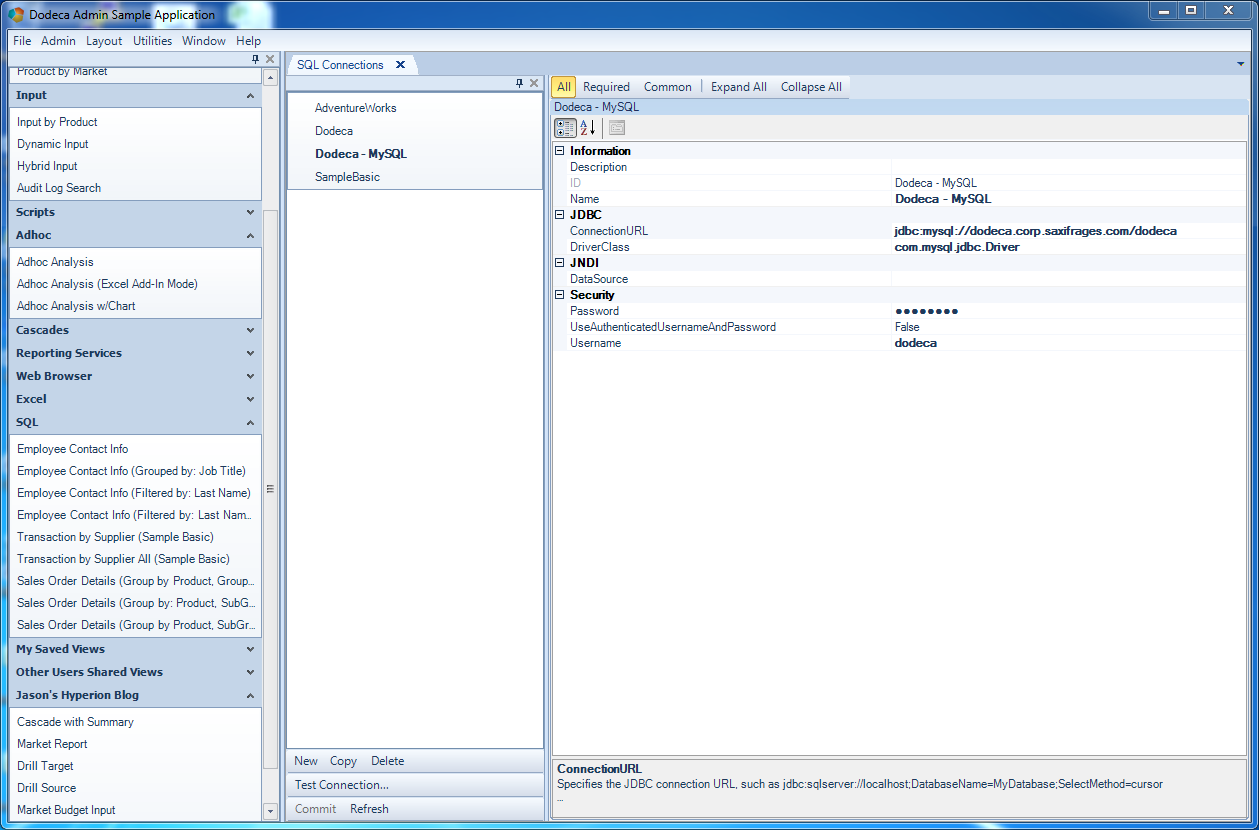
SQLConnectionID: this is the simplest item to configure. We simply use a dropdown box to choose from our list of SQL connections that have been mapped in previously. We set this regardless of writing data back to SQL or not (we need to set it even if we’re just reading data from SQL, obviously)DataTableInfo/Columns: often these don’t even need to be set because Dodeca can figure them out dynamically. It depends on the JDBC driver in play. I went ahead and created mappings for the columns just to make sure that there would be no issues with reading the column names and types out. The editor for creating these is straightforward and is purely just a literal column name and a column type (int,varchar,datetime, etc.). Additionally, I also explicitly told Dodeca what the primary key for the table is (EMPLOYEE_ID).- The
SelectSQLconfiguration is the exact same as before (when we we’re just reading data out of SQL), so nothing new to see there. What’s new is the configuration for theInsertSQLstatement.
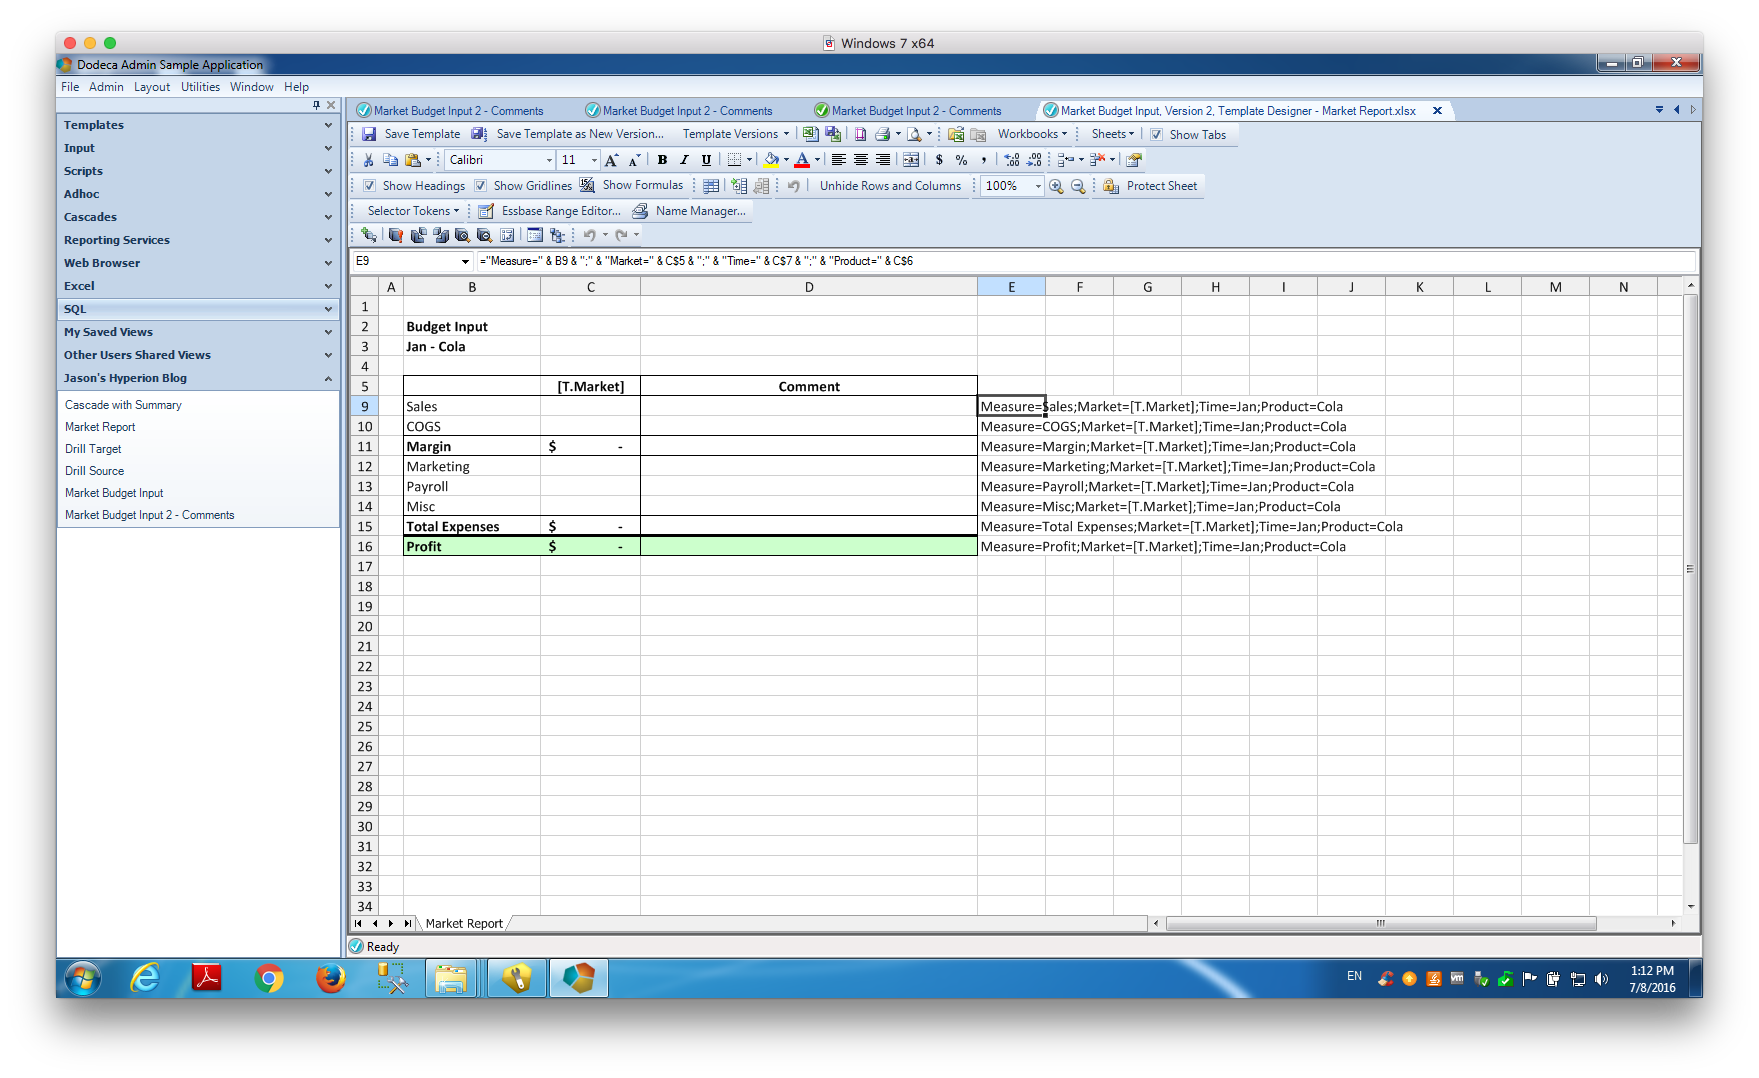
Let’s take a closer look at the exact configuration of the InsertSQL parameter, as it’s possibly one of the more interesting nuances in this whole configuration. The InsertSQL setting is ostensibly just the parameterized SQL code to insert a new row into the table, however, in this case we actually have two statements (one per line in the following screenshot):
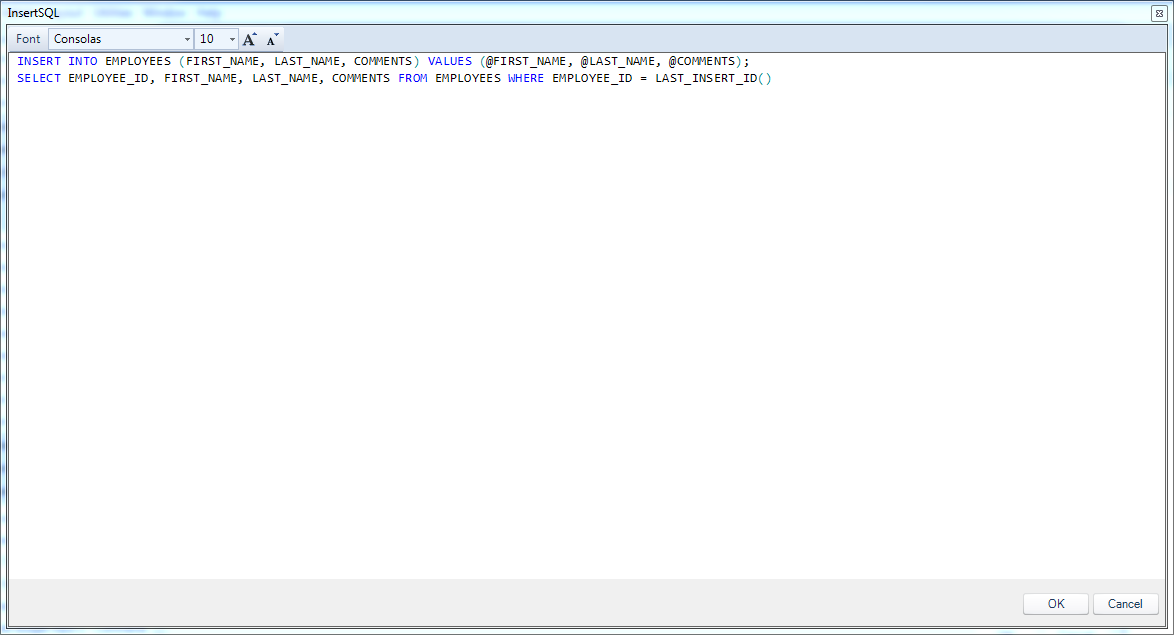
The InsertSQL value for the employees query on the employee SQL passthrough dataset
The first statement is the parameterized INSERT. The full statement is INSERT INTO EMPLOYEES (FIRST_NAME, LAST_NAME, COMMENTS) VALUES (@FIRST_NAME, @LAST_NAME, @COMMENTS). I want to draw your attention to the fact that I am explicitly not mentioning the primary key (EMPLOYEE_ID) here. Recall that this is the primary key but also an AUTO_INCREMENT (similar to IDENTITY/sequence in SQL Server/Oracle respectively). I’m basically telling the relational database engine “Hey, I’m going to explicitly give you these three things, but you’re smart enough to figure out how to automatically generate the key for me, so please do that.”
Inside of the VALUES section of our insert statement, you’ll see that we have tokens starting with an @ symbol: @FIRST_NAME, @LAST_NAME, and @COMMENTS. When Dodeca goes to do the insert, it’ll dynamically place the values from the row into these placeholders and then execute the query. So to be clear, these aren’t part of the native SQL syntax. For instance, if I am inserting my own name and comments into the row and then have Dodeca save it, the resulting SQL statement that Dodeca generates and then hands off to the database for processing might look like this:
INSERT INTO EMPLOYEES (FIRST_NAME, LAST_NAME, COMMENTS) VALUES ('Jason', 'Jones', 'Awesome employee')
The next statement, and one that’s incredibly useful to our user experience, is the “post insert SQL” command. The code for this post insert command in this case and for this technology is the following:
SELECT EMPLOYEE_ID, FIRST_NAME, LAST_NAME, COMMENTS FROM EMPLOYEES WHERE EMPLOYEE_ID = LAST_INSERT_ID()
Take special note that there is a semi-colon at the end of the first line that is separating the insert command from our special post-insert command. With respect to the post insert command, there are no special tokens in it, but it is specific to MySQL in this case. In particular, the LAST_INSERT_ID() function is a special function that returns the generated ID for the row that was just inserted in the previous statement. Effectively what I’m telling Dodeca is this: “After you insert the first name, last name, and comments to the relational database table, a primary key will have been generated. Here’s how you can use that generated primary key to fetch all of the details for that row, so that you can populate the key on my spreadsheet.”
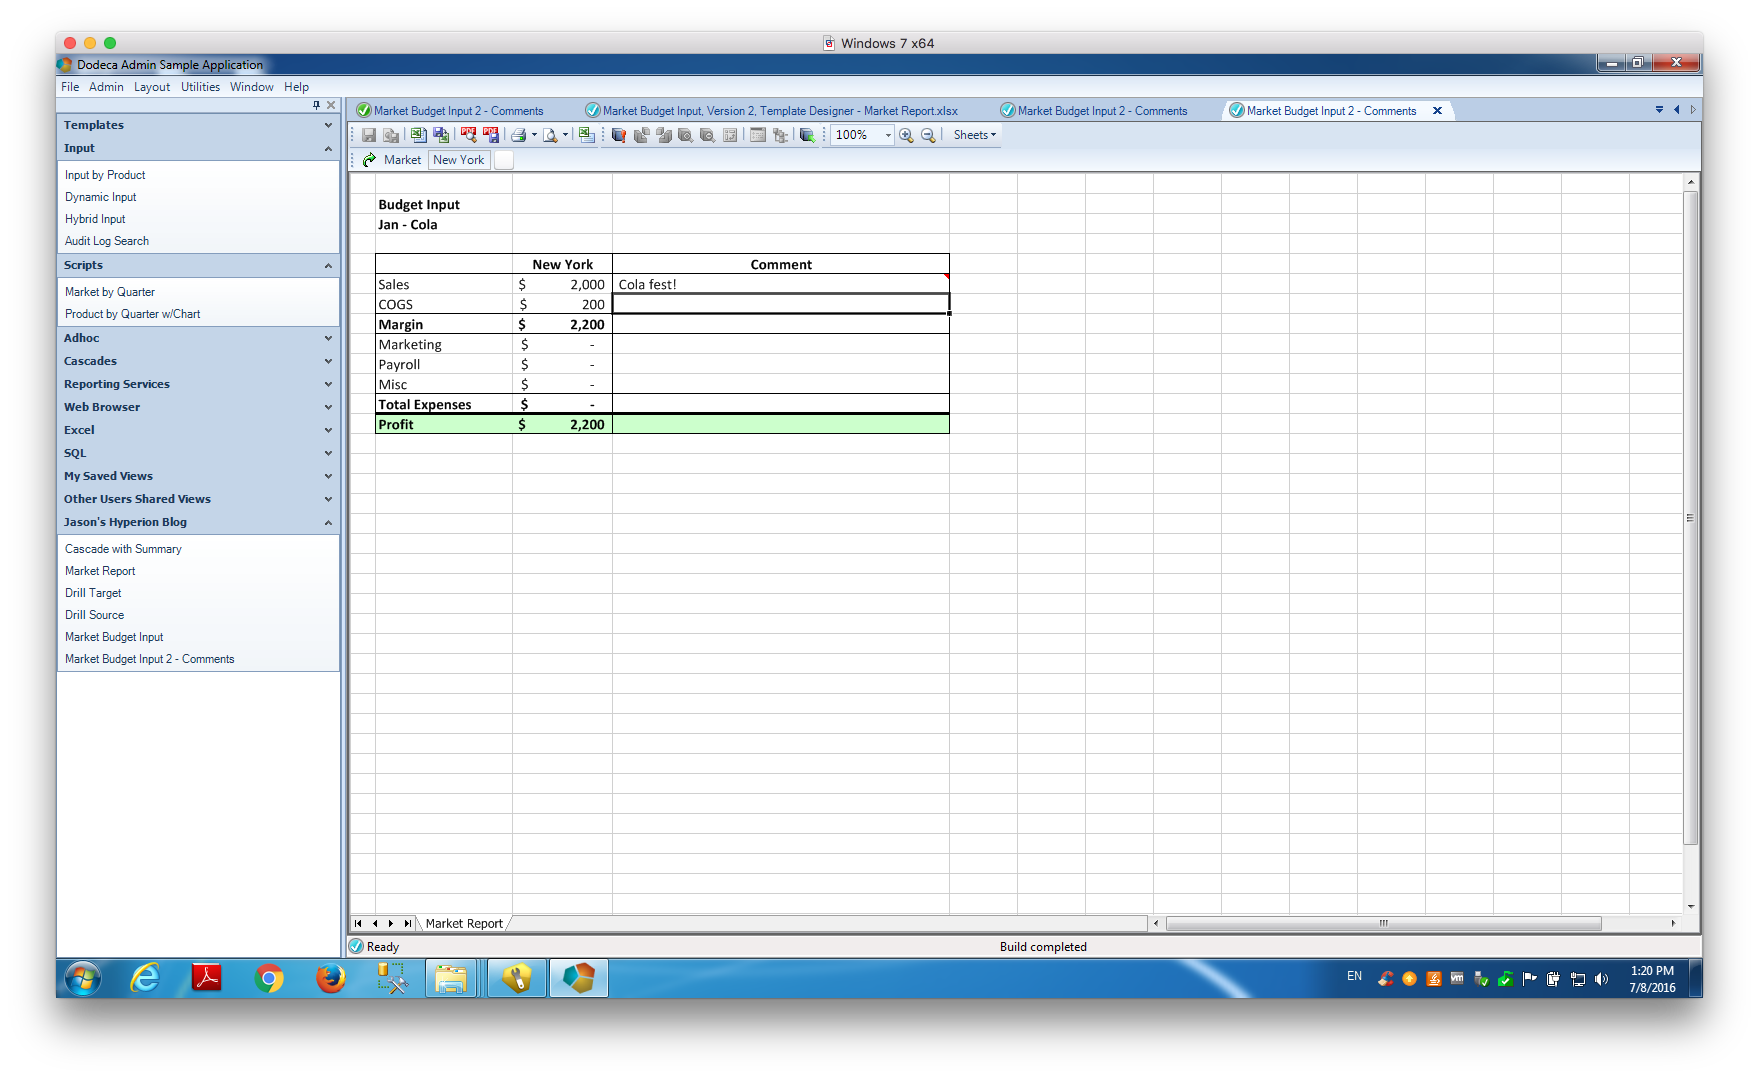
Let’s go ahead and take a look at how this looks on the spreadsheet and the user experience. With my view all configured, let’s run it and take a look:
The Insert Row button on the toolbar is enabled when the cursor is inside a value input range
I apparently have two employees in this absolutely fictitious company. As you can see, there’s myself, and then there’s Cameron Lackpour. Apparently Cameron likes CALC ALL;. He also really likes load rules, low block density, and inputting to upper level members. But that’s neither here nor there. Anyway.
You can see in the spreadsheet that my cursor is located within the data table somewhere. Because of this, the Insert Row button is active. Take a look at the button toolbar and about in the middle you can see there are some table row-related icons. The Insert Row button is the third button to the left of the “100%” zoom indicator. I simply click on that to insert a new row to the table:
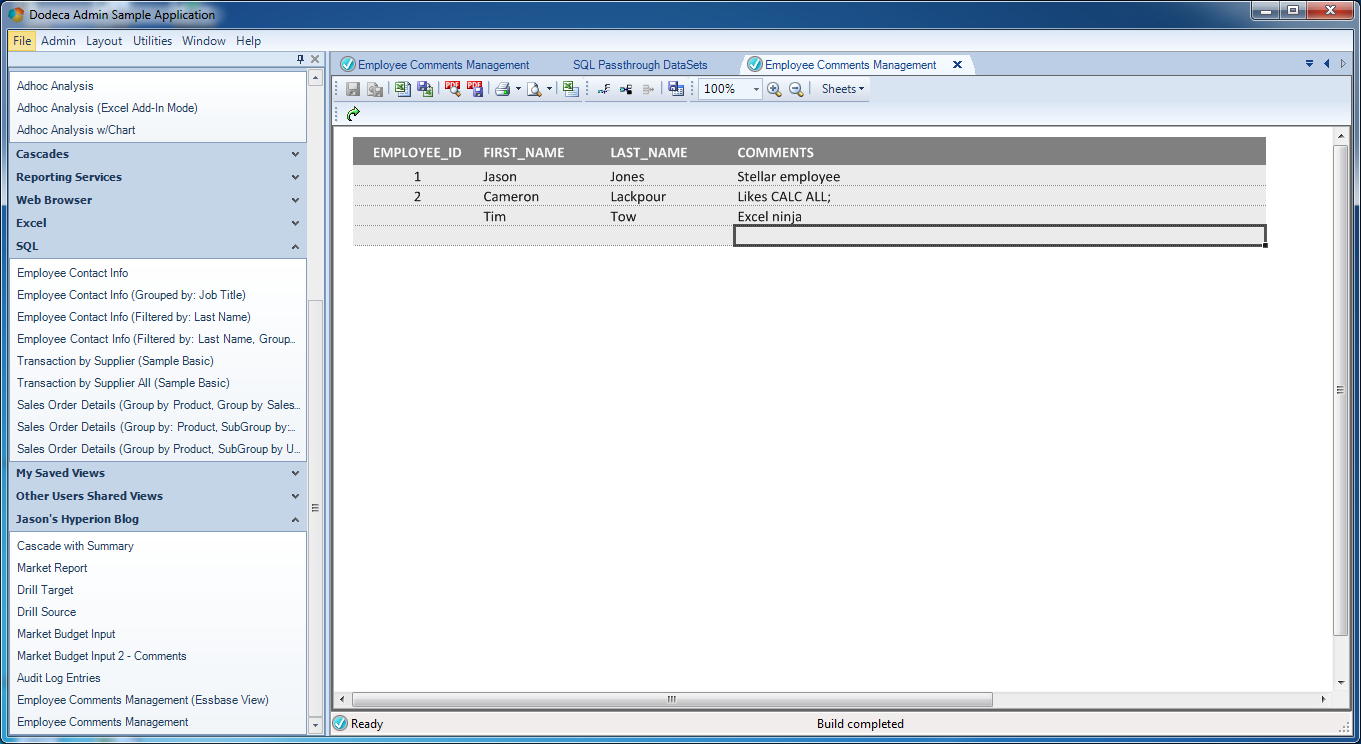
Finished entering data to be sent to the SQL database, but not saved yet
As you can see, I’ve added a new employee and comment. It’s Tim Tow and he apparently knows a thing or two about Excel. The row has not been sent to the database just yet. I will use the Save button on the toolbar (directly to the left of the 100% zoom indicator) to save this row.
Remember, behind the scenes, Dodeca knows that the value of FIRST_NAME is 'Tim', LAST_NAME is 'Tow', and COMMENTS is 'Excel ninja'. So it takes care of all of the ugly work of turning those raw inputs into a valid SQL query, using the statement we provided, talking to the relational database, getting the result back, and in this case, immediately executing the post-insert SQL statement. Immediately after pressing Save, our sheet looks like this:
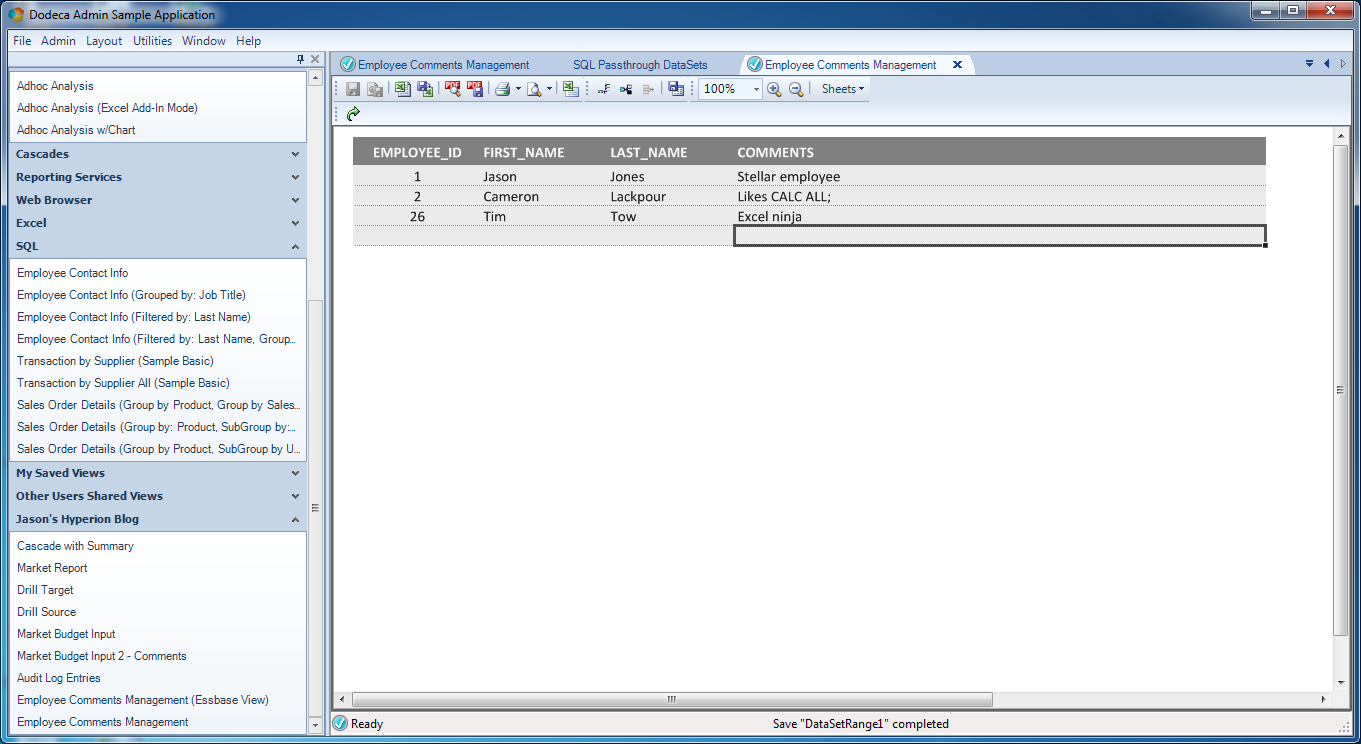
New row saved and primary key value is automatically updated
It’s basically the same, save for one thing: the newly generated primary key for the row we entered has been pulled back (along with the rest of the new row) and dynamically updated into the view – with no refresh needed.
Conclusion
This was a very long article that covered aspects of architecture, Essbase anti-patterns, Cameron Lackpour’s love of load rules, and a real example of using Dodeca to write back to a relational table. There are many more nuances to the SQL data editing/updating that I’ll explore in future posts, such as updating existing rows, deleting rows, data grouping and more. But I wanted to give a practical crash course on the basics of this incredibly useful feature. Relational data input is an incredibly useful and important ability to have in so many organizations, and yet when the need for this type of capability arises on the Hyperion side of things in many organizations, all too often there isn’t a compelling, cohesive, and maintainable way to achieve it – but Dodeca does it.