I’m going to take a small detour from my series on data input in Dodeca so that I can lay the foundation for the next article. Lately I’ve talked about how we can get user input in Dodeca, how users can add comments to their input in Dodeca, and how we can audit the input data by tapping in to the Dodeca audit log tables. As a small preview of where the data input series is going, in the near future I’m going to look at how we can input data to a relational database from within Dodeca.
Prior to that, of course, I’m going to do a brief introduction to relational data in Dodeca. There are a handful of configuration items that need to occur. There’s a little more to it than just dropping in a SQL SELECT statement, but as you’ll see, there is a lot of power and flexibility that will be available to use with just a few clicks.
Define the SQL Connection
The first thing we need is to tell Dodeca about our SQL connection. This is about as standard as it sounds. It’s worth noting that Dodeca allows for an arbitrary number of SQL connections and supports a wide variety of databases, owing to the fact that the Dodeca middle-tier is written completely in Java. This means that, as with software such as Drillbridge, anything with a JDBC driver is fair game – including Oracle, Microsoft SQL Server, DB2, MySQL, and many others.
As with before in the Dodeca data input series, I am using a MySQL schema, since I like running my development instances son a lean and mean Linux VM:
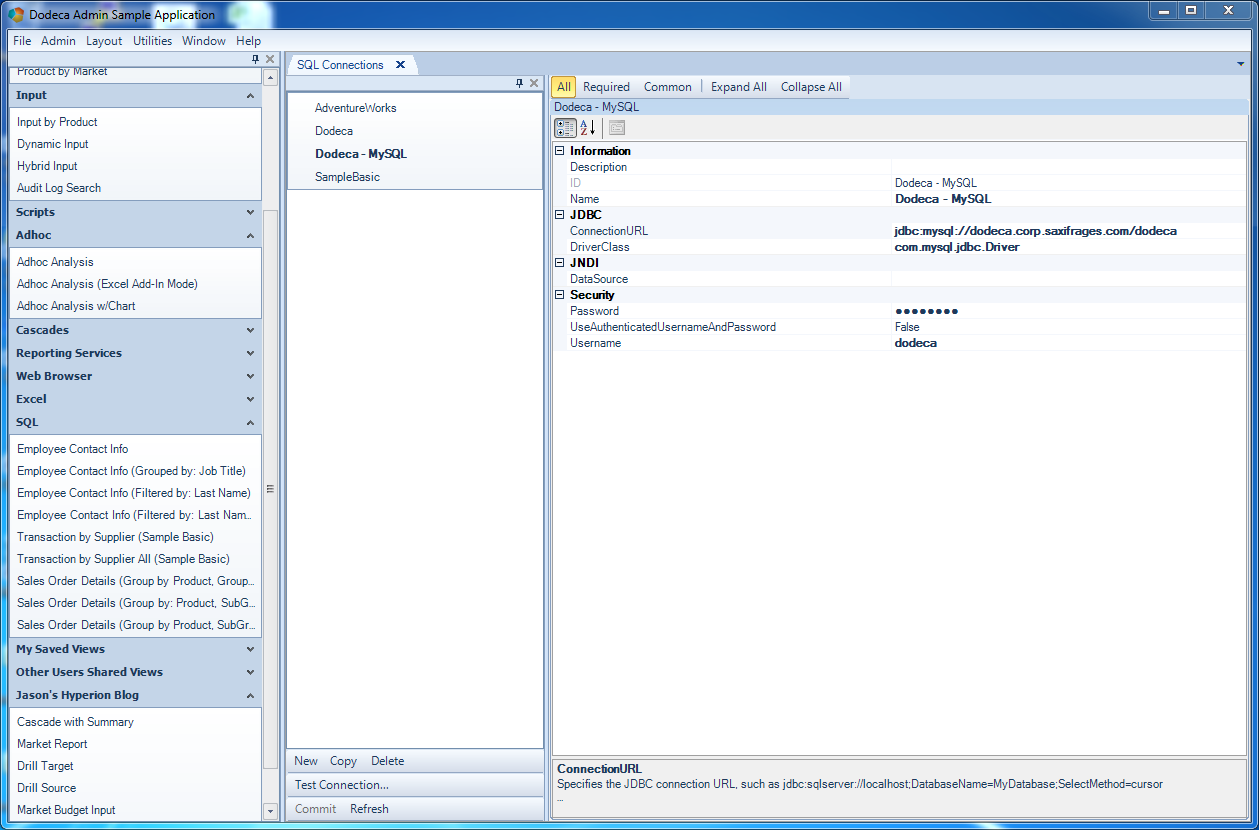
Viewing SQL connections in Dodeca client
Note that SQL connections only need to be setup once and then used over and over again. You don’t need to redefine them every time you have a new view. Most organizations will have anywhere from one to a dozen or so different connections, many times to quite a variety of data sources that they are pulling together.
Create the SQL Passthru DataSet
Given a SQL connection that we want to query, we need to create a SQL Passthru DataSet (SPTDS). Try to think of think of this as a collection of SQL queries defined along with several configuration options. In other words, we’re not just dumping a SELECT statement into our view or system somewhere and ending up with an unmaintainable mess. For this simple example, when I create the SQL Passthrough DataSet, I’m configuring which SQL Connection (defined earlier) to use, and defining one or more queries associated with the data set. Note in this example I just have the one query I care about:
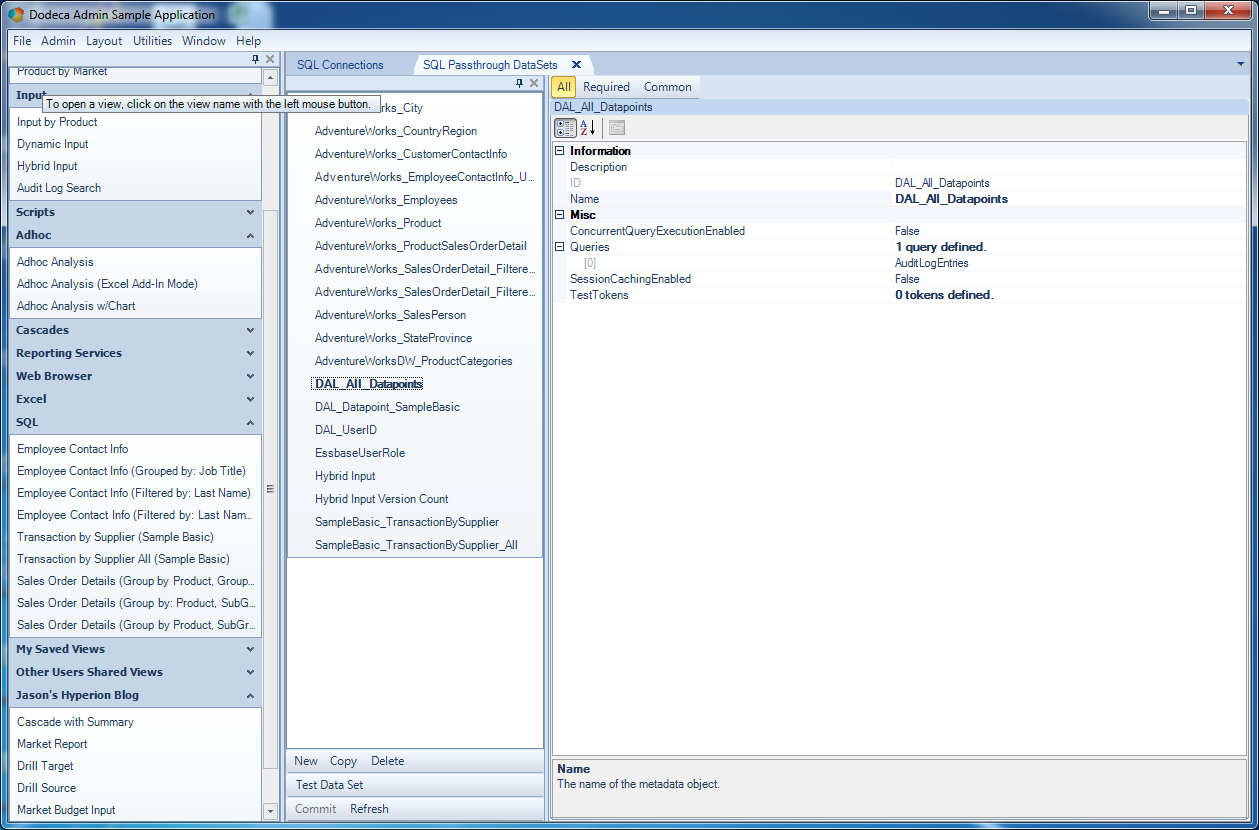
Dodeca SQL Passthrough DataSets editor
Add the Query to the DataSet
Now that I have my SQL Passthru DataSet created, I will add a query to it. The following editor is used to do this:
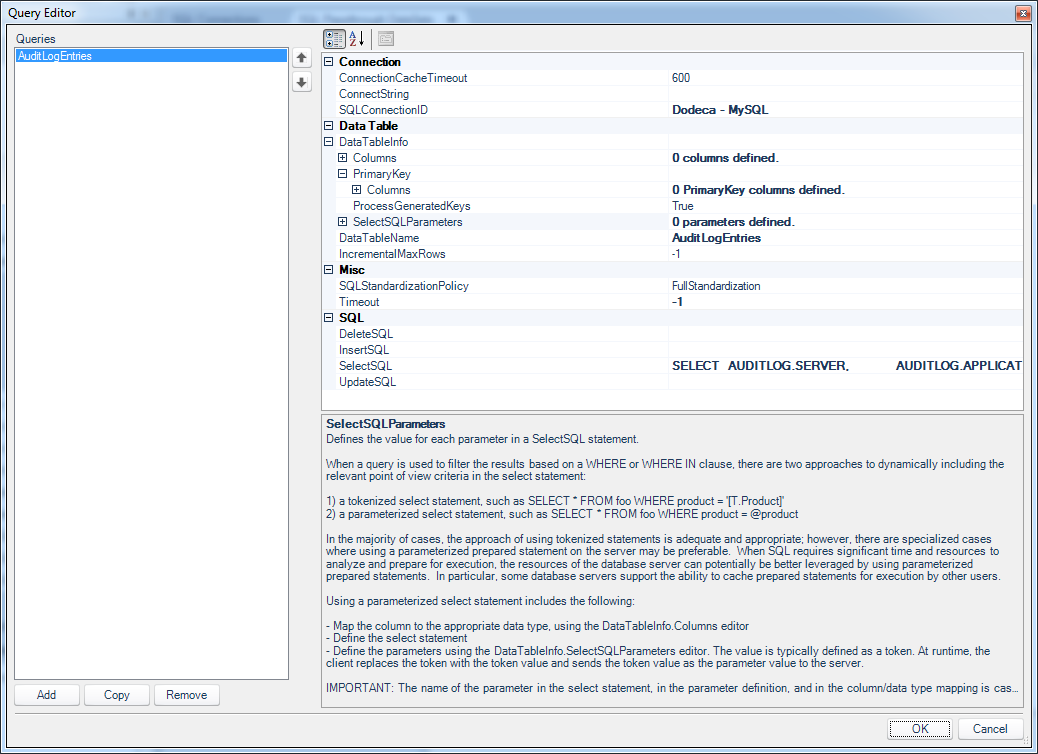
Query Editor window for a SQL Passthrough DataSet query
The main thing I am doing on this screen, clearly, is defining the query itself, which is accomplished by editing the definition for the SelectSQL property:
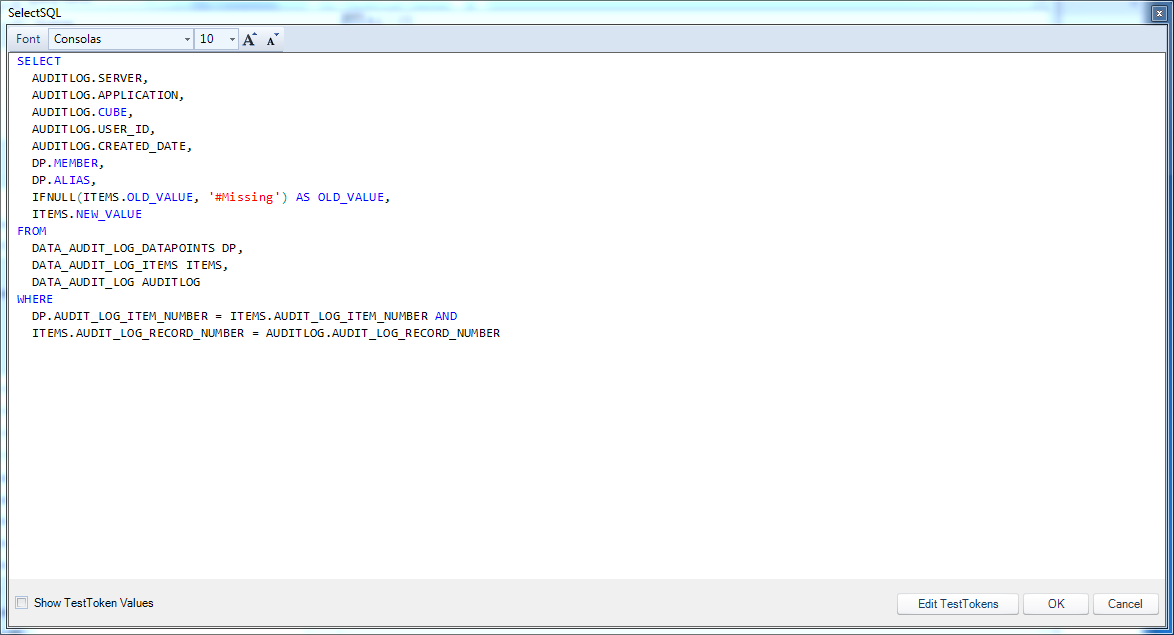
Editing actual query text in the query editor
This query is from my previous post on tapping in to the Dodeca audit log tables. Here’s the query for reference:
SELECT
    AUDITLOG.SERVER,
    AUDITLOG.APPLICATION,
    AUDITLOG.CUBE,
    AUDITLOG.USER_ID,
    AUDITLOG.CREATED_DATE,
    DP.MEMBER,
    DP.ALIAS,
    IFNULL(ITEMS.OLD_VALUE, '#Missing') AS OLD_VALUE,
    ITEMS.NEW_VALUE
FROM
    DATA_AUDIT_LOG_DATAPOINTS DP,
    DATA_AUDIT_LOG_ITEMS ITEMS,
    DATA_AUDIT_LOG AUDITLOG
WHERE
    DP.AUDIT_LOG_ITEM_NUMBER = ITEMS.AUDIT_LOG_ITEM_NUMBER AND
    ITEMS.AUDIT_LOG_RECORD_NUMBER = AUDITLOG.AUDIT_LOG_RECORD_NUMBER;
Also note that there are a handful of configuration options relating to the primary key and columns. For this simple example I’m going to stay away from defining those since I don’t need them. In a future post I will go into what those options are and how they can be useful. The important thing to consider for now is that for the most part, Dodeca chooses sensible defaults for me and I can grab the functionality I need without having to worry about setting a million options first.
Create the View
Now I have my SQL connection, a SQL Passthru DataSet, and a query defined. This effectively takes care of all of the non-view specific functionality that I need. Put another way, nothing I defined so far was specific to the view that I’ll be creating in a moment. The objects created so far are all things that can and likely will be reused on other views, saving myself development effort down the road.
Now I want to create my simple view to show the data that I’ve modeled. For my purposes here, I can create a very simple view. Recall that I’ve created a SQLExcel view as opposed to the views I’ve shown earlier in this series that focused on Essbase (don’t worry, it’s possible to put Essbase and relational data on the same view – stay tuned for a future post on that).
For my SQL Excel view, I’m just going to define labels on my top row, apply some very light formatting (bold text), and then freeze the panes so that when I scroll down, my headers will be retained. I have also defined a named range that is as wide as the number of columns I have and is two rows tall. This named range is important because in a moment I am going to configure the view so that it knows to put the SQL data it retrieves there.
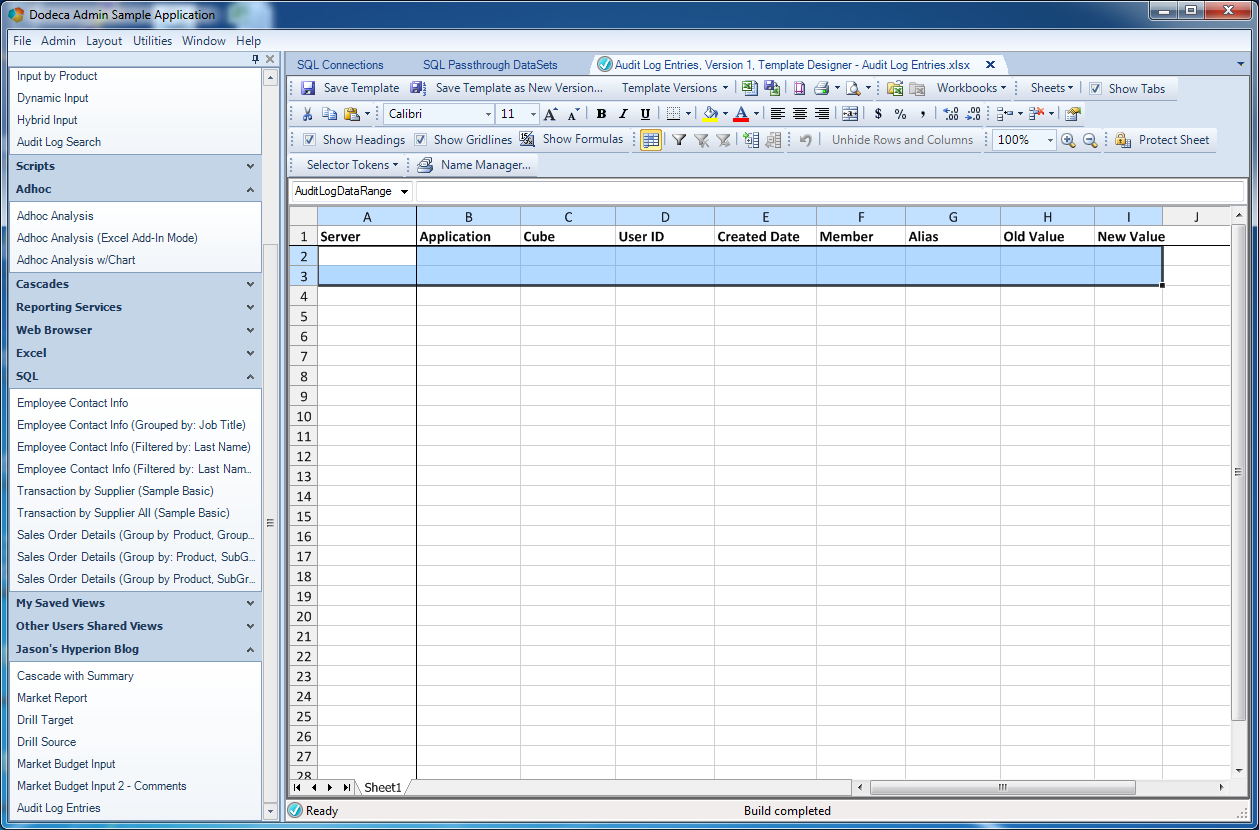
Dodeca SQLView Excel template
With the view template saved, I can now go over to the view editor and configure a few things so I can “glue” this view (so to speak) to the SQL data I defined earlier. The main property to consider is this SQLPassthroughDataSet Ranges category, which contains one item, DataSetRanges:
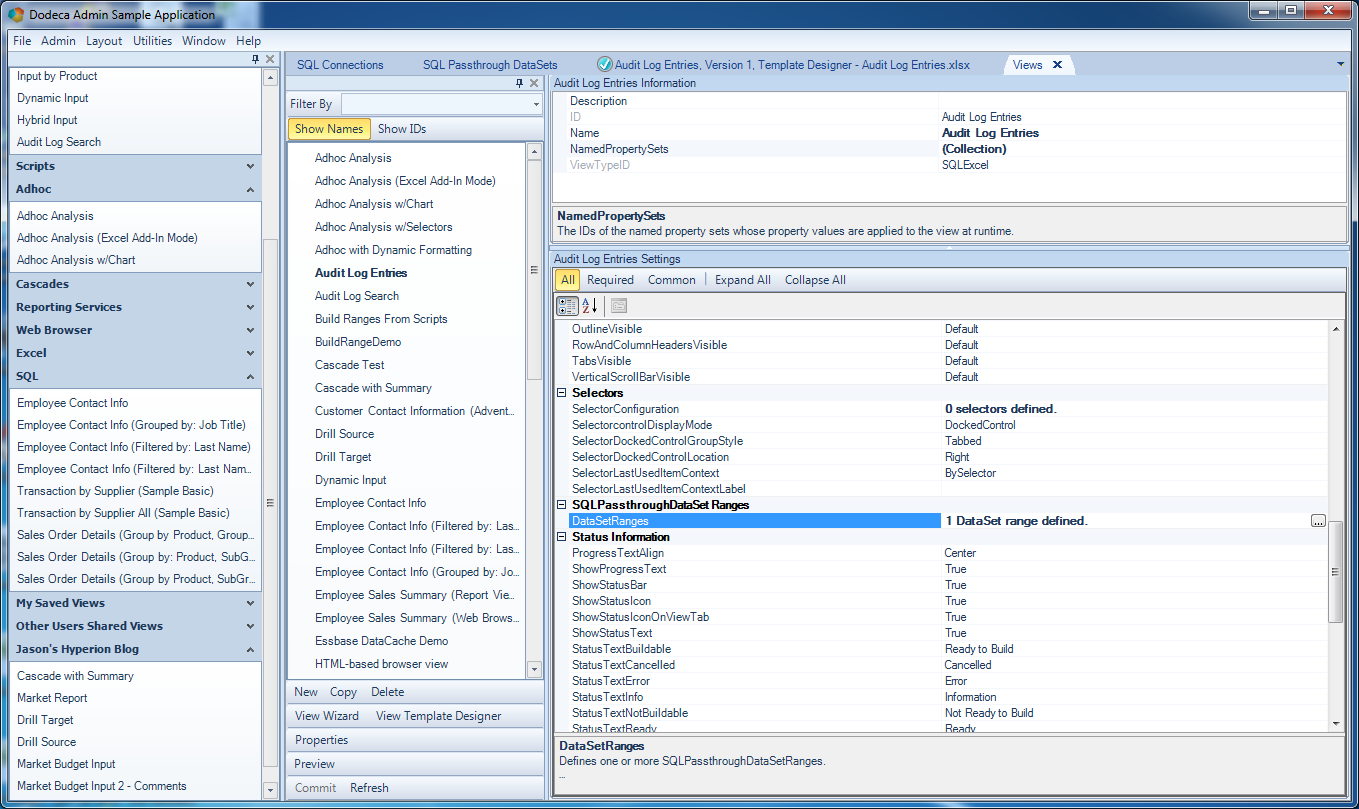
Upon editing it, I am presented with the DataSet Range Editor. All I have to do here is define my SQLPassthroughDataSetID to point to the dataset I defined earlier (helpfully, they are presented in a dropdown box so I just select it from a list), and then define a DataTableRange.
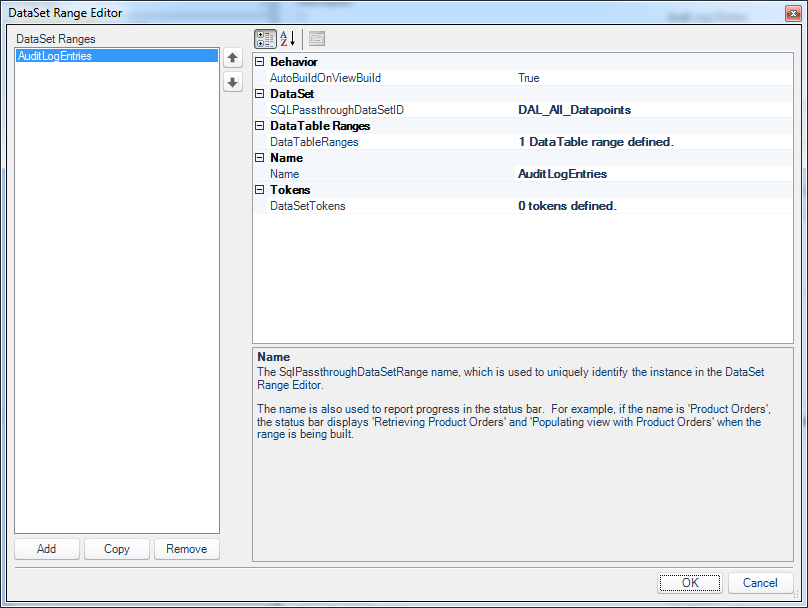
Dodeca DataSet Range Editor from Edit View screen
A Quick Note on Solution Architectures
Before going further, I want to step back for a moment and try to alleviate any qualms you might have in terms of the configuration we’ve done so far. If you’re feeling overwhelmed with all of these objects – SQL connections, SQL passthrough data sets, SQL queries, SQL data ranges – I can understand. You might be thinking “Why can’t I just drop in a SQL query and be done with it?”
Well, for a simple SQL Select example, that might seem simpler. But our solution is going to grow. And before long we’re going to want multiple SQL connections, queries, the ability to update rows, delete rows, sort data, group data, and more. And we’re going to have some absolutely incredibly power and flexibility in our hands – and it’ll be maintainable. We don’t want impenetrable walls of SQL code that breaks all the time, and this way of modeling things with connections/data sets/data ranges has been crafted incredibly carefully to offer performance, maintainability, and flexibility (just trust me).
Create the DataTableRange
In a lot of ways, the DataTableRange is where the magic happens. This is the last item we need to define before we can build our view. I don’t actually have to define much here in order to get things to work. I have to tell it where the data from the SQL query should go (my DataSheetRangeName, which corresponds to the defined name on the spreadsheet template), and a couple of other options. By default, the headers from the SQL query would come back along with the data, but I don’t want or need those in this case, because I put in my own “nice” headers on the template, so I can turn those off. This is the SetDataFlags option of NoColumnHeaders. Easy enough. You know what else I want? How about Filtering options that I know and love from Excel? Let’s turn that on with the click of a button by simply setting AutoFilteringEnabled to True.
Didn’t I just tell you that we would have some absolutely incredible power available to us with just a few clicks? That’s a prime example. No funky SQL code to write, no magic in the spreadsheet – just turn on that option and now I’ve got all of Excel’s powerful filtering abilities on any data set that comes back.
That’s all I want to configure for this data range for now. In total my options look like this:
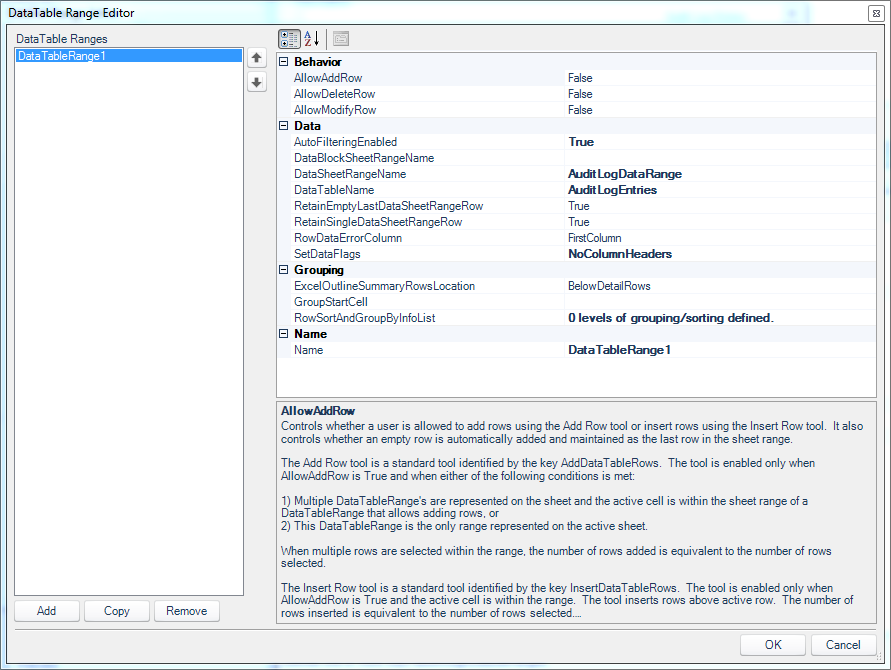
Dodeca DataTable Range Editor screen
Build the View
We made it – we have our SQL connection, data set, and data range definition. Future views that use this data will be able to shortcut and jump right into the view definition since we’ll be able to reuse the objects we setup previously, saving us development effort. Time go go build the view:
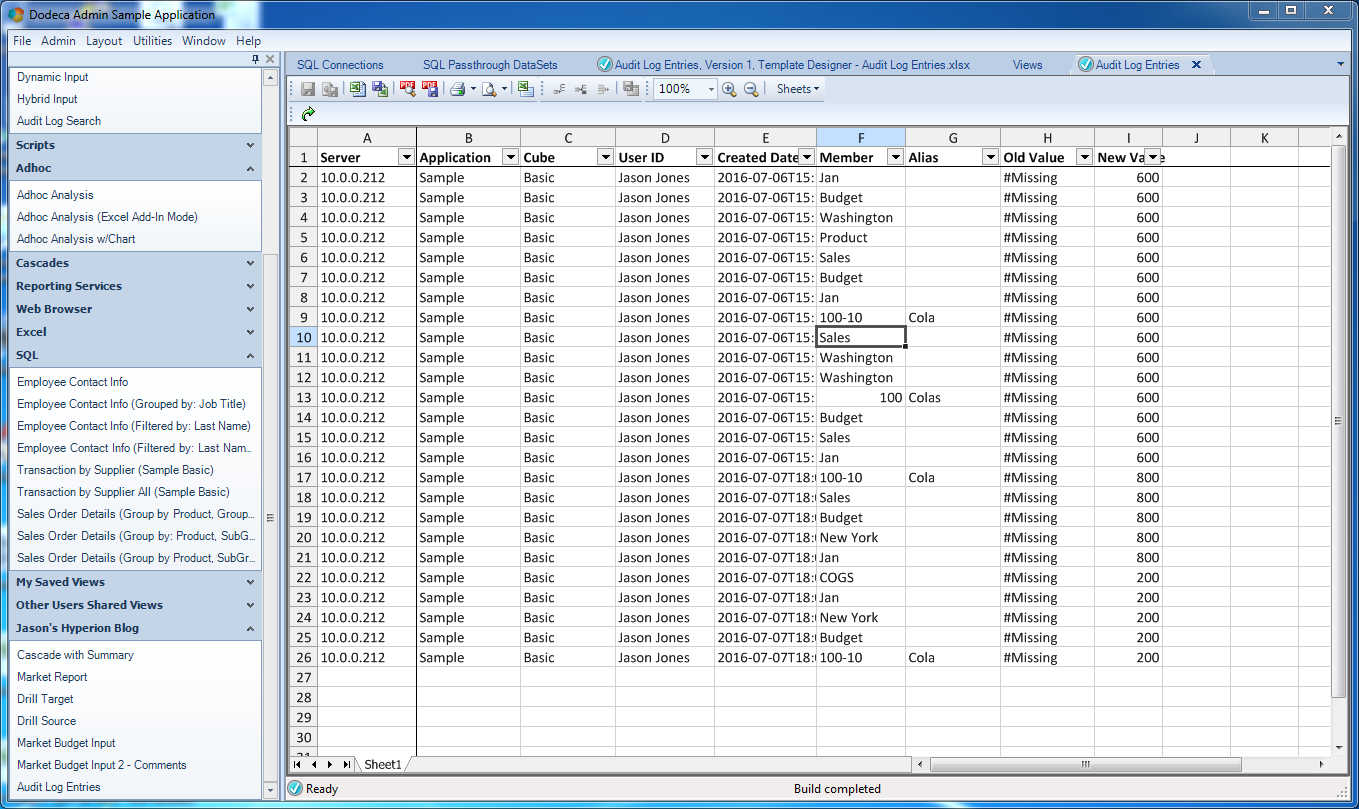
A Dodeca SQLExcel view built with data from the internal Dodeca audit log tables
The data in this view should look familiar from the previous post on playing around with the Dodeca Audit Log. And again, note the filtering boxes in each header row, where I can, say, filter on the Member column in order to see only rows that were modified that involved Cola.
[…] of the blog posts leading up to this one was a quick crash course in how to put relational data into a Dodeca view, so if you’re fuzzy on that, then I suggest you take a look at that. But in a nutshell, […]
[…] simple SQL Select statement). This post will assume that you’re up and running already with Dodeca’s SQL Passthrough DataSets, which I have written about before, so head over for a refresher if you need it. Also, I’ll […]
Is there any trail version available online to download for testing purpose ?
Certainly — please visit Applied OLAP and request more information!