Dodeca Spreadsheet Management System customers have been asking for HFM support for quite some time (some for years!) – and now we have it. For the last few months we have been testing out the new Dodeca HFM Connector with very compelling results. In order to understand how to use this new connector in your existing Dodeca environment, it’s important to understand a bit about how this connector works, and how to deploy it. I’ll cover this and more in this blog post.
Architecture
Dodeca is generally deployed with two major components: the Dodeca server itself and an Essbase web services component. Internally we generally call these the “metadata servlet” and the “Essbase servlet”, respectively. They are traditional Java servlets that can be deployed in WebLogic, Tomcat, or your preferred servlet container. The metadata servlet is absolutely essential as it is the heart of your Dodeca system. The Essbase servlet (or connector, if you will) is used by the Dodeca client to communicate with an Essbase server – our desktop client doesn’t communicate with an Essbase server directly. The Dodeca Essbase servlet is written in Java and uses the Essbase Java API to communicate with an Essbase server. This allows Dodeca to work with just about any version of Essbase, including Essbase on the cloud. It’s not uncommon for customers to deploy multiple versions of the Dodeca Essbase servlet simultaneously in order to use multiple differently versioned Essbase servers in Dodeca at the same time. For instance, you might deploy Dodeca Essbase servlets for a System 9 server, an 11.1.2.4 server, and an Essbase 19c/OAC Essbase server all at the same time. You could even develop a view in Dodeca that uses data from all three of these connections on the same grid (and of course you can even put relational data on the same view as well).
That brings us to the new Dodeca HFM Connector – the way that we’ve implemented this is that Dodeca thinks it’s talking to a normal Dodeca Essbase servlet – but there isn’t an Essbase server/cube on the other end, it’s in fact an HFM application. Setting aside for a moment why we might want to do this, what does this mean for organizations that want to use HFM with Dodeca?
It means the following things:
- Any version of Dodeca can now use HFM as a data source – no upgrade necessary (although you might want to upgrade anyway)
- Since Dodeca supports multiple Essbase connections in a single view and thinks that your HFM data is just Essbase data, you can combine Essbase and HFM data in the same view
- All your favorite Dodeca functionality such as commentary, drill-through, Workbook Scripts and more just works
Installation
The Dodeca HFM Connector is developed as a standalone web component as opposed to being added to an existing WebLogic/Tomcat instance. In the future we may add a traditional servlet deployment option, but the standalone approach has been very effective for Drillbridge, so we are using it here as the default choice. Setup is pretty straightforward, but there are a couple of special steps during installation that you need to make sure you perform.
First, extract the files from the zip into the location you want to locate the connector. In this example I’m just installing it on the C: drive of a server:
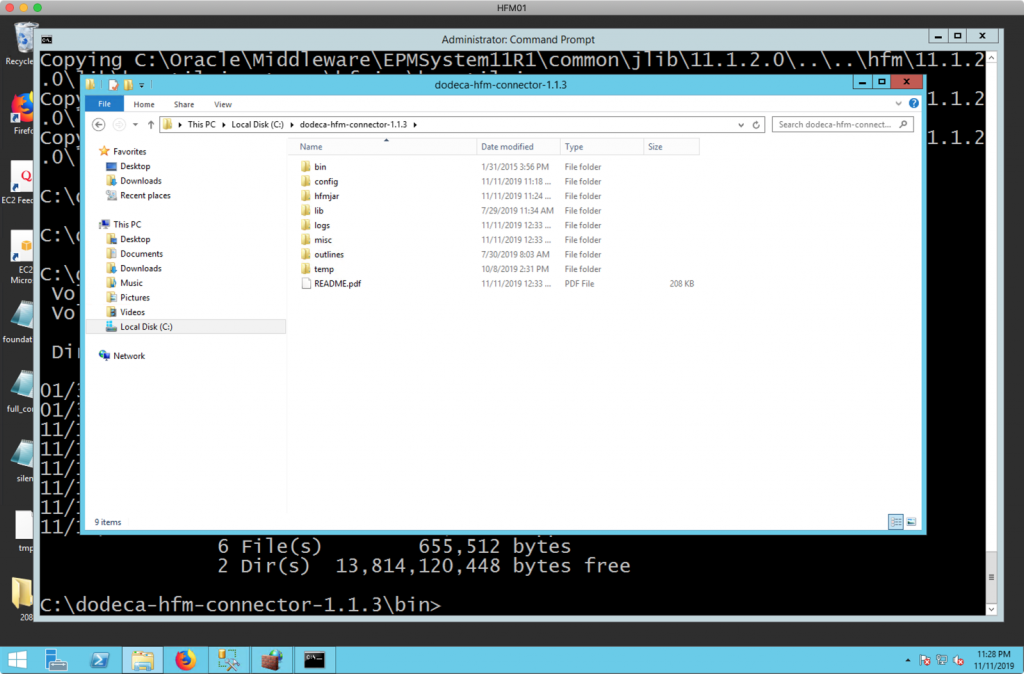
The extracted folders include the following:
- bin: binaries for running and installing the connector
- config: configuration files and where you add your own reg.properties file
- hfmjar: where you need to add the HFM Java JAR files from your HFM server
- lib: the Java libraries that the Dodeca HFM Connector uses itself
- logs: log files
- misc: miscellaneous files/utilities not needed during runtime
- outlines: the HFM connector will store outline caches here (if any)
- temp: temporary files used during execution
- README.pdf: notes on how to install and more
There are two major steps you need to perform to setup the connector: you need to get the HFM Java JAR files from your HFM server, and you need to get your reg.properties file from your EPM server.
The HFM Java JAR Situation
Developing Java programs with HFM is a little different than I typically see compared to other systems. In a more traditional deployment, you would have one or a handful of Java JAR files. This is the case when working with the Essbase Java API – there are 3-4 JAR files you need that you can just copy and add to your Java project and then be on your way.
Developing Java programs that work with HFM is ostensibly the same process – but not quite. Theoretically you can just bring in the epm_j2se.jar and epm_hfm_web.jar files and call it a day. And if I were developing a single Java program that ran on the HFM server itself, then that might be okay. There are several somewhat unorthodox things about the HFM JAR situation, though.
One, there’s nothing actually in the aforementioned JAR files – but they contain references to other JARs on your EPM system. And those JARs contain references to other JARs, and so on – it’s a long list, and deep. In fact, the full list of referenced JARs is almost 400 files. So that sort of rules out just copying and pasting a couple of files around. The other nuance to this JAR situation is that it would require me to locate my component (the HFM connector) on the HFM/EPM server itself, which isn’t necessarily a dealbreaker – but my customers have indicated a strong desire to be able to put the HFM connector on an arbitrary server and to not be forced to locate it on the existing HFM/EPM server.
Enter Jarnivore
The Dodeca HFM Connector ships with a Java program called Jarnivore (located in the misc/ folder mentioned earlier). Jarnivore is a command-line tool that provides several capabilities for working with a set of JAR files like HFM’s. The most notable capability is that given one or more primordial JAR files, it’ll follow the references inside of them and collect every single dependent JAR file. It can then print out the list/tree or copy the files to a folder you specify.
As the HFM connector does not ship with HFM JARs itself, it is imperative that you use Jarnivore to “extract” the HFM JARs from your server and copy them into the hfmjar/ folder where the connector is installed. This accomplishes a couple of things for you: one, you will end up with a set of JAR files that is completely matched to your HFM environment (including the exact patch version you are on), your exact version of Hyperion Shared Services, and last but not least: it lets you install the HFM connector on essentially any server you want. You can run the HFM connector on a Linux server even if your HFM server is installed on Windows.
Do note that the HFM connector itself requires Java 1.8, although Jarnivore only requires Java 1.6 or later. Your HFM server already has Java installed on it (somewhere, at least), so you can use the existing install of Java on your HFM server to run Jarnvore.
Running Jarnivore
Let’s take a look at running Jarnivore to pull out the HFM JAR files by first launching a terminal on the HFM server. First I am going to verify that the EPM_ORACLE_HOME environment variable is set by just attempting to print it out:
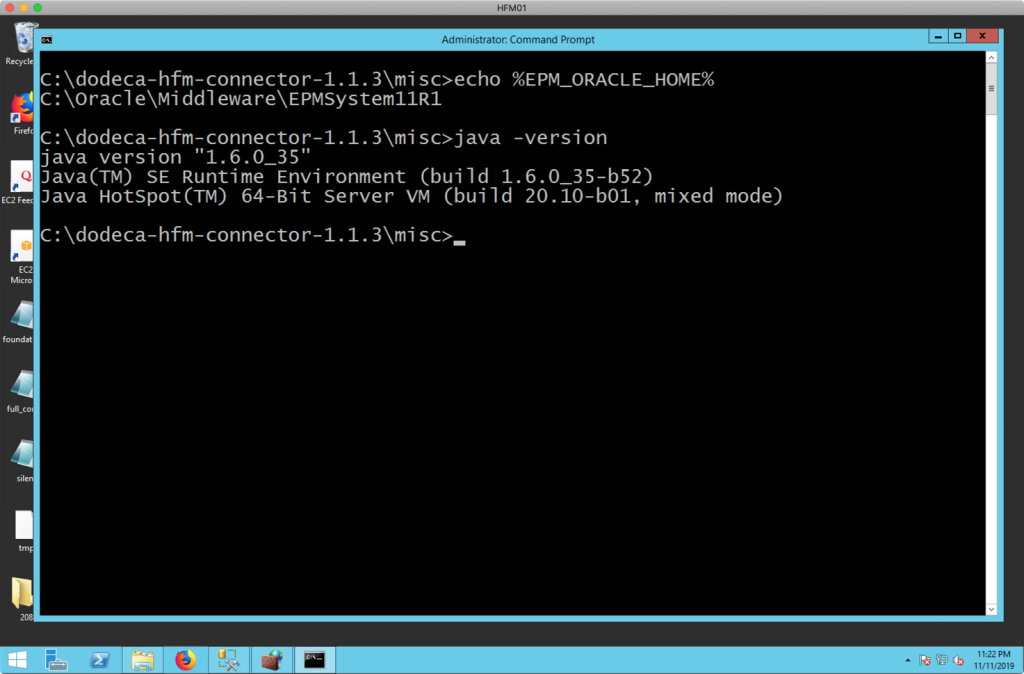
Right after I validated the value of EPM_ORACLE_HOME, I then run java -version to check that Java is on the current PATH and is at least version 1.6. Again, since EPM ships with Java 1.6, you should have at least that version available, although it’s not a guarantee that it’s on the path. If you don’t have Java on the path, you can just fully-qualify the reference to Java using its full folder and filename, but I find it’s easier to just add the folder containing java.exe (or just java on Linux) to the PATH and be able to reference it without any folders.
You can run Jarnivore without any parameters and it’ll print out some usage information:
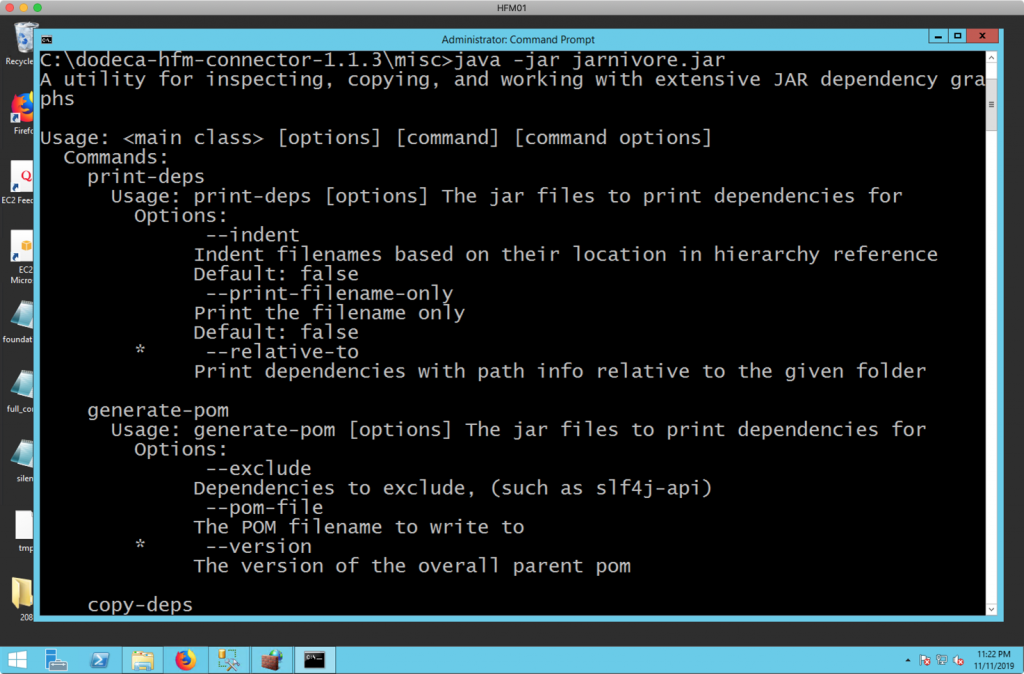
The above screenshot shows that there is a print-deps command (a command to print the JAR reference/dependency tree in hierarchical format), to generate a POM file (don’t worry about it, just used internally), and the copy-deps command, which is what we want (to copy all of the found dependencies into a single folder). Given that the EPM_ORACLE_HOME environment variable is properly set and Java is available on the PATH, we can run the following single-line command from the misc/ folder in order to copy all of the found HFM dependencies into our hfmjar/ folder:
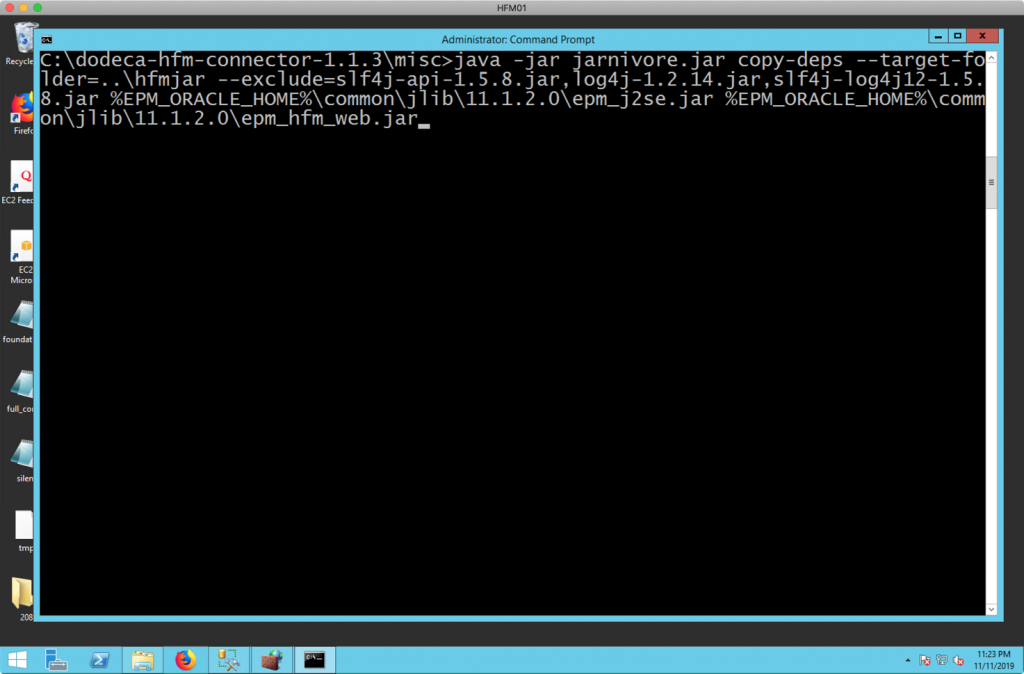
java -jar jarnivore.jar copy-deps --target-folder=..\hfmjar --exclude=slf4j-api-1.5.8.jar,log4j-1.2.14.jar,slf4j-log4j12-1.5.8.jar %EPM_ORACLE_HOME%\common\jlib\11.1.2.0\epm_j2se.jar %EPM_ORACLE_HOME%\common\jlib\11.1.2.0\epm_hfm_web.jar
Let me break this command down a bit. Again, it’s a single line. From left to right:
- java: run Java itself
- -jar: tells the Java executable that the next parameter will be a runnable JAR file that we want to run
- jarnivore.jar: the Java JAR file we want to run
- copy-deps: this is the first parameter to Jarnivore itself. Jarnivore has several commands it supports, and the one we want here is called
copy-depsin order to copy all of the found dependencies into a specified folder - –target-folder=..\hfmjar: specifies that the target folder (where to copy the found JAR files is up one folder and in the hfmjar subfolder. Again, recall that we are running this command while our current working directory is the
misc/folder itself, so we need to specify a path relative to the current one. You can specify any folder you want here and then copy the files over in one operation, or you can just put the JARs directly where they need to go. - –exclude=slf4j-api-1.5.8.jar,log4j-1.2.14.jar,slf4j-log4j12-1.5.8.jar: this tells Jarnivore NOT to copy the files if they match one of the specified names here. This part of the command may change slightly in the future, but right now is required. These JAR names are all related to various Java logging systems. Since the HFM connector provides its own, we need to specifically exclude these from the HFM jar set so that we don’t have conflicts. The HFM connector provides its own appropriate JAR files such that the rest of the HFM JAR files are “happy” and not missing any required functionality.
- %EPM_ORACLE_HOME%\common\jlib\11.1.2.0\epm_j2se.jar %EPM_ORACLE_HOME%\common\jlib\11.1.2.0\epm_hfm_web.jar: last but most certainly not least, we specify the HFM JAR files to start scanning. These are the two main HFM JARs that you may know from experience working with the HFM Java API. While neither of these JAR files contains any actual code, they essentially point to all of the other JARs that you need. Jarnivore will start its scanning with these two, follow all of the references and sub-references, exclude anything in the exclusions list, and then copy everything over to the specified folder.
For convenience and ease of use, we can use the %EPM_ORACLE_HOME% environment variable to save some typing as well as make this more portable. Before execution, the pasted in command looks like this in the command window:
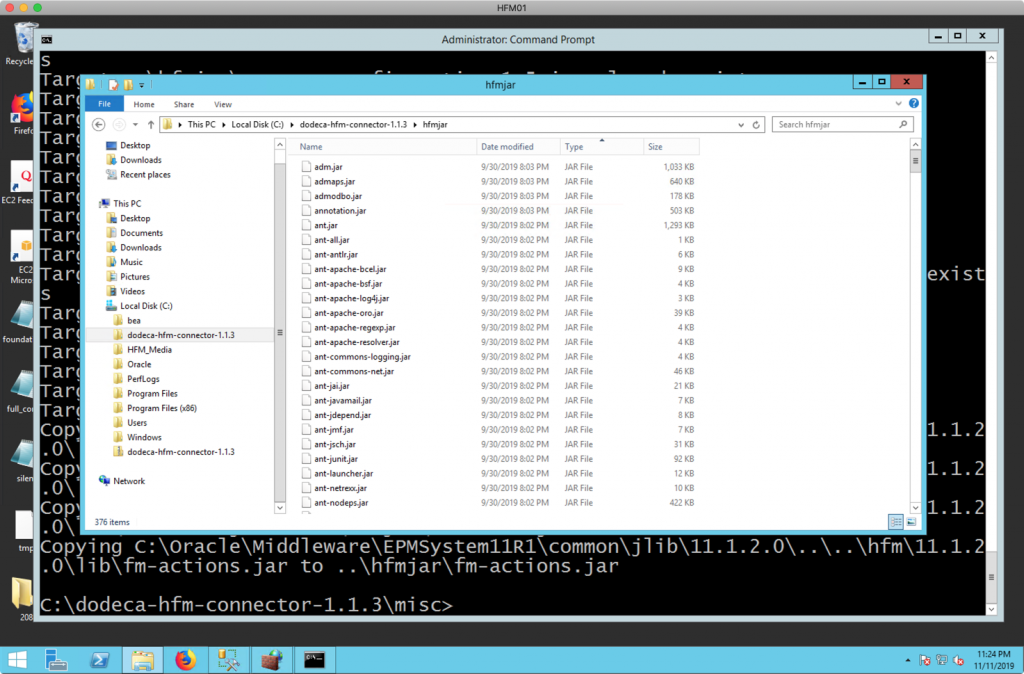
After executing, the tail end of output will look like the following:

More importantly, if I go to my hfmjar/ folder, I should see something like the following:
With the HFM JAR files in place, we need to get our reg.properties file in place. The reg.properties file is a configuration file on your EPM server. It contains the connection information to your Shared Services database. The HFM API startup sequence looks for this file, uses its information to connect to Shared Services, and then connects to your HFM server.
This startup sequence (connecting to a database and then the web service) is a bit unorthodox. Again, it’s neither bad nor good, but the more common configuration would be a “pure” web service without having to mess with the database. From a network security standpoint – and therefore a HFM connector deployment standpoint – you should make a note that the HFM connector needs to have network access to the Shared Services relational database on whichever port it uses (the default SQL Server port is 1433). If you’re unsure of what port your database is using, you can find this in the reg.properties file itself, as the first parameter is your JDBC URL (jdbc.url), and it contains a full JDBC URL that includes the server and port.
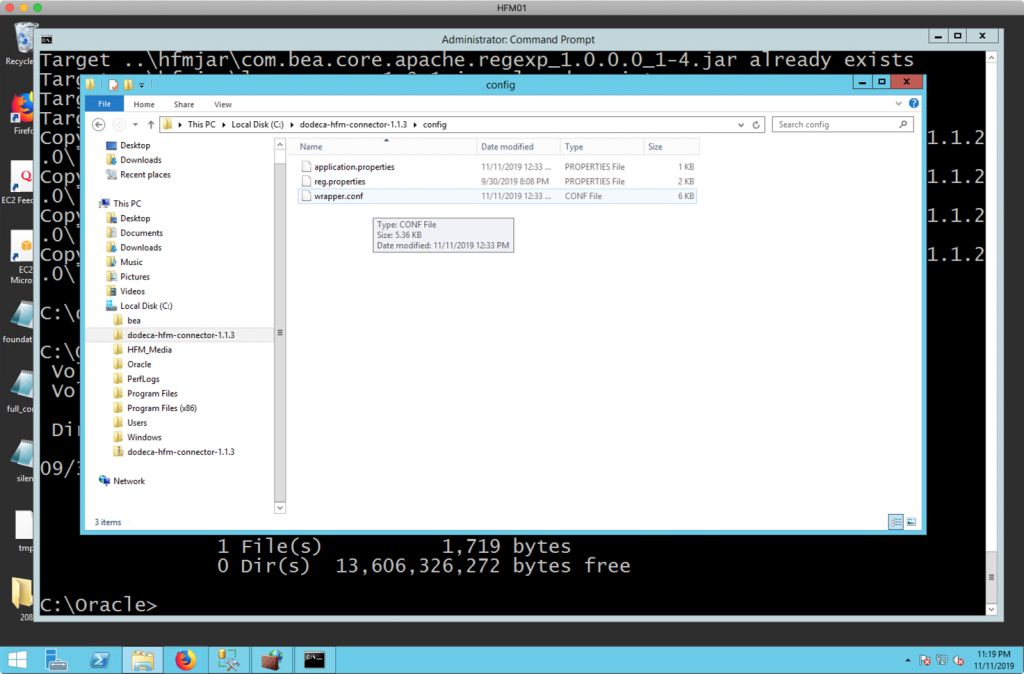
By default, you will be able to find your reg.properties file in %EPM_ORACLE_HOME%/../user_projects/config/foundation/11.1.2.0/reg.properties. For example, in a default install to the C: drive, this file might be at C:\Oracle\Middleware\user_projects\config\foundation\11.1.2.0.
Just copy it into the Dodeca HFM connector’s /config folder and you should now be set to start it up:
You can now start the Dodeca HFM Connector in “console” mode (by running dodeca-hfm console in the /bin folder) to test things out:
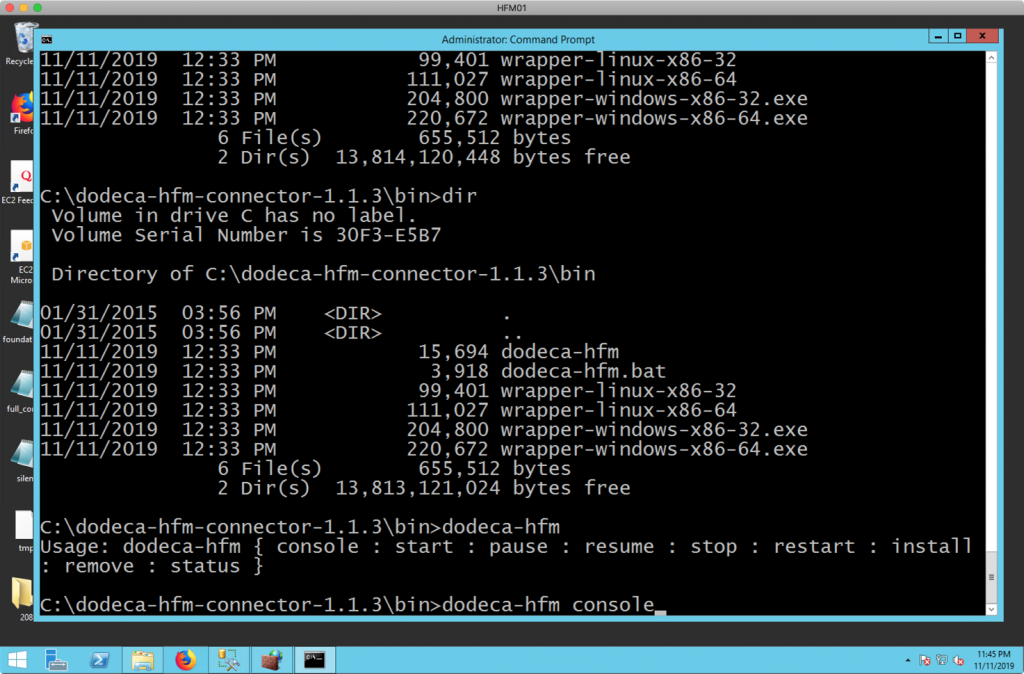
Console mode is a quick and easy way to watch the output of the service startup and make sure that nothing goes wrong. If you see a normal looking startup then you know that Java is installed correctly and of a suitable version, that you put your HFM JAR files in properly, and the reg.properties file was valid. After it starts up, you can leave it running in the command window or you may choose to stop it (Ctrl+C) and run the dodeca-hfm install command to install it as service. After installing you can then launch your new Windows service or just run dodeca-hfm start to start the service yourself. The Dodeca HFM Connector supports Linux too, but do note that each Linux system has its own nuances for installing the actual service (I almost always end up having to Google it depending on whether I’m on Ubuntu, Red Hat, or something else).
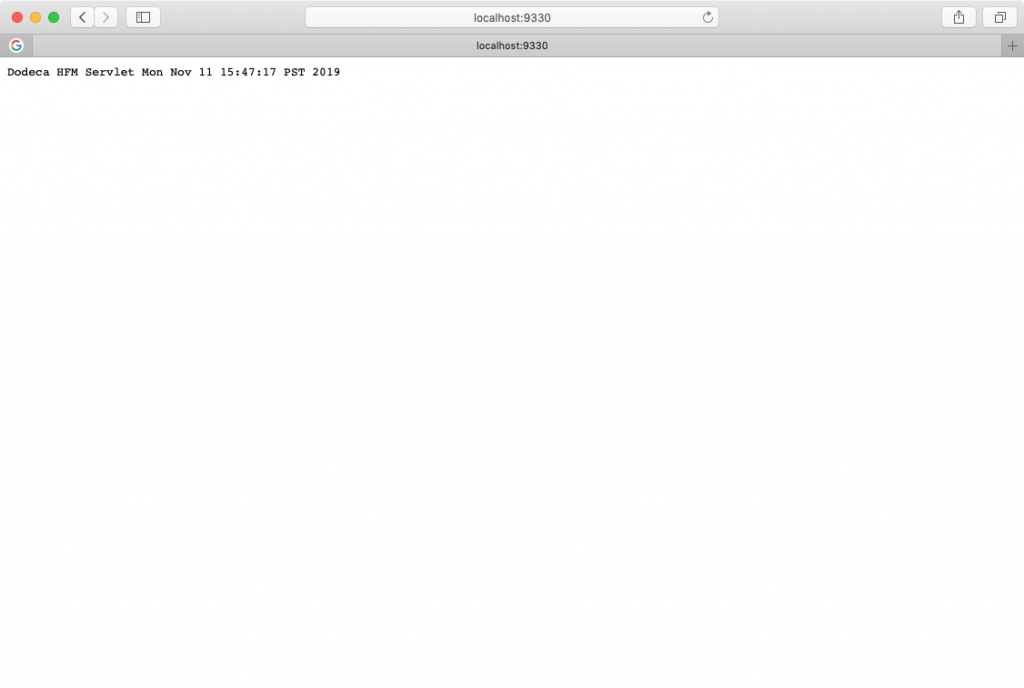
After the service successfully starts up, you can launch a browser to localhost or the server name on port 9330 to see if the service is indeed running:
Configuring a Dodeca HFM Connection
We’re now ready to go into Dodeca and setup an HFM connection. Again, recall that Dodeca just thinks this is a normal Essbase connection, so we are going to go to the Essbase Connections dialog to create the connection:

The notable settings here are Server, Application, Username, Password, and ServletPath. You do not need to set any other settings for now. The settings work as follows:
- Server: this is actually your HFM Cluster name, not the physical server name. The HFM connector knows what your actual server name is based on what the HFM API pulls out of your Shared Services database upon connecting using the reg.properties file – so it just needs the cluster here. This is often HFMCluster but may be something like DEV_HFM/PRD_HFM or similar, depending on your environment.
- Application: your HFM application name. Leave the Database setting blank.
- Username: you do not have to specify a username here, but you can. If left blank then your Dodeca security settings come in to play and each user will just use their own credentials to connect. I like to set a username here to test with initially.
- Password: same situation as with Username
- ServletPath: this is web path to the Dodeca HFM Connector relative to the clients that will be accessing it. At its simplest, this will be a value as shown in the screenshot, meaning that it’s http:// followed by the URL of the server where the HFM connector is installed, the port, and a trailing slash. Depending on your environment, this may change to use HTTPS, and/or a context path. You may wish to configure the HFM connector “behind” your Oracle HTTP server so that requests to, say, https://youroracleserver:19000/dodeca-hfm/ are being forwarded to the HFM connector. The choice is yours and is more of an infrastructure preference for you and your team.
After configuring the connection, I recommend that you use the Test Connection… button to test it and hopefully see a positive result. After the connection is working, it’s just a matter of using it in a Dodeca view as you would use any other Essbase connection. You can create view and then do a normal ‘default’ retrieve to get back an ad hoc grid:
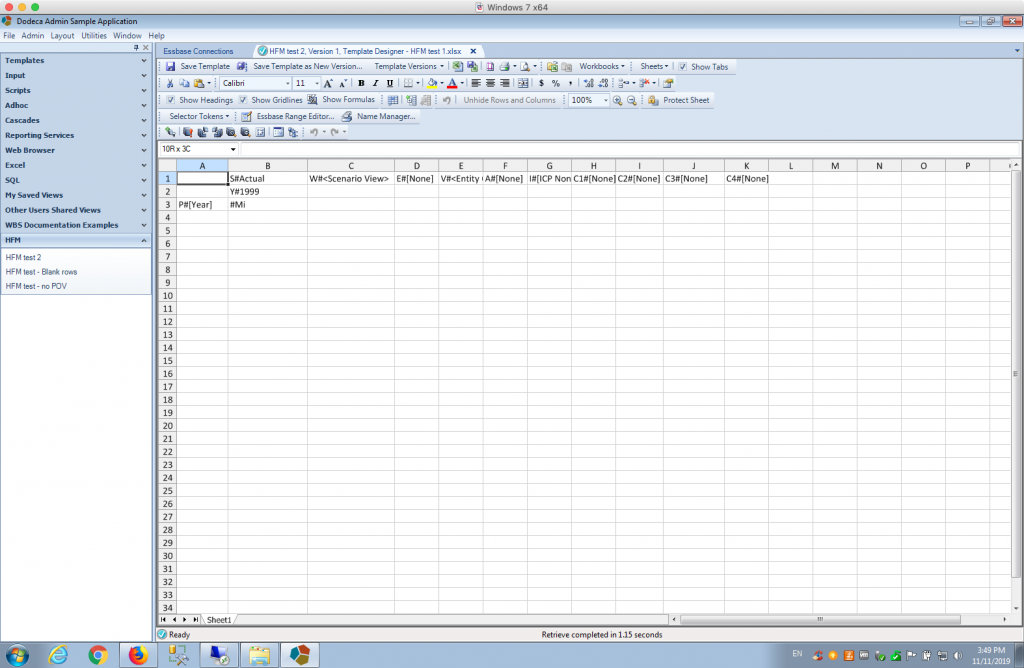
By default, the Dodeca HFM Connector conceptualizes your HFM application as having an outline with perfectly unique members. In order to accomplish this, the member names are prefixed with their “dimension short name” to create fully-qualified members. The connector provides several synthetic alias tables that you can use to instead show the member name, member description, or member name and description, as you might be used to seeing in the HFM interface. For example, let’s turn on aliases and use the table with names and descriptions:
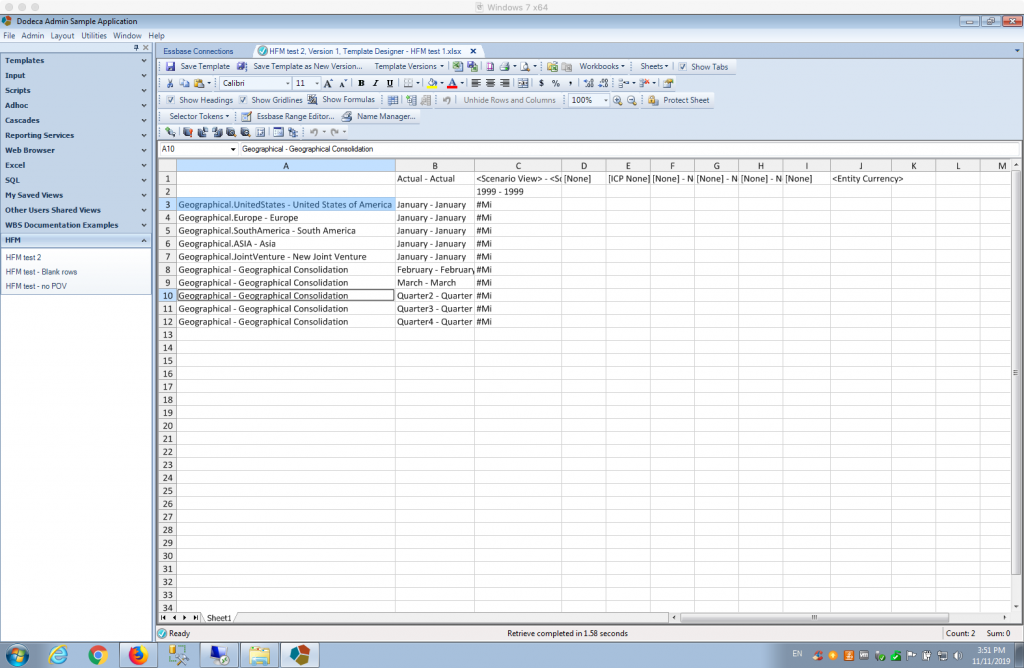
Note that basic ad hoc operations are supported: pivot, zoom in, keep only, remove only, and so on. I am calling this “simple” ad hoc as the ad hoc operations aren’t exactly what you might get in Smart View (nor are they meant to be at this time), but they are sufficiently capable of helping design a report for your users in Dodeca, giving you one-stop shopping in Dodeca to create views based on HFM data.
Next Steps
These are exciting times for Dodeca customers, who have been clamoring for HFM support for a long time. Many of our customers are looking to, among other things, build reports and views in Dodeca on top of their HFM data and combine it with data from Essbase, relational databases. There are countless use cases for this connector to streamline existing processes that are very manual right now. I will be posting more information about the connector as it continues to evolve in the future. If you would like to test, use, or demo the new HFM connector, please contact Applied OLAP for more information.
Nice move Jason, will the connector operate also with FCCS/FC?
As you know cloud is the path to follow nowadays!
Hi Sébastien, we have a connector coming out soon for PBCS as well. Our current understanding is the the FCCS API is substantially similar to PBCS and that the connector could be adapted to work with it fairly easily. It seems the most likely path forward right now is that a partner would come to us with a FCCS opportunity and we could test the connector with their help. That way we can get real world feedback rather than us setting up our own FCCS system (for now).
Hello
I would like you to send me your pricing, we would like to cooperate, we are looking for suppliers for our client, please contact me on Whatsapp:
+48504723568